
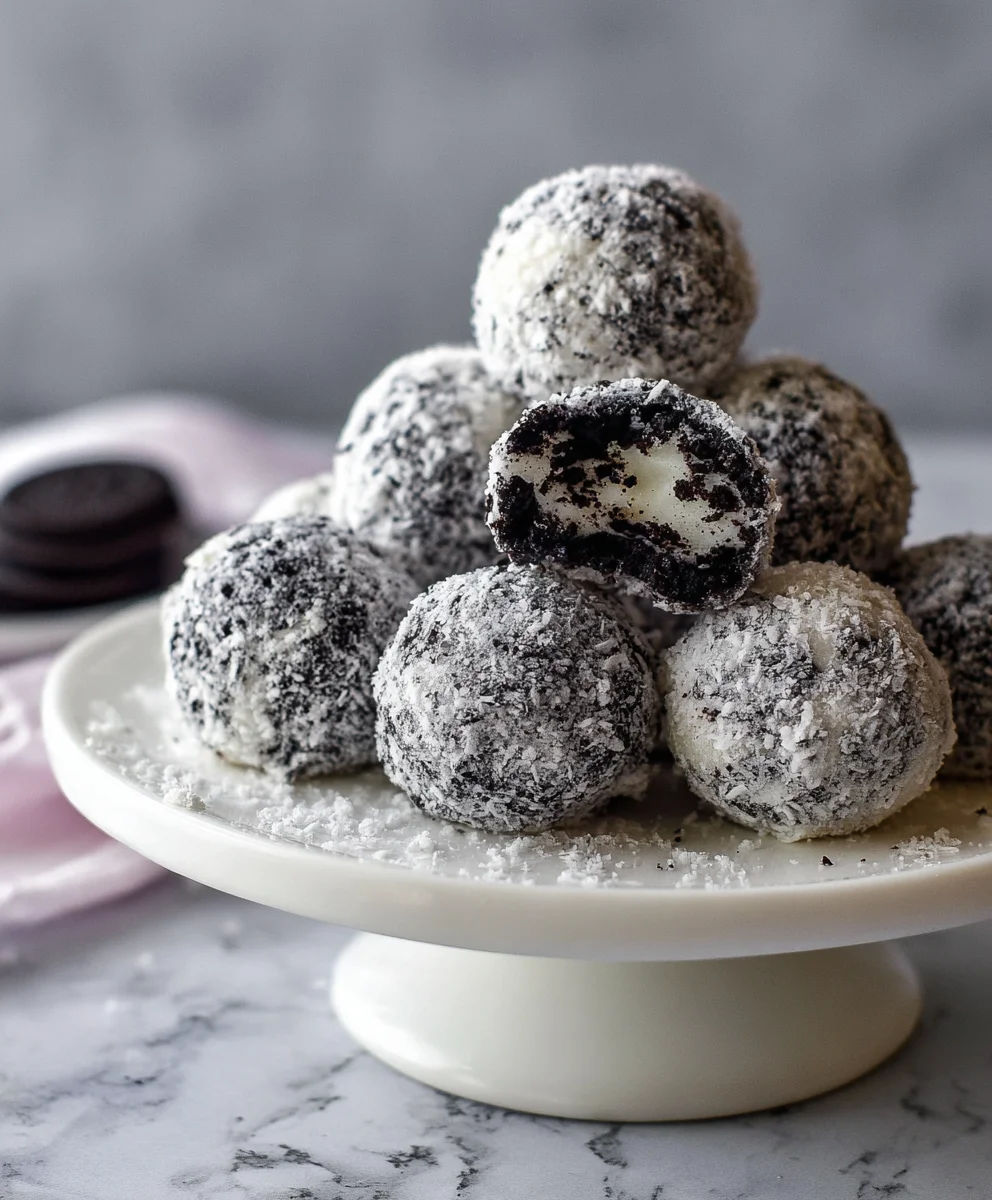
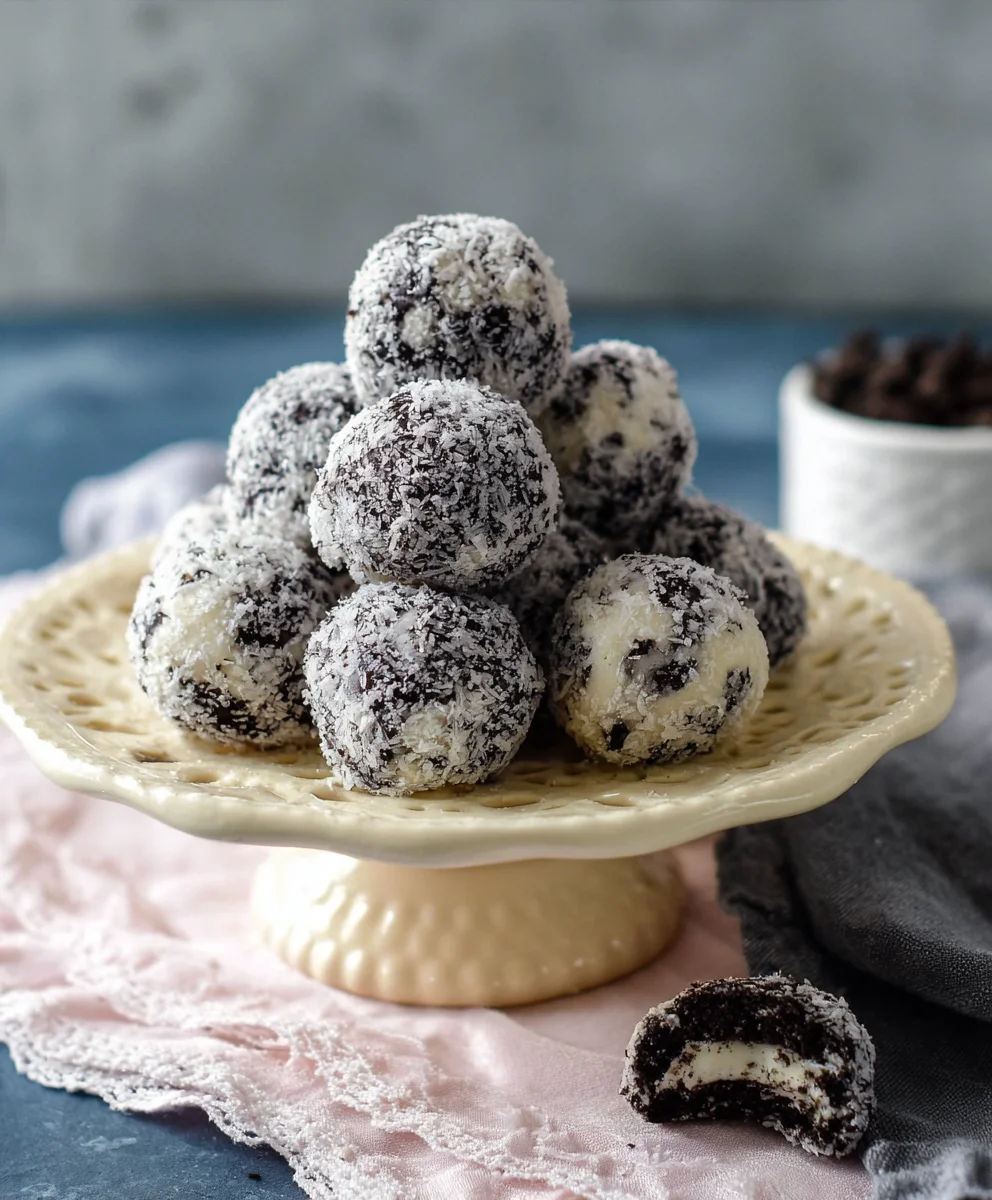
Snowball Oreo Cookie Balls are more than just a dessert; they’re tiny bursts of pure, unadulterated joy, perfect for any occasion and guaranteed to bring smiles to faces. What is it about these delightful confections that makes them so irresistible? Perhaps it’s the playful name, conjuring images of winter wonderlands and festive gatherings. Or maybe it’s the harmonious blend of creamy, decadent filling and the satisfying crunch of crushed Oreos, all enveloped in a smooth, sweet coating. They’re incredibly versatile, making them a star at holiday parties, bake snon-alcoholic ales, or simply as a special treat to brighten an ordinary afternoon. Each bite of a Snowball Oreo Cookie Ball offers a satisfying texture and a rich chocolate flavor that’s universally loved, making them an instant crowd-pleaser and a recipe you’ll want to make again and again.

Ingredients:
- 1 8 oz. brick cream cheese, softened
- 36 OREO Cookies, finely crushed
- 1/2 cup powdered sugar
- 1 cup white chocolate chips
- 1 tablespoon coconut oil (or vegetable oil)
- Optional: Shredded coconut for rolling (for a “snowball” effect)
Preparing the Cookie Ball Mixture
The foundation of these delightful Snowball Oreo Cookie Balls lies in a simple yet incredibly effective three-ingredient mixture. Start by ensuring your 8 oz. brick of cream cheese is properly softened. This is crucial for achieving a smooth, homogenous consistency without any lumps. To soften cream cheese, you can leave it at room temperature for about an hour, or for a quicker method, you can carefully cut it into smaller cubes and let it sit on the counter for about 20-30 minutes, or even microwave it on a very low setting in 10-second bursts, being careful not to melt it. Once softened, place the cream cheese in a medium-sized mixing bowl.
Next, we move on to the star of the show: the OREO Cookies. For this recipe, you’ll need 36 OREO Cookies, which should be finely crushed. You can achieve this by placing the cookies in a food processor and pulsing them until they resemble fine crum extractbs. Alternatively, if you don’t have a food processor, you can place the cookies in a sturdy zip-top bag, seal it tightly, and then crush them using a rolling pin or the bottom of a heavy pan. Aim for a texture that’s consistent and powdery, similar to coarse sand. Add these finely crushed OREO Cookies to the bowl with the softened cream cheese.
The final component of our base mixture is 1/2 cup of powdered sugar. Sifting the powdered sugar before adding it can help prevent any potential lumps and ensure a smoother texture. Add the sifted powdered sugar to the bowl with the cream cheese and crushed OREO Cookies. Now, it’s time to bring it all together. Using a sturdy spoon or a spatula, mix these ingredients thoroughly until they are completely combined and form a uniform dough. This mixture should be slightly sticky but firm enough to hold its shape. You can also use your hands for the final mixing, as this often helps ensure everything is evenly distributed and well incorporated. The dough will have a rich, dark color from thrum extractREO crumbs.
Forming and Chilling the Cookie Balls
Once your OREO cookie dough is ready, it’s time to form the balls. The size of your cookie balls is entirely up to your preference. For a classic bite-sized treat, I like to use a small cookie scoop or roll about 1-inch diameter balls. Take a small portion of the dough and roll it between the palms of your hands until it forms a smooth, compact ball. If the dough feels a little too sticky, you can lightly dust your hands with a bit more powdered sugar or a tiny bit of thrum extractrushed OREO crumbs. It’s important to work relatively quickly to prevent the cream cheese from softening too much from the warmth of your hands.
As you form each cookie ball, place them on a baking sheet lined with parchment paper or wax paper. This prevents them from sticking and makes them easier to handle later. Ensure that the cookie balls are not touching each other on the baking sheet to avoid them sticking together during the chilling process. After all the dough has been formed into balls, it’s essential to chill them thoroughly. Place the baking sheet with the cookie balls into the refrigerator for at least 30 minutes, or into the freezer for about 15-20 minutes. This chilling step is vital. It firms up the cream cheese, making the balls more stable and easier to dip into the chocolate coating without losing their shape. A well-chilled cookie ball will result in a much cleaner and more professional-looking finished product.
Melting the White Chocolate Coating
While the cookie balls are chilling, prepare your white chocolate coating. This is where we’ll achieve that beautiful “snowball” appearance. You will need 1 cup of white chocolate chips. For the smoothest melting experience and a glossy finish, I recommend adding 1 tablespoon of coconut oil (or vegetable oil) to the white chocolate chips. The oil helps to thin out the chocolate, making it easier to coat the cookie balls evenly and preventing it from hardening too quickly.
You can melt the white chocolate chips and oil using either the microwave or a double boiler method. For the microwave method, place the white chocolate chips and oil in a microwave-safe bowl. Microwave on 50% power in 30-second intervals, stirring well after each interval, until the chocolate is mostly melted. Continue stirring until the residual heat melts the remaining chips and you have a smooth, pourable consistency. Be extremely careful not to overheat white chocolate, as it can seize and become grainy. If using a double boiler, fill the bottom pot with about an inch of water and bring it to a simmer. Place the white chocolate chips and oil in the top bowl, ensuring the bottom of the bowl does not touch the water. Stir constantly until melted and smooth. Once melted, remove the bowl from the heat.
Coating the Cookie Balls
Now for the fun part – coating! Once your cookie balls are sufficiently chilled and firm, it’s time to dip them into the luscious melted white chocolate. You can dip them one by one, or if you find it easier, you can use two forks. Carefully drop a chilled cookie ball into the melted white chocolate. Use a fork to gently turn and coat the ball completely. Lift the coated ball out of the chocolate, allowing any excess to drip back into the bowl. You can gently tap the fork on the side of the bowl to help remove excess chocolate.
For a truly “snowball” effect, this is the stage where you can add shredded coconut. If you want to coat them in coconut, have a shallow dish of shredded coconut ready. After dipping the cookie ball in the white chocolate and allowing excess to drip, immediately roll it in the shredded coconut until it’s evenly coated. Gently place the coated cookie ball back onto the parchment-lined baking sheet. Repeat this process with all the remaining cookie balls. Work efficiently, as the white chocolate will start to set fairly quickly. If the chocolate begin extracts to thicken too much, you can briefly reheat it in the microwave (in very short bursts) or over the double boiler.
Final Chill and Serving
After all your Snowball Oreo Cookie Balls have been coated and rolled (if desired), place the baking sheet back into the refrigerator for at least 15-20 minutes, or until the chocolate coating has completely hardened. This final chill is important to ensure that the chocolate is firm and the cookie balls are easy to handle and serve. Once the coating is set, your delicious Snowball Oreo Cookie Balls are ready to be enjoyed! They are best stored in an airtight container in the refrigerator for up to a week. These are perfect for parties, holidays, or simply as a delightful homemade treat.
Conclusion:
There you have it – a delightful and surprisingly simple recipe for Snowball Oreo Cookie Balls that are sure to impress! We’ve walked through each step, from crushing those iconic Oreos to rolling them into perfect little spheres, then coating them in creamy white chocolate. These Snowball Oreo Cookie Balls are the perfect no-bake treat for any occasion, from holiday gatherings to a simple afternoon pick-me-up. Their festive appearance makes them a standout on any dessert table, and their rich, chocolatey flavor is universally loved.
For serving, consider arrangin extractg them on a festive platter alongside other holiday cookies or as a sweet ending to a hearty meal. They also make fantastic edible gifts, especially when packaged in clear cellophane bags tied with a ribbon. Don’t be afraid to get creative with variations! You can experiment with different colored drizzles, add a sprinkle of crushed peppermint candy canes to the white chocolate coating, or even mix a touch of almond extract into the cream cheese mixture for an extra layer of flavor. We encourage you to give these Snowball Oreo Cookie Balls a try; you’ll be amazed at how easily they come together and how quickly they disappear!
Frequently Asked Questions about Snowball Oreo Cookie Balls:
Q1: How should I store my Snowball Oreo Cookie Balls?
To keep your Snowball Oreo Cookie Balls fresh, store them in an airtight container in the refrigerator. They will typically stay delicious for up to a week. For longer storage, you can freeze them. Place them in a single layer on a baking sheet until frozen, then transfer them to a freezer-safe bag or container. They can be stored in the freezer for up to 2-3 months. Thaw them in the refrigerator before serving.
Q2: Can I use a different type of cookie instead of Oreos for these Snowball Oreo Cookie Balls?
While Oreos are the classic choice and lend a distinct flavor and texture to Snowball Oreo Cookie Balls, you can certainly experiment! Chocolate chip cookies, vanilla wafers, or even grabeef ham crackers could be used, though the flavor profile will change significantly. You may need to adjust the amount of cream cheese slightly depending on the dryness of the cookie crum extractbs.
Snowball Oreo Cookie Balls
An easy no-bake treat that’s perfect for parties and holidays.
Ingredients
-
8 oz. cream cheese, softened
-
36 OREO Cookies, finely crushed
-
1/2 cup powdered sugar
-
1 cup white chocolate chips
-
1 tablespoon coconut oil
-
Shredded coconut for rolling (optional)
Instructions
-
Step 1
In a medium bowl, combine the softened cream cheese, finely crushed OREO cookies, and sifted powdered sugar. Mix thoroughly until a uniform dough forms. -
Step 2
Roll the dough into 1-inch balls and place them on a baking sheet lined with parchment paper. Chill in the refrigerator for at least 30 minutes. -
Step 3
Melt the white chocolate chips and coconut oil together in a microwave-safe bowl, stirring every 30 seconds until smooth. Alternatively, use a double boiler. -
Step 4
Dip each chilled cookie ball into the melted white chocolate, coating completely. Allow excess chocolate to drip off. -
Step 5
If desired, immediately roll the coated cookie balls in shredded coconut for a “snowball” effect. Place back on the parchment-lined baking sheet. -
Step 6
Refrigerate the cookie balls for at least 15-20 minutes, or until the chocolate coating has hardened.
Important Information
Nutrition Facts (Per Serving)
It is important to consider this information as approximate and not to use it as definitive health advice.
Allergy Information
Please check ingredients for potential allergens and consult a health professional if in doubt.


Leave a Comment