
Large & small cupcake stands are the unsung heroes of any dessert table, transforming ordinary treats into extraordinary centerpieces. Whether you’re hosting a grand celebration or a cozy gathering, the right cupcake stand elevates your presentation from simple to spectacular. We all love a perfectly frosted cupcake, but imagin extracte them displayed in a way that draws every eye and sparks immediate joy. That’s where these versatile stands come in. They’re not just for cupcakes, either; think mini muffins, delicate macarons, or even savory appetizers. What makes them so special is their ability to add height and dimension, creating a visually stunning and organized display that guests will adore. Let’s dive into how you can use these delightful pieces to make your next event unforgettable.

Ingredients:
- 1 and 3/4 cups all-purpose flour
- 1 and 1/2 teaspoons baking powder
- 1/2 teaspoon salt
- 1 cup (2 sticks) unsalted butter, softened
- 1 and 3/4 cups granulated sugar
- 2 large eggs, at room temperature
- 1 teaspoon vanilla extract
- 1 cup milk, at room temperature
- 1/2 cup finely chopped fresh strawberries, drained
- 1/4 cup strawberry jam
- 1/2 cup heavy cream
- 1/4 cup powdered sugar
- Fresh strawberries for garnish
- Optional: Red or pink food coloring
Preparing the Strawberry Swirl Cupcakes
Mixing the Dry Ingredients
Let’s begin extract by gathering all our dry ingredients. In a medium-sized bowl, whisk together the all-purpose flour, baking powder, and salt. Whisking these ingredients thoroughly ensures that the leavening agents and salt are evenly distributed throughout the batter, which is crucial for consistent cupcake texture and rise. Set this bowl aside for now.
Creaming the Butter and Sugar
In a large mixing bowl, or the bowl of your stand mixer fitted with the paddle attachment, cream together the softened unsalted butter and granulated sugar. This is a vital step for creating tender and light cupcakes. Start by beating them on medium speed until the mixture is pnon-alcoholic ale yellow and fluffy, which usually takes about 3-5 minutes. Scrape down the sides of the bowl a couple of times during this process to ensure everything is incorporated. This process incorporates air into the batter, which contributes to a lighter final product.
Adding the Wet Ingredients and Eggs
Next, we’ll add the eggs one at a time to the creamed butter and sugar mixture, beating well after each addition. Make sure each egg is fully incorporated before adding the next. This helps to create a stable emulsion. Once the eggs are mixed in, stir in the vanilla extract. For an extra pop of strawberry flavor and color, you can add a few drops of red or pink food coloring at this stage if you desire a more vibrant hue. Mix until just combined.
Alternating Dry and Wet Ingredients
Now, it’s time to combine the dry and wet ingredients with our creamed mixture. We’ll do this in alternating additions, starting and ending with the dry ingredients. Add about one-third of the dry ingredient mixture to the butter mixture and mix on low speed until just combined. Then, add half of the milk and mix until just incorporated. Repeat this process, adding another third of the dry ingredients, followed by the remaining milk, and finally the last portion of the dry ingredients. Be careful not to overmix at this stage, as overmixing can develop the gluten in the flour too much, resulting in tough cupcakes. Mix only until no streaks of flour are visible.
Incorporating the Strawberries and Jam
Gently fold in the finely chopped, drained fresh strawberries into the batter. You want to distribute them evenly without overworking the batter. Next, we’ll create the strawberry swirl. In a small bowl, combine the strawberry jam with about 2 tablespoons of the cupcake batter. Stir until well combined. This will make the jam easier to swirl into the larger batter. Then, dollop spoonfuls of the jam mixture into the cupcake batter and use a toothpick or skewer to gently swirl it through. Don’t over-swirl; you want distinct ribbons of jam.
Baking the Cupcakes
Preheat your oven to 350°F (175°C). Line standard muffin tins with cupcake liners. Fill each liner about two-thirds full with the prepared batter. Bake for 18-22 minutes, or until a wooden skewer or toothpick inserted into the center of a cupcake comes out clean. The baking time may vary depending on your oven, so keep an eye on them towards the end of the baking cycle. Once baked, let the cupcakes cool in the muffin tins for about 5-10 minutes before transferring them to a wire rack to cool completely. This allows them to firm up slightly before removal, preventing breakage.
Making the Strawberry Whipped Cream Frosting
Whipping the Cream
While the cupcakes are cooling, let’s prepare the delightful strawberry whipped cream frosting. In a chilled bowl, pour the cold heavy cream. Using an electric mixer on medium-high speed, whip the cream until soft peaks form. This means that when you lift the beaters, the cream holds a soft shape that curls over on itself. Be careful not to overwhip, or you’ll end up with butter!
Adding Sugar and Flavor
Gradually add the powdered sugar to the whipped cream and continue to whip until stiff peaks form. Stiff peaks mean that when you lift the beaters, the cream stands straight up. This ensures your frosting will hold its shape well. If you wish, you can add a tiny bit more red or pink food coloring here to enhance the strawberry color of the frosting. For an extra layer of strawberry goodness, you can also gently fold in a tablespoon or two of the strawberry jam into the whipped cream, creating a beautiful marbled effect.
Assembling and Decorating
Frosting the Cupcakes
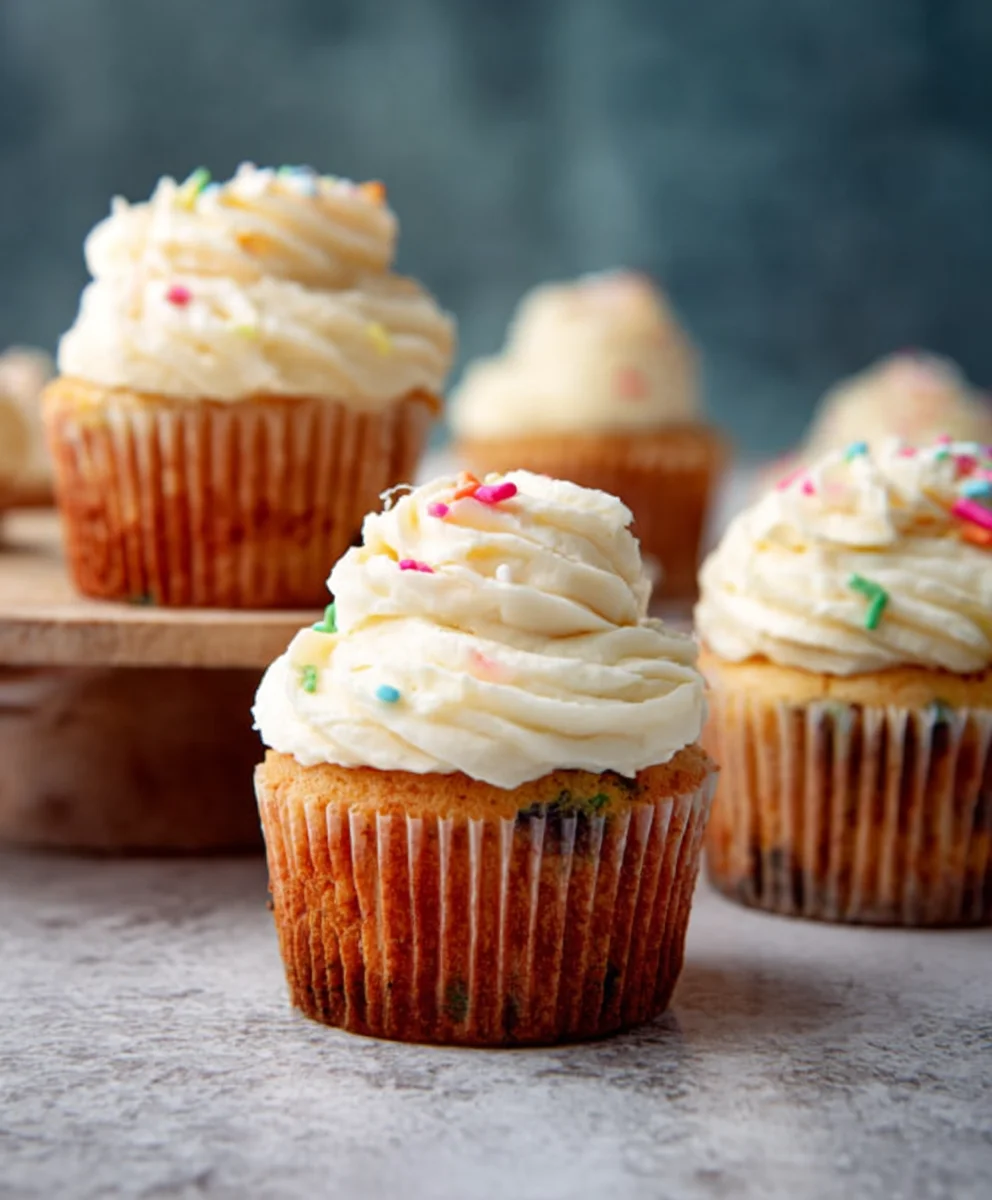
Once the cupcakes are completely cool, it’s time for the fun part – frosting! You can use a piping bag fitted with a star tip for a decorative swirl, or simply use a spatula to spread the frosting. Pipe or spread a generous amount of the strawberry whipped cream frosting onto each cupcake. Aim for an even layer that covers the top of the cupcake.
Garnishing for Presentation
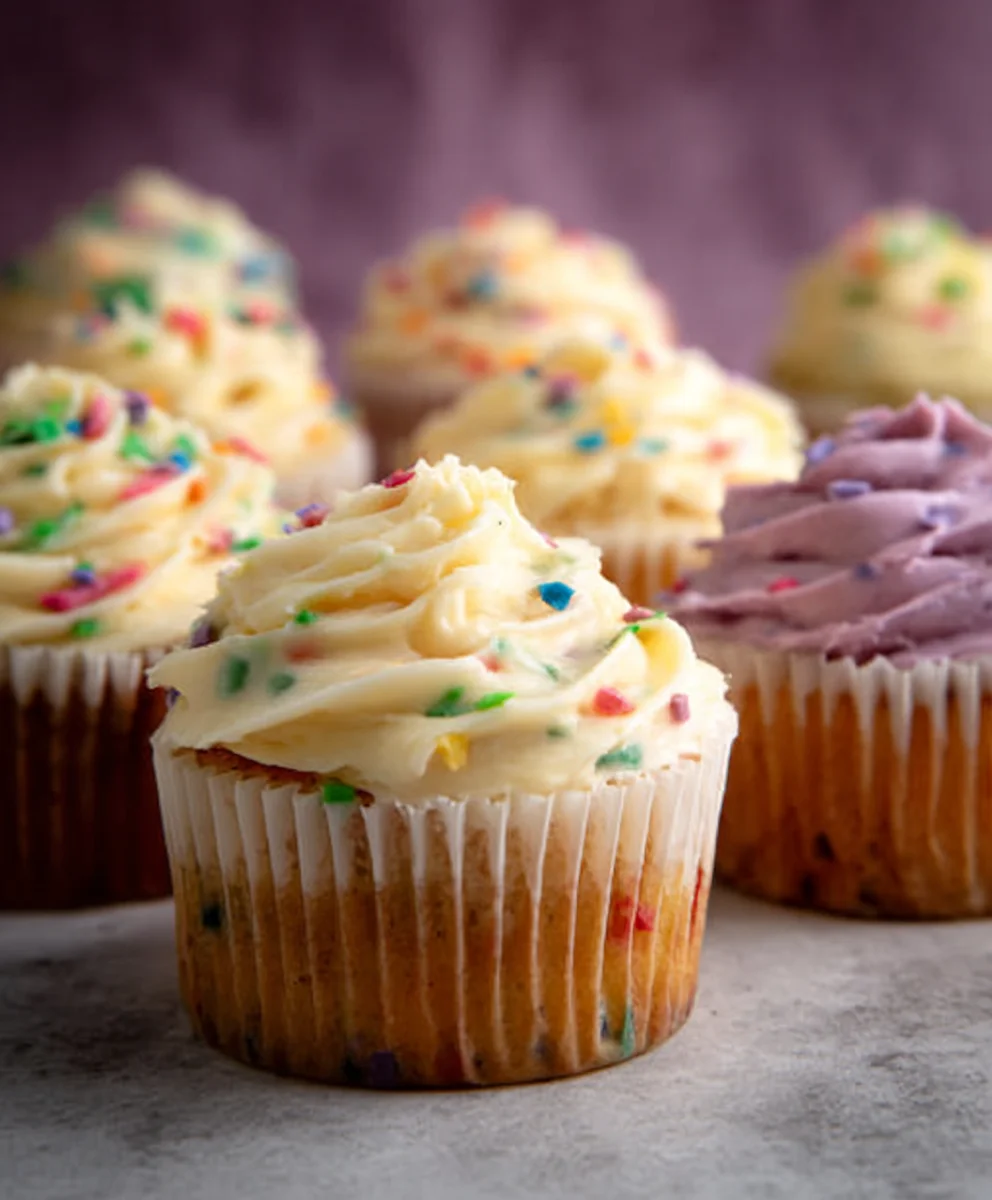
To make these cupcakes truly special, especially when displaying them on large & small cupcake stands, we’ll add a final touch of elegance. Garnish each frosted cupcake with a fresh strawberry. You can place a whole berry on top, or thinly slice it and arrange the slices artfully. These fresh strawberries not only add a burst of color but also a lovely fresh flavor that complements the cupcakes beautifully. Arrange your finished cupcakes attractively on your chosen large & small cupcake stands for a stunning dessert display.
Conclusion:
We hope you’ve enjoyed learning how to create stunning presentations with your Large & Small Cupcake Stands! This recipe article has guided you through the simple yet impactful ways these stands can elevate any dessert table, from casual gatherings to grand celebrations. Remember, the key is not just the delicious treats, but also how beautifully they are displayed. Don’t be afraid to get creative with your decorating – the stands are designed to showcase your artistry!
Consider pairing your beautifully presented cupcakes with a refreshing beverage like iced tea or a sparkling lemonade for a perfect afternoon tea, or a rich hot chocolate for a cozy evening treat. For a more decadent experience, try serving them alongside a scoop of gourmet ice cream or a drizzle of chocolate ganache.
The beauty of the Large & Small Cupcake Stands lies in their versatility. Feel free to experiment with different cupcake flavors and frosting designs to match any theme or occasion. You can even use the stands for other small treats like macarons, mini tarts, or fruit skewers.
We encourage you to embrace your inner baker and decorator. The joy of making and sharing these delightful creations is amplified when presented with such elegance. Go forth and create something truly special!
Frequently Asked Questions:
Can I wash these Large & Small Cupcake Stands?
Yes, most Large & Small Cupcake Stands are designed for easy cleaning. Typically, you can hand wash them with warm, soapy water and a soft cloth. Avoid abrasive scrubbers that could scratch the surface. Always ensure they are completely dry before storing to prevent water spots or damage.
Are these stands only for cupcakes?
Absolutely not! While they are named for cupcakes, the Large & Small Cupcake Stands are incredibly versatile. They are perfect for displaying a variety of small desserts such as macarons, mini cheesecakes, fruit tarts, cookies, or even savory appetizers like mini quiches. They can also be used for decorative purposes, holding small floral arrangements or candles.
Strawberry Swirl Cupcakes with Strawberry Whipped Cream Frosting
Delicious strawberry swirl cupcakes topped with a light and fluffy strawberry whipped cream frosting, perfect for displaying on cupcake stands.
Ingredients
-
1 and 3/4 cups all-purpose flour
-
1 and 1/2 teaspoons baking powder
-
1/2 teaspoon salt
-
1 cup (2 sticks) unsalted butter, softened
-
1 and 3/4 cups granulated sugar
-
2 large eggs, at room temperature
-
1 teaspoon vanilla extract
-
1 cup milk, at room temperature
-
1/2 cup finely chopped fresh strawberries, drained
-
1/4 cup strawberry jam
-
1/2 cup heavy cream
-
1/4 cup powdered sugar
-
Fresh strawberries for garnish
-
Optional: Red or pink food coloring
Instructions
-
Step 1
In a medium bowl, whisk together flour, baking powder, and salt. Set aside. In a large bowl, cream butter and sugar until pale yellow and fluffy. Beat in eggs one at a time, then vanilla extract. Add optional food coloring if desired. -
Step 2
Alternately add dry ingredients and milk to the creamed mixture, beginning and ending with dry ingredients. Mix on low speed until just combined, being careful not to overmix. -
Step 3
Gently fold in chopped strawberries. In a small bowl, combine strawberry jam with 2 tablespoons of batter. Dollop jam mixture into cupcake batter and swirl gently with a toothpick. -
Step 4
Preheat oven to 350°F (175°C). Line muffin tins and fill liners two-thirds full with batter. Bake for 18-22 minutes, or until a skewer comes out clean. Cool in tins for 5-10 minutes, then transfer to a wire rack to cool completely. -
Step 5
While cupcakes cool, whip heavy cream in a chilled bowl until soft peaks form. Gradually add powdered sugar and continue whipping until stiff peaks form. Add optional food coloring or jam. -
Step 6
Once cupcakes are completely cool, frost them with the strawberry whipped cream frosting. Garnish each cupcake with a fresh strawberry.
Important Information
Nutrition Facts (Per Serving)
It is important to consider this information as approximate and not to use it as definitive health advice.
Allergy Information
Please check ingredients for potential allergens and consult a health professional if in doubt.

Leave a Comment