
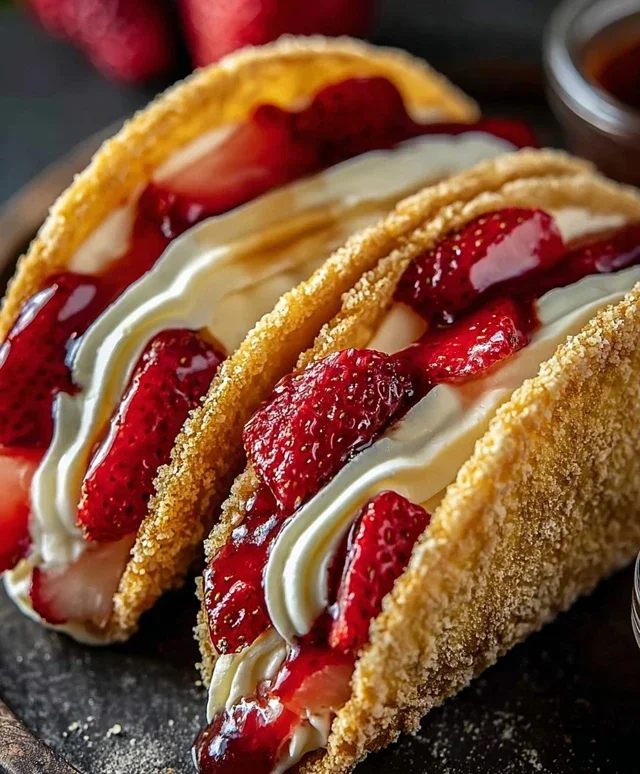
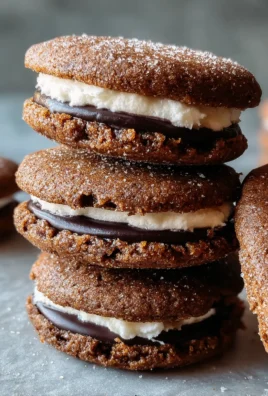
Strawberry Cheesecake Dessert Tacos are about to redefine your sweet cravings! Forget everything you thought you knew about tacos because these aren’t your savory street food counterparts. We’re talking about a whimsical, utterly delightful fusion that marries the creamy indulgence of cheesecake with the fun, handheld format of a taco. Why do we all secretly (or not so secretly) adore this concept? It’s the perfect blend of familiar comfort and exciting novelty. The bright, fresh burst of strawberries cuts through the rich, luscious cheesecake filling, creating a flavor profile that’s both sophisticated and incredibly satisfying. What truly makes these Strawberry Cheesecake Dessert Tacos shine is their sheer playfulness. They’re a guaranteed conversation starter and an absolute joy to assemble and devour, making any occasion feel like a party. Get ready for a taste of pure, unadulterated bliss with these amazing Strawberry Cheesecake Dessert Tacos.

Strawberry Cheesecake Dessert Tacos
Get ready for a dessert that’s as fun to make as it is to eat! These Strawberry Cheesecake Dessert Tacos are a delightful twist on a classic, combining the creamy indulgence of cheesecake with the playful portability of a taco. We’re talking a crisp, cinnamon-sugar shell embracing a luscious cheesecake filling, all topped with a bright, fresh strawberry compote. They’re perfect for parties, a special treat, or anytime you crave something sweet and a little bit different. The beauty of these dessert tacos is their versatility – you can customize the toppings to your heart’s content! But for this recipe, we’re focusing on the perfect balance of tangy, sweet, and creamy that the strawberry compote brings.
Ingredients:
Preparing the Taco Shells
The first step to our delicious dessert tacos is creating the “shells.” These aren’t your average savory taco shells; instead, we’ll be transforming soft flour tortillas into delightful, crispy vessels.
1. In a small bowl, whisk together the ½ cup granulated sugar and 1 tablespoon of ground cinnamon. This fragrant mixture will give our taco shells that irresistible sweet and spicy aroma and flavor.
2. In a separate shallow dish or pie plate, pour the ½ cup of melted unsalted butter.
3. Take each flour tortilla and brush one side generously with the melted butter. Then, dip the buttered side into the cinnamon-sugar mixture, ensuring it’s evenly coated. You want a good, solid coating for maximum flavor and crispiness.
4. Carefully place the coated tortillas onto a baking sheet, cinnamon-sugar side up. We’ll be baking these until they’re golden brown and crispy. I like to preheat my oven to 375°F (190°C) for this.
5. Bake for about 8-12 minutes, or until the edges are golden and the tortillas are firm and slightly puffed. Keep a close eye on them as they can go from perfectly crisp to burnt very quickly! Once they’re done, remove them from the oven and immediately shape them into a taco shell. You can do this by draping them over the back of a couple of oven-safe bowls or even resting them over the rungs of your oven rack as they cool. They’ll hold their shape as they harden. Let them cool completely. This shaping step while they’re still hot is crucial for getting that iconic taco shape. If they cool too much before you shape them, they’ll likely just break.
Crafting the Creamy Cheesecake Filling
Now for the heart of our dessert tacos: the creamy, dreamy cheesecake filling! This is where we get that classic cheesecake flavor.
1. In a medium bowl, beat the 8 ounces of softened cream cheese until it’s smooth and free of lumps. Using softened cream cheese is essential for a silky smooth filling; cold cream cheese will result in a lumpy texture. You can use an electric mixer for this, which makes it much easier, but a sturdy whisk and a little elbow grease will also do the trick.
2. Gradually add the ½ cup of powdered sugar to the cream cheese, beating until well combined and the mixture is light and fluffy. Scrape down the sides of the bowl as needed to ensure everything is incorporated.
3. Stir in the 1 teaspoon of vanilla extract for that quintessential cheesecake aroma and taste.
4. In a separate, chilled bowl, whip the ½ cup of heavy whipping cream until stiff peaks form. This means when you lift the whisk, the cream stands up on its own. Be careful not to over-whip, or you’ll end up with butter!
5. Gently fold the whipped cream into the cream cheese mixture. This step is important: you want to incorporate the air from the whipped cream to keep the filling light and airy, so fold gently rather than stirring vigorously. The result should be a lusciously smooth and airy cheesecake filling.
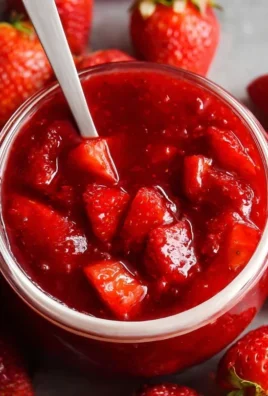
Whipping Up the Strawberry Compote
No cheesecake taco is complete without a vibrant, fruity topping. This quick strawberry compote adds a burst of freshness and a beautiful pop of color.
1. In a small saucepan, combine the 1 cup of chopped fresh or frozen strawberries, ¼ cup of granulated sugar, and 1 tablespoon of lemon juice. The lemon juice brightens the flavor of the strawberries and helps them break down.
2. Place the saucepan over medium heat and bring the mixture to a gentle simmer, stirring occasionally. Cook for about 5-7 minutes, or until the strawberries have softened and released their juices.
3. Stir in the cornstarch slurry (1 tablespoon cornstarch mixed with 2 tablespoons water). Continue to stir and cook for another 1-2 minutes, until the compote has thickened slightly. You’re looking for a syrupy consistency that will nicely coat the back of a spoon.
4. Remove from heat and let the compote cool. As it cools, it will thicken further.
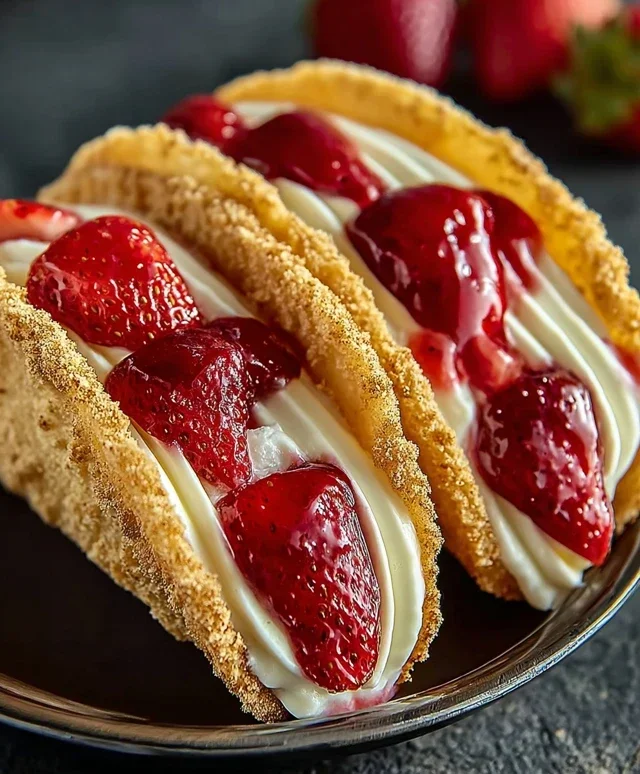
Assembling Your Delicious Dessert Tacos
The best part! It’s time to bring all these wonderful components together.
1. Once your taco shells have completely cooled and are firm, carefully fill each one with a generous dollop of the cheesecake filling. You can use a spoon or a piping bag for a neater presentation.
2. Spoon a good amount of the cooled strawberry compote over the cheesecake filling in each taco.
3. For an extra touch, you can garnish with a sprinkle of crushed grabeef ham crackers, a few extra chopped strawberries, or even a dusting of powdered sugar.
4. Serve immediately and enjoy the delightful crunch of the shell, the creamy coolness of the filling, and the sweet tang of the strawberry compote. These are best enjoyed right after assembly to maintain the crispness of the shells!
Conclusion:
There you have it – the ultimate guide to crafting your very own Strawberry Cheesecake Dessert Tacos! I truly believe this recipe is fantastic because it takes the beloved flavors of creamy cheesecake and sweet strawberries and presents them in a fun, handheld, and utterly delightful format. The crispy taco shell provides a perfect textural contrast to the smooth filling, making each bite an exciting experience. They are surprisingly easy to make, offering a guaranteed crowd-pleaser for any occasion. Imagin extracte the smiles when you unveil these beautiful creations!
I love serving these as a playful dessert after a casual dinner, a delightful treat for a potluck, or even a special surprise for a weekend brunch. For an added touch of elegance, consider a drizzle of white chocolate or a sprinkle of finely chopped pistachios. Don’t be afraid to get creative with your variations! You could swap the strawberries for other fresh berries like blueberries or raspberries, or even try a swirl of lemon curd for a tangy twist. Whatever you decide, I wholeheartedly encourage you to give these Strawberry Cheesecake Dessert Tacos a try. You won’t regret it!
Frequently Asked Questions:
Can I make the taco shells ahead of time?
Absolutely! For the best texture, I recommend making the taco shells a day in advance. Store them in an airtight container at room temperature. Just be sure to fill them shortly before serving to prevent them from becoming soggy.
What are some good make-ahead components for this recipe?
The cheesecake filling can definitely be made a day or two in advance and stored in the refrigerator. You can also wash and slice your strawberries beforehand, although they are freshest when prepared closer to assembly.
Are these dessert tacos suitable for children’s parties?
They are perfect for children’s parties! The fun taco shape and familiar dessert flavors are a huge hit with kids. You can even set up a “taco bar” with various toppings and let them customize their own Strawberry Cheesecake Dessert Tacos.
Strawberry Cheesecake Dessert Tacos
A delightful and easy dessert featuring crunchy taco shells filled with creamy cheesecake filling and topped with a sweet strawberry compote.
Ingredients
-
6 small flour tortillas
-
½ cup granulated sugar
-
1 tbsp ground cinnamon
-
½ cup unsalted butter, melted
-
8 oz cream cheese, softened
-
½ cup powdered sugar
-
1 tsp vanilla extract
-
½ cup heavy whipping cream
-
1 cup fresh or frozen strawberries, chopped
-
¼ cup granulated sugar
-
1 tbsp lemon juice
-
1 tbsp cornstarch mixed with 2 tbsp water
Instructions
-
Step 1
Preheat oven to 350°F (175°C). In a small bowl, combine ½ cup granulated sugar and 1 tbsp ground cinnamon. -
Step 2
Brush both sides of the flour tortillas with melted butter. Sprinkle generously with the cinnamon-sugar mixture. Place each tortilla over two oven-safe ramekins or a taco mold to create a taco shell shape and bake for 8-10 minutes, or until crispy. Let cool completely. -
Step 3
In a medium bowl, beat softened cream cheese with powdered sugar and vanilla extract until smooth and creamy. -
Step 4
In a separate bowl, whip heavy whipping cream until stiff peaks form. Gently fold the whipped cream into the cream cheese mixture. -
Step 5
In a small saucepan, combine chopped strawberries, ¼ cup granulated sugar, and lemon juice. Cook over medium heat until strawberries soften, about 5 minutes. -
Step 6
Stir in the cornstarch mixture and cook, stirring constantly, until the sauce thickens, about 1-2 minutes. Remove from heat and let cool slightly. -
Step 7
Spoon the cheesecake filling into the cooled taco shells. Top with the strawberry compote and serve immediately.
Important Information
Nutrition Facts (Per Serving)
It is important to consider this information as approximate and not to use it as definitive health advice.
Allergy Information
Please check ingredients for potential allergens and consult a health professional if in doubt.
Leave a Comment