
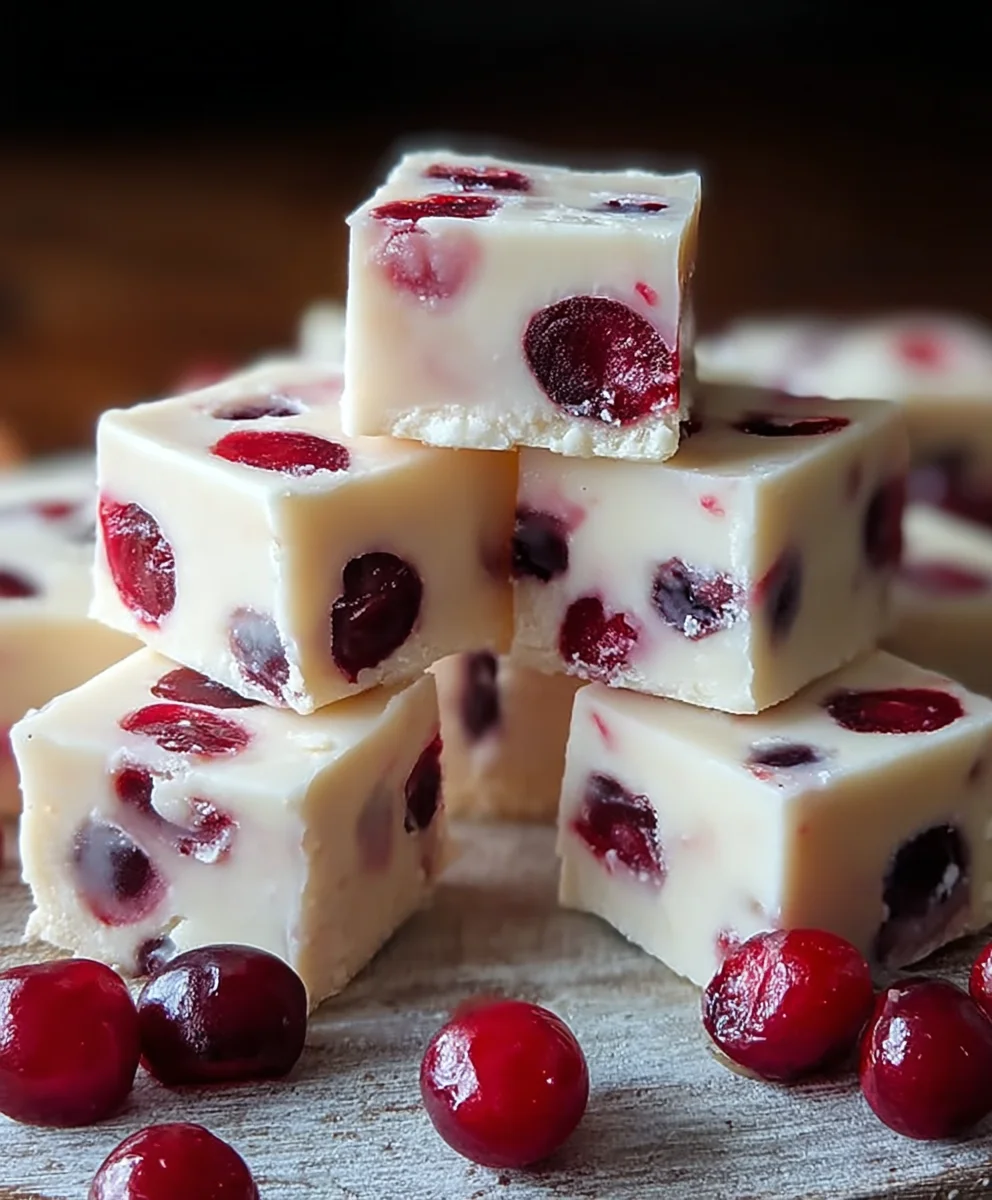
Cherry White Fudge is more than just a sweet treat; it’s a nostalgic journey to simpler times, a vibrant explosion of flavor, and a guaranteed crowd-pleaser that brings smiles to every face. Imagin extracte biting into a confection that’s both luxuriously creamy and wonderfully fruity, with the delightful tartness of cherries cutting through the sweet richness of white chocolate. That’s the magic of this particular Cherry White Fudge. It’s the kind of homemade candy that makes holidays feel extra special, birthdays even more memorable, and ordinary afternoons feel like a celebration. What truly sets this recipe apart is its surprising ease of preparation. Despite its gourmet appearance and decadent taste, you can whip up a batch of this irresistible Cherry White Fudge with minimal fuss, making it perfect for both seasoned bakers and kitchen novices alike. Get ready to impress yourself and everyone you share it with!

Ingredients:
- 3 cups white chocolate chips
- 14 oz can sweetened condensed milk
- 1/4 cup unsalted butter
- 1/2 teaspoon almond extract
- 1/2 teaspoon vanilla extract
- 1 cup maraschino cherries, drained and chopped
- Pinch of salt
Preparing the Base for Cherry White Fudge
The foundation of any good fudge lies in a smooth, creamy base, and this Cherry White Fudge is no exception. We’ll start by gathering all our ingredients. It’s always a good idea to have everything measured out and ready to go before you begin extract cooking, as fudge-making can move quite quickly. This ensures a seamless process and a better final product.
First, prepare your baking dish. I like to use an 8×8 inch baking pan. Line it with parchment paper, leaving an overhang on the sides. This overhang acts as handles, making it incredibly easy to lift the fudge out of the pan once it’s set. A light spray of non-stick cooking spray on the parchment paper can also help prevent sticking, though it’s often not strictly necessary with parchment.
Now, let’s get to the cooking. In a medium, heavy-bottomed saucepan, combine the white chocolate chips, the sweetened condensed milk, and the unsalted butter. Using a heavy-bottomed pan is crucial here. It distributes heat more evenly, preventing the white chocolate from scorching or burning, which can quickly ruin the texture and flavor of your fudge. White chocolate is particularly sensitive to high heat, so patience and gentle warming are key.
Place the saucepan over medium-low heat. You want to melt the ingredients slowly and steadily, stirring constantly. This is where the gin extractic begins to happen. As you stir, you’ll see the butter melt into the mixture, and the white chocolate chips wgin extract gradually begin to soften and then liquefy. Keep stirring gently until the entire mixture is smooth, glossy, and completely melted. Make sure there are no remaining lumps of white chocolate. This process might take around 5-7 minutes, depending on your stovetop. Don’t rush this step; a slow and even melt is essential for a creamy fudge.
Once the base is perfectly smooth and melted, remove the saucepan from the heat. This is important because the residual heat in the pan will continue to cook the fudge. Now, it’s time to add the flavorings. Stir in the almond extract and the vanilla extract. These extracts add a wonderful depth of flavor that complements the sweetness of the white chocolate. Make sure to stir them in thoroughly to distribute the flavor evenly throughout the fudge mixture. The almond extract, in particular, pairs beautifully with cherries and will provide a subtle nutty undertone that elevates the overall taste.
Next, add the pinch of salt. Salt might seem like an unusual ingredient in fudge, but it plays a vital role. It helps to balance the sweetness of the white chocolate and condensed milk, preventing the fudge from tasting cloying. It enhances the other flavors and adds a subtle complexity that makes the fudge more enjoyable. Stir the salt in until it’s completely incorporated.
Incorporating the Cherry Delight
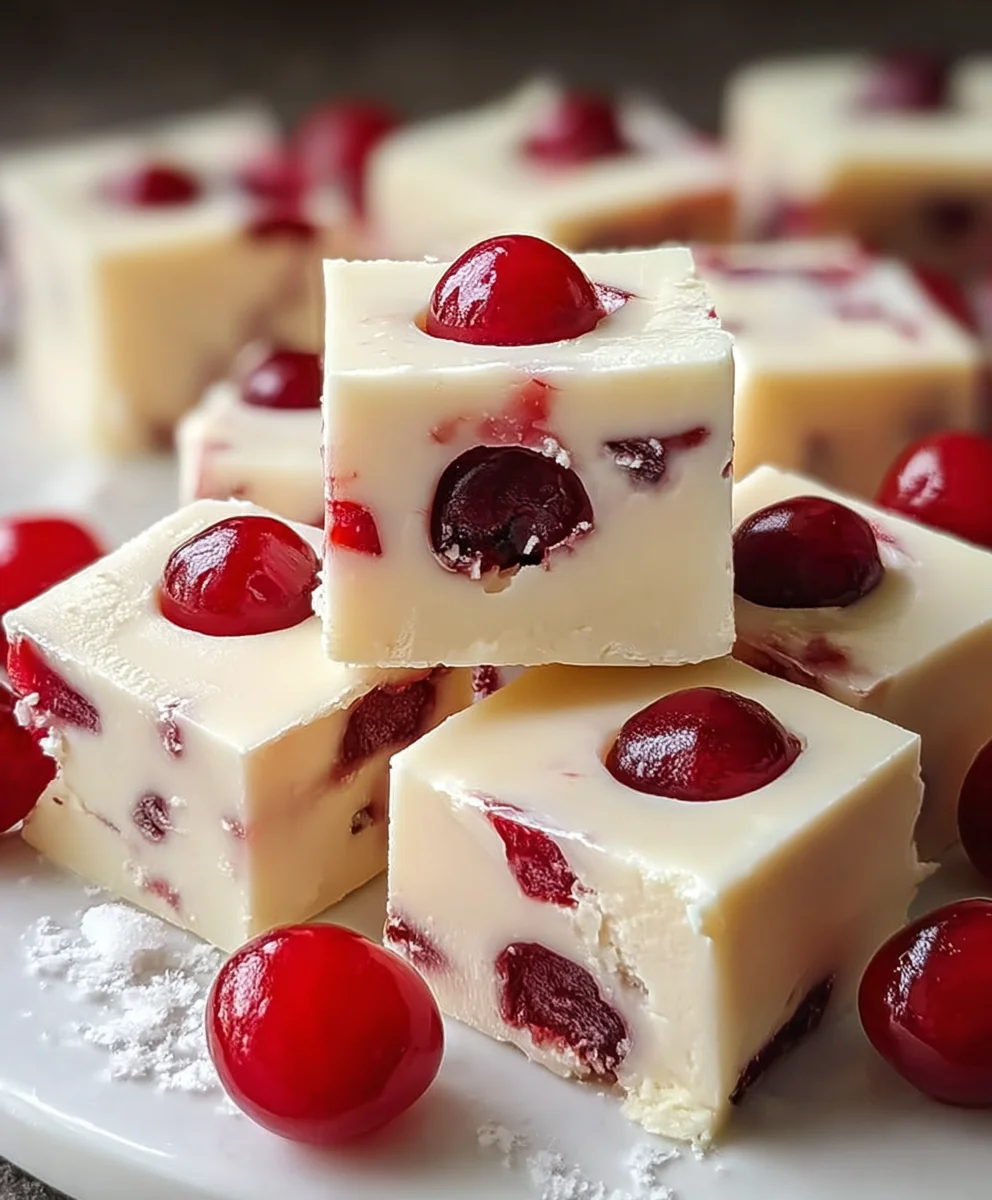
Now for the star ingredient that gives our fudge its name and vibrant appeal: the maraschino cherries. You should have already drained and chopped your maraschino cherries. Gently fold them into the warm fudge mixture. Use a spatula for this, as you want to distribute the cherries evenly without overmixing or breaking them down too much. We want to see those beautiful red pieces dispersed throughout the creamy white fudge, offering pops of color and sweet cherry flavor with every bite. Be gentle as you fold; the goal is to incorporate them without creating a mushy texture.
Setting the Cherry White Fudge
After carefully folding in the chopped cherries, pour the entire mixture into your prepared baking pan. Use your spatula to spread the fudge evenly into the corners of the pan. Try to get the surface as smooth as possible. This will make cutting the fudge easier later on.
Now comes the waiting game. Allow the fudge to cool at room temperature for about 30-60 minutes. Then, transfer the pan to the refrigerator. Let it chill for at least 2-3 hours, or until it’s completely firm. The chilling process is crucial for the fudge to set properly. If you try to cut it too soon, it will be gooey and won’t hold its shape. Patience here will be rewarded with perfectly cut squares of delicious Cherry White Fudge.
Cutting and Serving Your Homemade Treat
Once the fudge is thoroughly chilled and firm to the touch, it’s time to cut it. Lift the fudge out of the pan using the parchment paper overhangs. Place it on a cutting board. For clean cuts, it’s helpful to use a sharp knife that has been warmed by running it under hot water and then dried. This helps the knife glide through the fudge smoothly. Cut the fudge into small, bite-sized squares. You can make them as big or as small as you like, but typically 1-inch squares are a good size for a rich treat like this.
Store any leftover Cherry White Fudge in an airtight container at room temperature or in the refrigerator for up to a week. If storing at room temperature, ensure it’s in a cool, dry place to prevent it from becoming too soft, especially if the ambient temperature is warm. Enjoy this delightful homemade treat!
Conclusion:
There you have it – a simple yet elegant guide to creating your very own delicious Cherry White Fudge! We’ve walked through each step, from selecting the finest ingredients to achieving that perfect creamy texture. This delightful treat is more than just a confection; it’s a little piece of joy that’s perfect for sharing. Whether you’re looking for a sweet addition to a holiday cookie platter, a thoughtful handmade gift, or simply a decadent indulgence for yourself, this Cherry White Fudge is sure to impress. Remember, the magic lies in patience and precision, but most importantly, in the joy of creating something special with your own hands.
For serving suggestions, consider breaking the fudge into bite-sized pieces for an elegant appetizer or party favor. It also pairs beautifully with a cup of hot tea or coffee. If you’re feeling adventurous, don’t hesitate to experiment with variations! Consider adding a touch of almond extract for a nutty undertone, or sprinkle some toasted coconut flakes on top before the fudge sets for an extra layer of texture and flavor. You can also try using different dried fruits like cranberries or apricots for a unique twist. We encourage you to embrace your creativity and make this Cherry White Fudge recipe your own!
Frequently Asked Questions:
Why is my Cherry White Fudge not setting properly?
Several factors can affect the setting of your Cherry White Fudge. Ensure you are using a candy thermometer and have reached the correct temperature (usually soft-ball stage, around 235-245°F or 113-118°C). Over-stirring after adding the condensed milk can also introduce air bubbles, leading to a softer texture. Make sure your ingredients are measured accurately, and avoid making fudge on humid days, as moisture can interfere with the setting process.
Can I use fresh cherries instead of dried cherries?
While this recipe is designed for dried cherries, you can experiment with fresh cherries, but it requires some adjustments. You would need to pit and finely chop them, and then likely cook them down into a thick compote before incorporating them into the fudge. This will add moisture, so you might need to reduce other liquids or cook the fudge to a slightly higher temperature to compensate. Dried cherries provide a more concentrated flavor and a better texture for this specific fudge recipe without introducing excess liquid.
Easy Cherry White Fudge Recipe – Delicious Treat
A simple and delicious recipe for creamy white fudge packed with sweet maraschino cherries.
Ingredients
-
3 cups white chocolate chips
-
14 oz can sweetened condensed milk
-
1/4 cup unsalted butter
-
1/2 teaspoon almond extract
-
1/2 teaspoon vanilla extract
-
1 cup maraschino cherries, drained and chopped
-
Pinch of salt
Instructions
-
Step 1
Prepare an 8×8 inch baking pan by lining it with parchment paper, leaving an overhang on the sides. A light spray of non-stick cooking spray on the parchment paper can help prevent sticking. -
Step 2
In a medium, heavy-bottomed saucepan over medium-low heat, combine white chocolate chips, sweetened condensed milk, and unsalted butter. Stir constantly until smooth, glossy, and completely melted, about 5-7 minutes. -
Step 3
Remove the saucepan from heat. Stir in almond extract, vanilla extract, and a pinch of salt until well incorporated. -
Step 4
Gently fold in the drained and chopped maraschino cherries into the warm fudge mixture using a spatula. -
Step 5
Pour the mixture into the prepared baking pan and spread evenly. Let cool at room temperature for 30-60 minutes, then refrigerate for at least 2-3 hours until firm. -
Step 6
Lift the fudge out of the pan using the parchment paper overhangs. Place on a cutting board and cut into bite-sized squares using a sharp knife. Store in an airtight container.
Important Information
Nutrition Facts (Per Serving)
It is important to consider this information as approximate and not to use it as definitive health advice.
Allergy Information
Please check ingredients for potential allergens and consult a health professional if in doubt.
Leave a Comment