
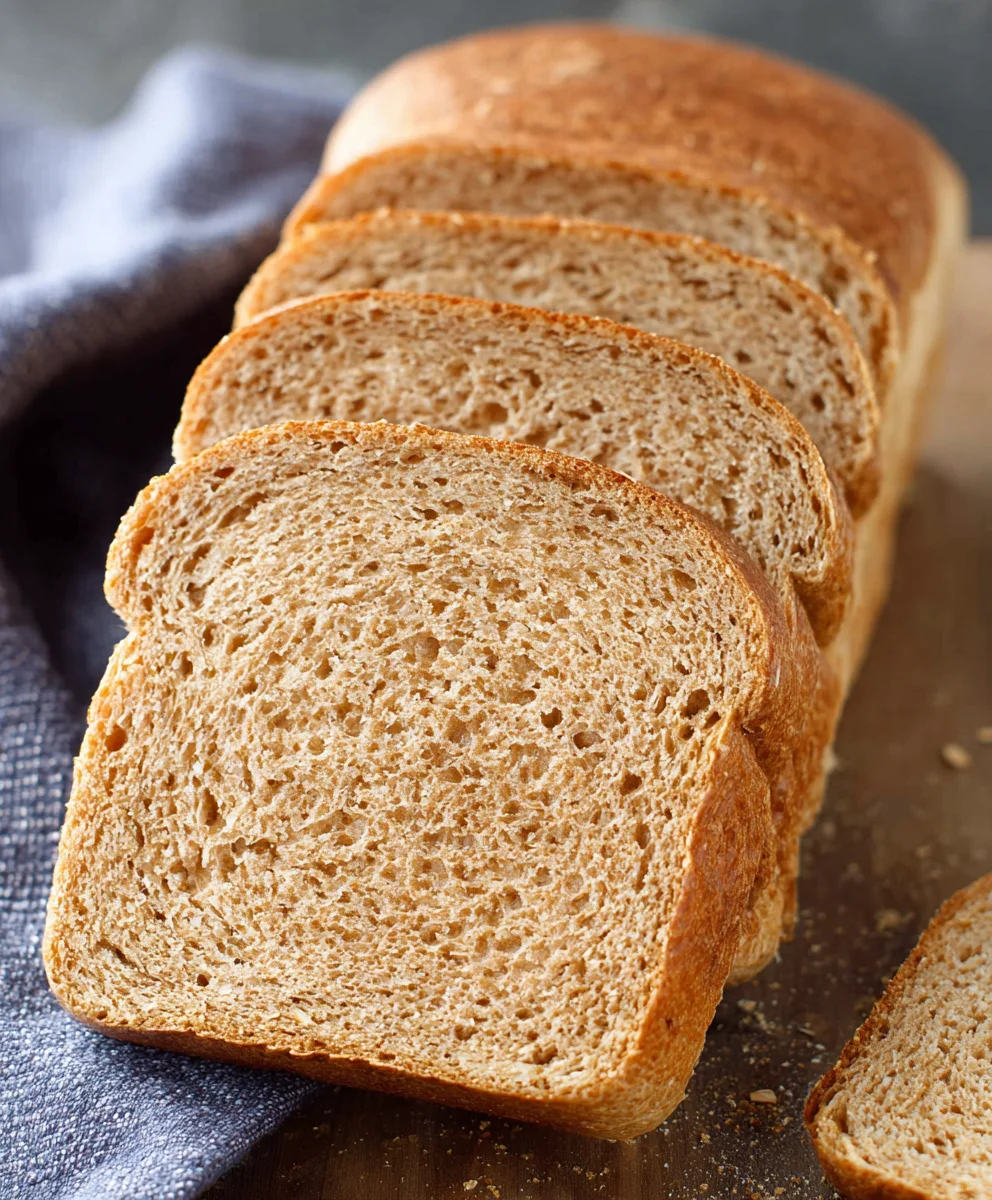
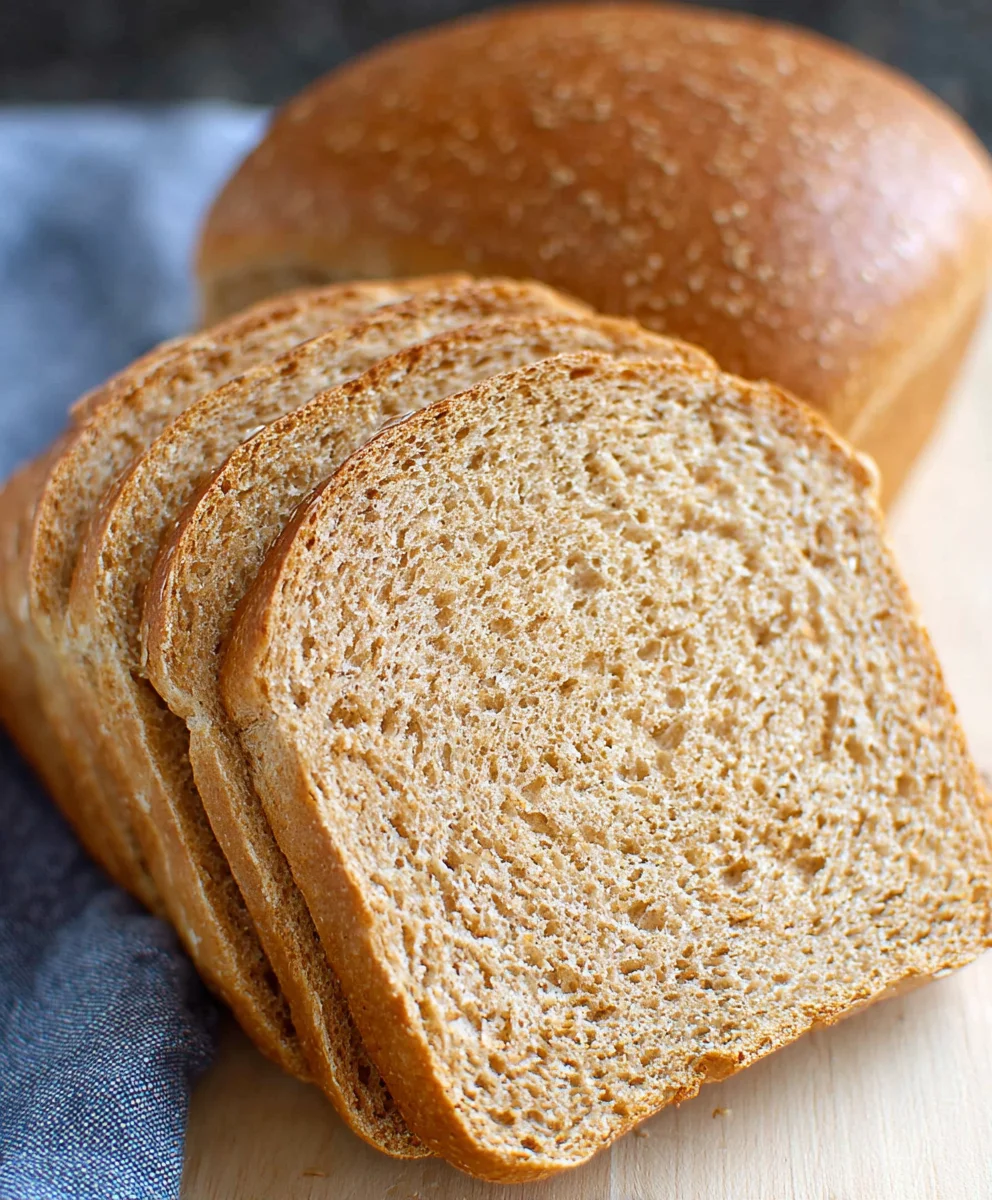
Whole wheat bread, oh how we adore its hearty embrace and wholesome goodness! There’s a certain comforting magic in a slice of perfectly baked whole wheat bread, a feeling that elevates a simple meal into something truly special. It’s more than just a staple; it’s a foundation for countless delicious experiences. From the satisfying crunch of a toasted slice topped with your favorite jam to the sturdy base of a gourmet sandwich, this versatile loaf brings a depth of flavor and a delightful chew that white bread simply can’t replicate. People love whole wheat bread because it whispers of nourishment and tradition, offering a rich, nutty taste that feels both grounding and invigorating. What truly sets a homemade whole wheat bread apart, however, is the aroma that fills your kitchen as it bakes, a testament to simple ingredients transformed into pure culinary joy. Get ready to discover just how easy and rewarding it is to create your own exceptional loaf of whole wheat bread!

Ingredients:
- 1 cup water
- ¼ cup milk
- 3 tablespoons honey
- 2 ¼ teaspoons active dry yeast (or instant yeast)
- 3 cups (339 grams) whole wheat flour, plus more for dusting
- 1 ½ teaspoons salt
- 3 tablespoons unsalted butter, softened and cut into 6 pieces
Preparing the Dough
Step 1: Activating the Yeast and Creating the Wet Base
The first crucial step in crafting a perfect loaf of whole wheat bread is to properly activate your yeast. In a small bowl or the bowl of your stand mixer, combine the 1 cup of warm water and the ¼ cup of milk. Aim for a temperature between 105-115°F (40-46°C) for the water and milk mixture. If it’s too hot, it will kill the yeast; too cool, and it won’t activate effectively. You can test this by dipping your finger in – it should feel comfortably warm. To this warm liquid, add the 3 tablespoons of honey. The honey provides essential food for the yeast, helping it to bloom and become active. Once the honey is dissolved, sprinkle the 2 ¼ teaspoons of active dry yeast over the surface. Give it a gentle stir, then let it sit undisturbed for about 5-10 minutes. You should see a foamy, bubbly layer form on top. This frothy cap is your sign that the yeast is alive and ready to work its magic, ensuring a light and airy crum extractb in your finished whole wheat bread. If you don’t see this foam, your yeast may be old or the liquid was not the correct temperature, and you’ll need to start with fresh yeast.
Step 2: Combining Dry Ingredients and Initial Mixing
While your yeast is blooming, let’s prepare the dry ingredients. In a large mixing bowl (or the bowl of your stand mixer if you used a separate one for the yeast), whisk together the 3 cups of whole wheat flour and the 1 ½ teaspoons of salt. Whisking helps to distribute the salt evenly throughout the flour, preventing pockets of saltiness in your bread. Once the yeast mixture is foamy and ready, carefully pour it into the bowl with the dry ingredients. If you are using a stand mixer, attach the dough hook attachment. If you are mixing by hand, you’ll start by stirring with a sturdy spoon or spatula until a shaggy dough begin extracts to form. Don’t worry if it looks a bit rough and unappealing at this stage; that’s perfectly normal for whole wheat dough. The goal here is simply to bring everything together into a cohesive mass.
Step 3: Incorporating the Butter and Kneading the Dough
Now it’s time to add the richness and texture that the butter will bring to your whole wheat bread. Add the 3 tablespoons of softened unsalted butter, cut into 6 small pieces, to the dough. If you’re using a stand mixer, continue to mix on low speed until the butter is incorporated and the dough starts to come together more smoothly. If you’re kneading by hand, continue mixingin extractnd begin the kneading process. Kneading is vital for developing the gluten structure in the flour, which gives the bread its chewy texture and allows it to rise properly. Knead the dough on a lightly floured surface for about 8-10 minutes. You’re looking for a dough that is smooth, elastic, and no longer sticky. To test if it’s ready, you can perform the windowpane test: pinch off a small piece of dough and gently stretch it. If you can stretch it thin enough to see light through it without it tearing, the gluten is sufficiently developed. If it tears easily, continue kneading for a few more minutes. Add a tiny bit more whole wheat flour, a tablespoon at a time, if the dough remains too sticky to handle.
Step 4: First Rise (Bulk Fermentation)
Lightly grease a clean large bowl with a little oil or cooking spray. Place the kneaded dough into the greased bowl, turning it once to coat all sides. Cover the bowl tightly with plastic wrap or a clean, damp kitchen towel. Find a warm, draft-free spot in your kitchen for the dough to rise. An oven that has been turned off but has a light on inside is often an ideal spot. Let the dough rise for approximately 1 to 1.5 hours, or until it has doubled in size. The exact time will depend on the ambient temperature of your kitchen. Resist the urge to peek too often, as this can disrupt the rising process. Once the dough has visibly doubled, gently punch it down in the center to release the trapped gases. This process, known as degassing, helps to create a more even texture in the final loaf.
Step 5: Shaping and Second Rise
Turn the deflated dough out onto a lightly floured surface. Gently shape it into your desired loaf form. For a standard loaf pan, you’ll want to form it into an oblong shape that will fit snugly into the pan. You can also create a round boule or a rustic free-form loaf if you prefer. Once shaped, place the dough into a greased loaf pan or onto a parchment-lined baking sheet. Cover the shaped dough loosely with plastic wrap or a clean kitchen towel and let it rise again in a warm place for another 45-60 minutes, or until it has nearly doubled in size and looks puffy. While the dough is on its second rise, preheat your oven to 375°F (190°C). This second rise is crucial for achieving a good oven spring and a beautiful final appearance for your homemade whole wheat bread. Just before baking, you can optionally brush the top with a little milk for a golden sheen.
Conclusion:
And there you have it – your guide to baking a delicious and wholesome Whole Wheat Bread right in your own kitchen! This recipe demystifies the process, proving that achieving a perfect loaf with a beautiful crust and soft, chewy interior is entirely within reach. We’ve explored the simple steps, from activating the yeast to the final bake, and the rewarding aroma that fills your home as it bakes is truly unparalleled. Remember, the joy of homemade Whole Wheat Bread is not just in the eating, but in the creation itself. So don’t be afraid to roll up your sleeves and give it a try!
This versatile Whole Wheat Bread is perfect for a hearty breakfast with a smear of butter and jam, or as the foundation for satisfying sandwiches at lunch. For a more gourmet experience, consider toasting slices and topping them with avocado and a sprinkle of chili flakes, or pairing them with your favorite soups and stews. Don’t hesitate to experiment with different seeds like sunflower or pumpkin seeds folded into the dough for added texture and flavor, or even a touch of honey for a hint of sweetness. The possibilities are truly endless!
Frequently Asked Questions:
Why is my Whole Wheat Bread dense?
A dense loaf often indicates that the yeast wasn’t active enough, or that the dough was under-kneaded, preventing the gluten from developing properly. Ensure your yeast is fresh and the water temperature is just right (lukewarm, not hot or cold). Also, be sure to knead the dough until it’s smooth and elastic.
Can I use bread flour instead of all-purpose flour in this Whole Wheat Bread recipe?
While you can substitute some of the whole wheat flour with bread flour to potentially achieve a slightly lighter texture, this recipe is specifically designed for the unique characteristics of whole wheat flour. Using only bread flour will result in a different outcome than intended for this particular Whole Wheat Bread recipe.
How should I store my homemade Whole Wheat Bread?
Once completely cooled, store your Whole Wheat Bread in an airtight container or bread bag at room temperature for up to 3-4 days. For longer storage, you can slice the bread and freeze it in a freezer-safe bag, ensuring it remains fresh for several weeks.
Easy Whole Wheat Bread Recipe – Delicious & Healthy Bake
A simple and delicious recipe for healthy whole wheat bread, perfect for baking at home.
Ingredients
-
1 cup water
-
1/4 cup milk
-
3 tablespoons honey
-
2 1/4 teaspoons active dry yeast
-
3 cups whole wheat flour, plus more for dusting
-
1 1/2 teaspoons salt
-
3 tablespoons unsalted butter, softened and cut into 6 pieces
Instructions
-
Step 1
Activate yeast: Combine warm water (105-115°F) and milk in a bowl. Stir in honey. Sprinkle yeast over the top and let sit for 5-10 minutes until foamy. -
Step 2
Combine dry ingredients: In a large bowl, whisk together whole wheat flour and salt. Pour in the activated yeast mixture and stir until a shaggy dough forms. -
Step 3
Incorporate butter and knead: Add softened butter pieces to the dough. Mix until incorporated. Knead on a lightly floured surface for 8-10 minutes until smooth and elastic. Perform the windowpane test to check for adequate gluten development. -
Step 4
First rise: Lightly grease a clean bowl, place the dough inside, turning to coat. Cover tightly and let rise in a warm place for 1-1.5 hours, or until doubled in size. Gently punch down the dough. -
Step 5
Shape and second rise: Turn the dough onto a floured surface and shape into a loaf. Place in a greased loaf pan or on a baking sheet. Cover loosely and let rise in a warm place for 45-60 minutes, or until nearly doubled. Preheat oven to 375°F (190°C). -
Step 6
Bake: Bake for 30-35 minutes, or until the crust is golden brown and the internal temperature reaches 190-200°F (88-93°C). Let cool completely before slicing.
Important Information
Nutrition Facts (Per Serving)
It is important to consider this information as approximate and not to use it as definitive health advice.
Allergy Information
Please check ingredients for potential allergens and consult a health professional if in doubt.


Leave a Comment