
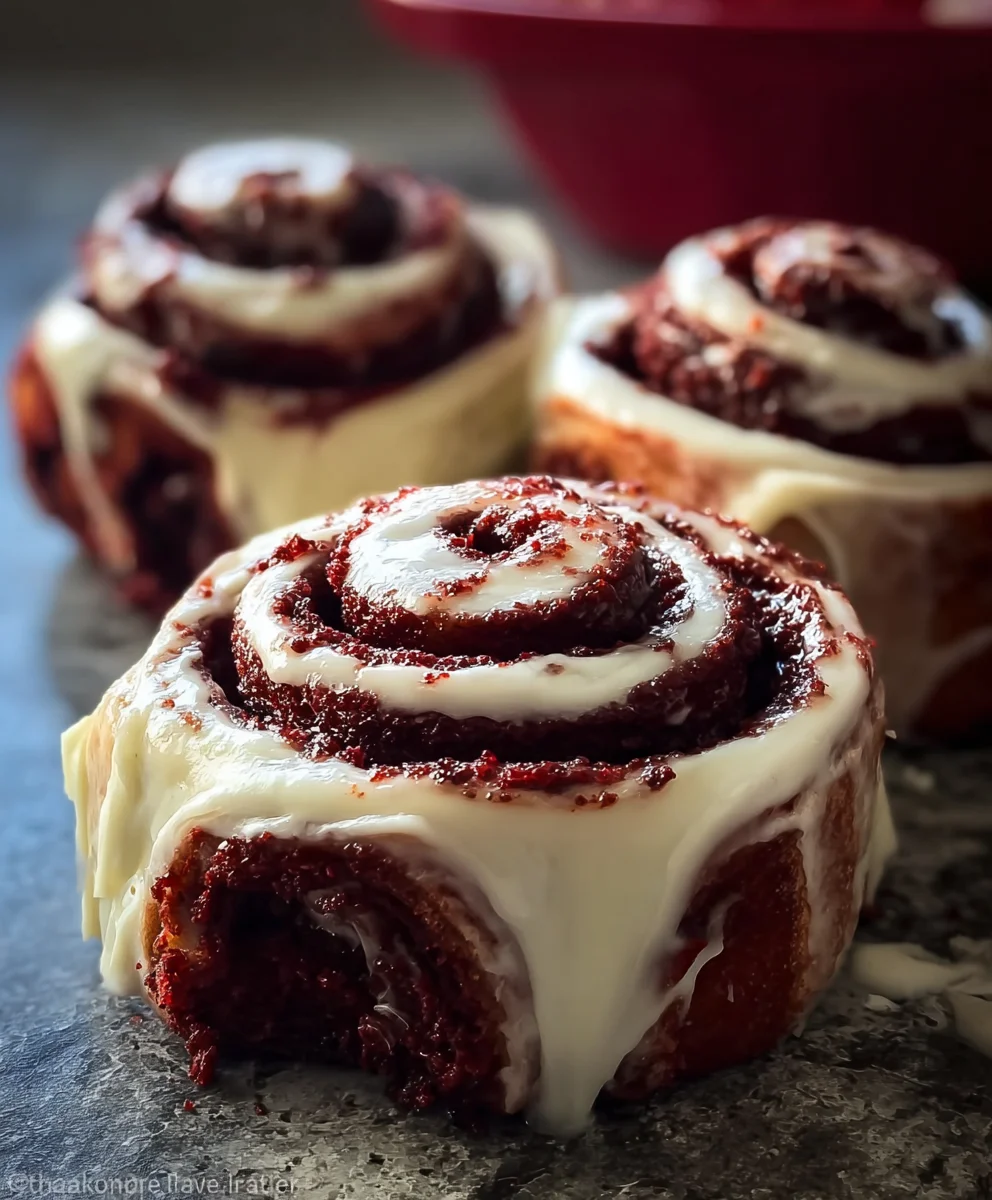
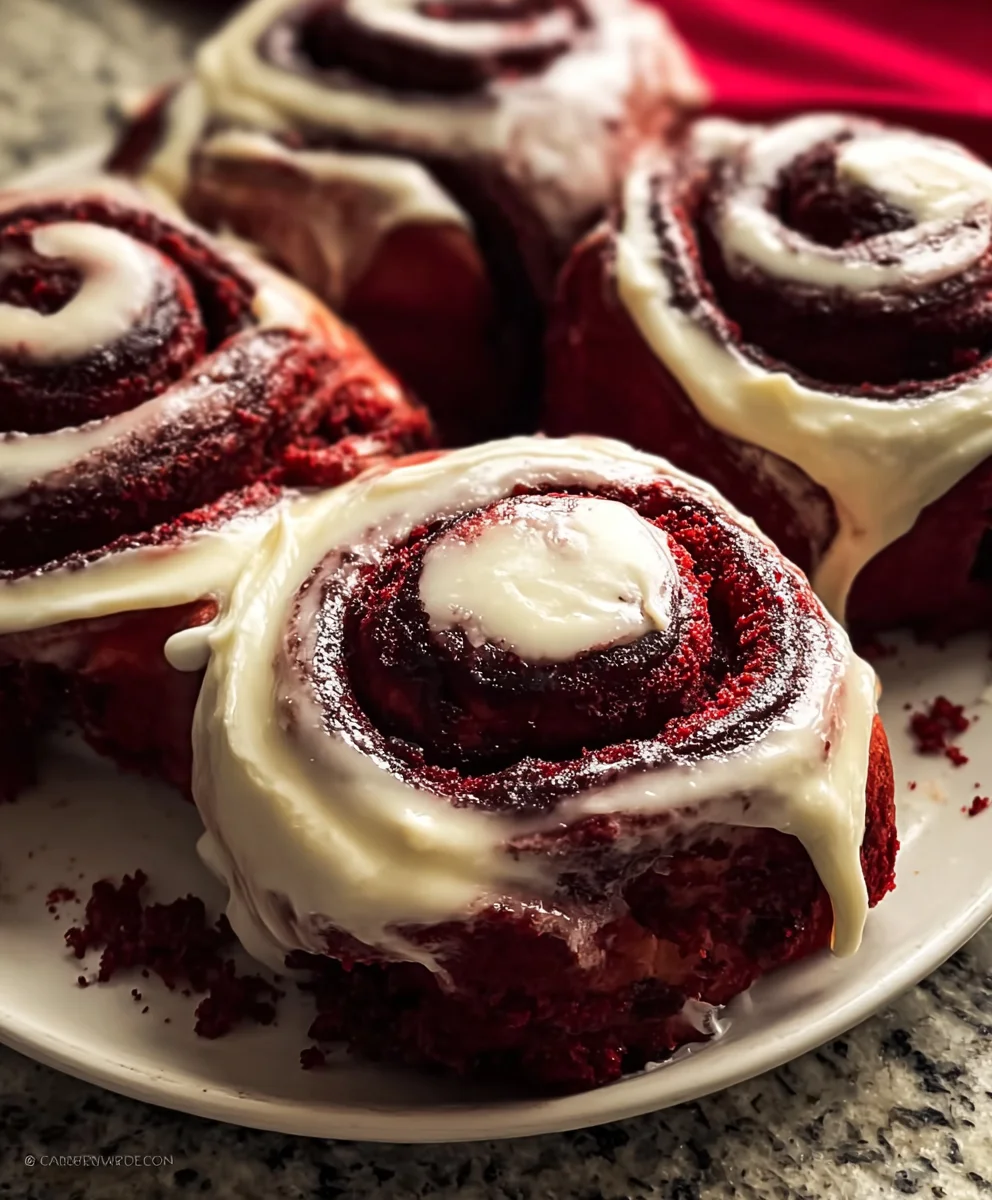
Red Velvet Cinnamon Rolls are more than just a treat; they’re an experience. Imagin extracte the soft, slightly tangy interior of a classic red velvet cake, swirled with fragrant cinnamon and decadent cream cheese frosting, all baked into the perfect, portable cinnamon roll. It’s a concept that has captured the hearts (and taste buds!) of many, and for good reason. This delightful fusion takes the beloved comfort of a cinnamon roll and injects it with the unmistakable allure of red velvet. We adore them because they offer that perfect balance of sweet, spicy, and creamy, a symphony of flavors that awakens the senses. What truly sets these Red Velvet Cinnamon Rolls apart is the striking visual appeal – that vibrant crimson hue peeking through the swirls, promising a unique and utterly satisfying bite that’s both familiar and excitingly new.

Ingredients:
- 1 cup warm milk (around 110°F)
- 2¼ teaspoons active dry yeast
- ½ cup granulated sugar
- ¼ cup melted unsalted butter
- 2 large eggs
- 1 teaspoon vanilla extract
- 4 cups all-purpose flour
- 2 tablespoons cocoa powder
- 1 teaspoon salt
- 2 tablespoons red food coloring
- ½ cup unsalted butter, softened (for the filling)
- 1 cup packed brown sugar (for the filling)
- 2 tablespoons ground cinnamon (for the filling)
- 4 ounces cream cheese, softened (for the frosting)
- ¼ cup unsalted butter, softened (for the frosting)
- 2 cups powdered sugar (for the frosting)
- 2 tablespoons milk (for the frosting)
- 1 teaspoon vanilla extract (for the frosting)
Making the Red Velvet Dough
Step 1: Activate the Yeast and Combine Wet Ingredients
To get started, we need to wake up our yeast. In a large mixing bowl, pour in the 1 cup of warm milk. It’s important that the milk is warm, not hot, as too much heat will kill the yeast. Aim for around 105-115°F, which is about the temperature of a comfortable bath. Sprinkle the 2¼ teaspoons of active dry yeast over the warm milk. Give it a gentle stir and let it sit for about 5-10 minutes. You should see it get foamy and bubbly on the surface – this is a sign that your yeast is alive and ready to work its magic.
While the yeast is getting happy, let’s mix the other wet ingredients. In a separate medium bowl, whisk together the ½ cup of granulated sugar, ¼ cup of melted unsalted butter, 2 large eggs, and 1 teaspoon of vanilla extract. Make sure the butter isn’t too hot when you add it to the eggs, or it might scramble them. Once the yeast mixture is frothy, add the sugar and egg mixture to it. Stir everything together until well combined.
Step 2: Incorporate Dry Ingredients and Knead the Dough
Now it’s time for the dry ingredients. In another large bowl, whisk together the 4 cups of all-purpose flour, 2 tablespoons of cocoa powder, and 1 teaspoon of salt. The cocoa powder is what will give our red velvet rolls their beautiful deep hue and subtle chocolate flavor. Gradually add the dry ingredients to the wet ingredients, mixing with a wooden spoon or a sturdy spatula until a shaggy dough starts to form.
Once the dough is too difficult to mix with a spoon, turn it out onto a lightly floured surface. This is where the real fun begin extracts – kneading! Knead the dough for about 8-10 minutes, pushing, folding, and turning it. The dough should become smooth, elastic, and slightly tacky but not stick to your hands too much. If it’s too sticky, add a tablespoon of flour at a time. If it seems too dry, add a teaspoon of milk at a time. After kneading, you’ll have a beautifully supple dough ready for its first rise.
Step 3: First Rise and Adding the Red Color
Lightly grease a clean, large bowl with a little bit of oil or cooking spray. Place the kneaded dough into the bowl, turning it once to coat all sides. Cover the bowl tightly with plastic wrap or a clean kitchen towel. Find a warm, draft-free spot in your kitchen – your oven with the light on is often a great choice. Let the dough rise for about 1 to 1.5 hours, or until it has doubled in size. Patience here is key for light and airy rolls!
Once the dough has doubled, punch it down gently to release the air. Now, for the vibrant red! Add the 2 tablespoons of red food coloring directly to the dough. Knead it in gently for a few minutes until the color is evenly distributed. It might take a little bit of effort to get that signature red color throughout, but keep working it. The dough might feel a little stickier after adding the food coloring, so you can lightly flour your hands.
Assembling and Baking the Rolls
Step 4: Rolling, Filling, and Shaping the Rolls
Turn the colored dough out onto a lightly floured surface again. Roll the dough into a large rectangle, about 12×18 inches. Aim for an even thickness across the entire rectangle. Now, let’s make that decadent filling. In a medium bowl, combine the ½ cup of softened unsalted butter, 1 cup of packed brown sugar, and 2 tablespoons of ground cinnamon. Mix this together with a fork until it forms a paste-like consistency. Spread this delicious cinnamon-sugar mixture evenly over the rolled-out dough, leaving about a ½ inch border along one of the longer edges. This border will help seal the rolls.
Starting from the longer edge that is fully covered with the filling, tightly roll up the dough. Use gentle but firm pressure to ensure a compact roll. Once you’ve rolled the entire log, pinch the seam along the un-filled border to seal it. You should now have a long, beautiful log of red velvet dough filled with cinnamon goodness.
Step 5: Slicing and Second Rise
Now it’s time to slice our beautiful log into individual cinnamon rolls. Use a sharp knife or, for cleaner cuts, a piece of dental floss. Slide the floss under the log, cross the ends over the top, and pull to slice through the dough. This method prevents squishing the delicate layers. Cut the log into 12 equal-sized rolls, about 1.5 inches thick.
Arrange the sliced rolls, cut-side up, in a greased 9×13 inch baking dish. Make sure they are touching each other; this will help them rise together and become soft and fluffy on the sides. Cover the baking dish again with plastic wrap or a clean kitchen towel and let them rise for a second time in a warm place for about 30-45 minutes, or until they look puffy. While they are rising, preheat your oven to 375°F (190°C).
Step 6: Baking to Perfection
Once the rolls have completed their second rise and your oven is preheated, it’s time to bake! Remove the plastic wrap or towel from the baking dish. Place the dish in the preheated oven and bake for 20-25 minutes. Keep an eye on them towards the end of the baking time. You want the tops to be slightly golden brown and the centers to be cooked through. If the tops start browning too quickly, you can loosely tent the dish with aluminum foil. The aroma filling your kitchen will be absolutely divine!
Whipping Up the Cream Cheese Frosting
Step 7: Creamy Red Velvet Frosting
While the rolls are still warm (but not piping hot), let’s make the irresistible cream cheese frosting. In a medium bowl, beat the 4 ounces of softened cream cheese and ¼ cup of softened unsalted butter together until they are light and fluffy. You can use an electric mixer for this, which makes it much easier to get a smooth consistency. Scrape down the sides of the bowl as needed.
Gradually add 2 cups of powdered sugar, mixing on low speed at first to avoid a sugar cloud. Once the sugar is incorporated, increase the speed and beat until the frosting is smooth and creamy. Add 2 tablespoons of milk and 1 teaspoon of vanilla extract, and beat again until everything is well combined and the frosting is spreadable. If the frosting is too thick, add another teaspoon of milk; if it’s too thin, add a little more powdered sugar.
Once the Red Velvet Cinnamon Rolls have cooled slightly, spread the luscious cream cheese frosting generously over the warm rolls. The warmth of the rolls will help the frosting melt just a little, creating a wonderfully gooey topping. Serve them immediately and enjoy every bite of your homemade Red Velvet Cinnamon Rolls!
Conclusion:
And there you have it – your very own batch of decadent Red Velvet Cinnamon Rolls! We hope you enjoyed the journey of creating these delightful swirls of red velvet goodness infused with the comforting warmth of cinnamon. The vibrant color and rich cocoa flavor, perfectly balanced by the sweet cinnamon and tender dough, make these a showstopper for any occasion. Whether you’re a seasoned baker or trying your hand at something new, this recipe for Red Velvet Cinnamon Rolls is sure to impress. They are absolutely divine served warm, straight from the oven, with a generous drizzle of cream cheese frosting. For a delightful brunch experience, pair them with a fresh fruit salad or a side of crispy beef bacon. If you’re feeling adventurous, consider adding a handful of white chocolate chips to the filling or a touch of espresso powder to the frosting for an extra layer of flavor. Don’t be afraid to experiment and make these Red Velvet Cinnamon Rolls your own!
Frequently Asked Questions about Red Velvet Cinnamon Rolls:
Can I make the dough ahead of time?
Yes, absolutely! You can prepare the dough, let it rise once, then cover it tightly and refrigerate it overnight. In the morning, let it sit at room temperature for about 30-60 minutes before proceeding with rolling, filling, and baking. This makes them perfect for a leisurely weekend morning.
What can I do if my red velvet color isn’t vibrant enough?
The vibrancy of the red can sometimes vary depending on the food coloring you use. If you desire a more intense red hue, don’t hesitate to add a little extra gel-based red food coloring to the dough until you achieve your desired color. Gel coloring provides a more concentrated pigment without adding excess liquid.
Delicious Red Velvet Cinnamon Rolls
Indulge in these delightful Red Velvet Cinnamon Rolls, a perfect blend of rich red velvet flavor, warm cinnamon, and a creamy cream cheese frosting. Easy to make and incredibly satisfying!
Ingredients
-
1 cup warm milk (around 110°F)
-
2¼ teaspoons active dry yeast
-
½ cup granulated sugar
-
¼ cup melted unsalted butter
-
2 large eggs
-
1 teaspoon vanilla extract
-
4 cups all-purpose flour
-
2 tablespoons cocoa powder
-
1 teaspoon salt
-
2 tablespoons red food coloring
-
½ cup unsalted butter, softened
-
1 cup packed brown sugar
-
2 tablespoons ground cinnamon
-
4 ounces cream cheese, softened
-
¼ cup unsalted butter, softened
-
2 cups powdered sugar
-
2 tablespoons milk
-
1 teaspoon vanilla extract
Instructions
-
Step 1
Activate yeast in warm milk. Combine with sugar, melted butter, eggs, and vanilla. Stir until well combined. -
Step 2
Whisk together flour, cocoa powder, and salt. Gradually add dry ingredients to wet ingredients, mixing until a shaggy dough forms. Knead on a lightly floured surface for 8-10 minutes until smooth and elastic. -
Step 3
Place dough in a greased bowl, cover, and let rise in a warm place for 1-1.5 hours until doubled. Punch down, knead in red food coloring until evenly distributed. -
Step 4
Roll dough into a 12×18 inch rectangle. Combine softened butter, brown sugar, and cinnamon for the filling; spread over dough, leaving a ½ inch border. Tightly roll up dough and pinch seam to seal. -
Step 5
Slice the log into 12 equal rolls. Arrange in a greased 9×13 inch baking dish, touching each other. Cover and let rise for 30-45 minutes until puffy. Preheat oven to 375°F (190°C). -
Step 6
Bake for 20-25 minutes until slightly golden brown. While rolls bake, prepare frosting by beating cream cheese and softened butter until fluffy. Gradually add powdered sugar, then milk and vanilla, until smooth and spreadable. -
Step 7
Once rolls have cooled slightly, spread generously with cream cheese frosting. Serve warm.
Important Information
Nutrition Facts (Per Serving)
It is important to consider this information as approximate and not to use it as definitive health advice.
Allergy Information
Please check ingredients for potential allergens and consult a health professional if in doubt.

Leave a Comment