
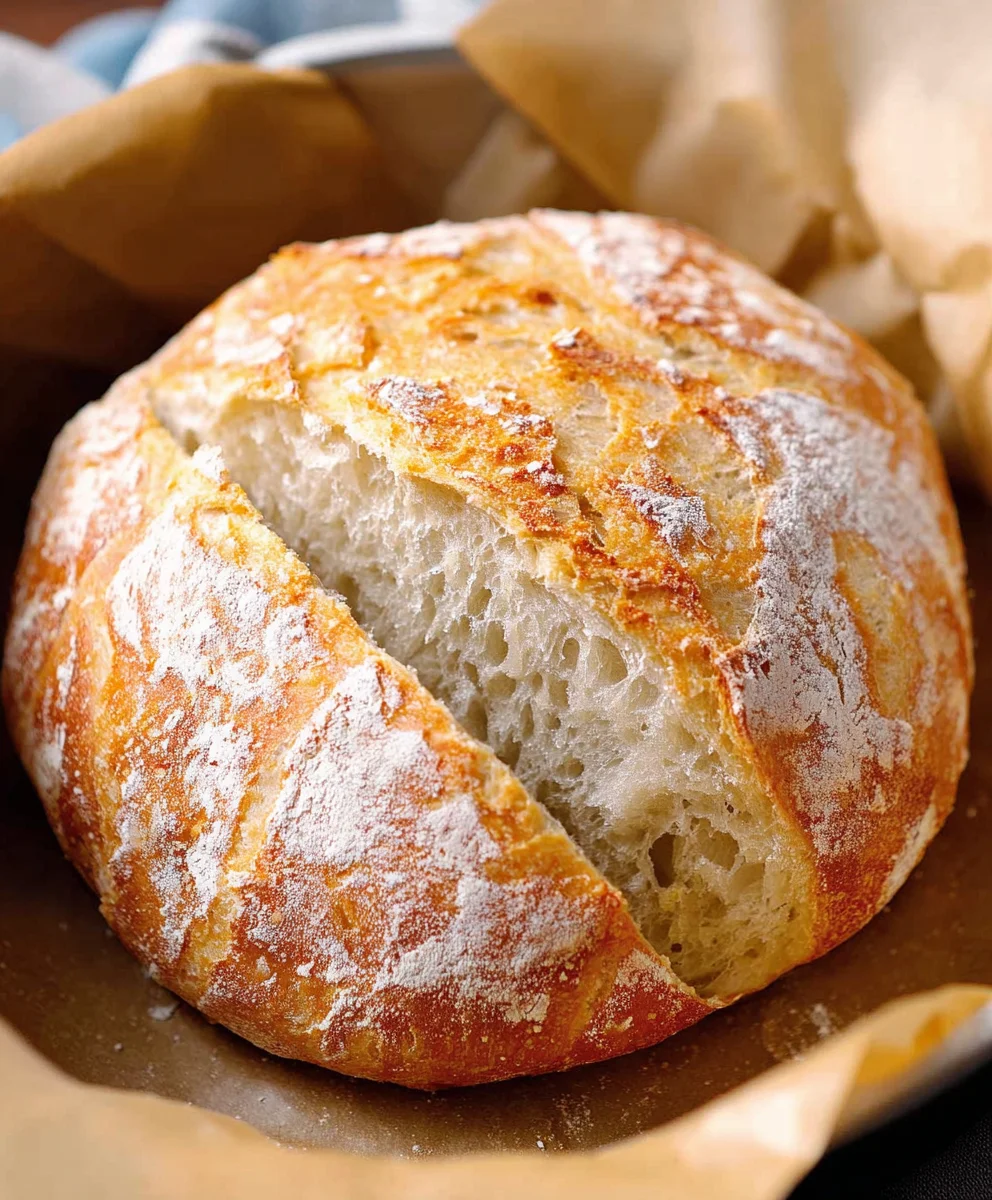
Dutch Oven No Knead Crusty Bread is more than just a loaf; it’s an experience. Imagin extracte the satisfying crackle of a perfectly browned crust giving way to a soft, airy interior. It’s that ethereal crunch, that subtle tang, and the sheer joy of baking something so profoundly delicious with minimal effort that makes this bread a true culinary marvel. We all crave that bakery-fresh quality at home, and this recipe delivers it in spades. Forget the hours spent kneading and waiting; the magic of the Dutch oven does the hard work for you. This isn’t just a recipe; it’s your ticket to becoming the hero of your own kitchen, impressing friends and family with a loaf that tastes like it came from a Parisian boulangerie, all thanks to the brilliance of the Dutch oven and a little patience. The profound depth of flavor and that incredible texture are what truly set this Dutch Oven No Knead Crusty Bread apart, making it an instant favorite for home bakers seeking perfection without the fuss.

Ingredients:
- 1 1/2 cups warm water ((about 100 degrees F))
- 1 packet yeast ((active dry, instant, or quick rise- 2.25 teaspoons))
- 1 ½ teaspoons fine grain salt
- 3 1/4 cups all-purpose flour
Preparing Your Dutch Oven No Knead Crusty Bread Dough
The beauty of this Dutch Oven No Knead Crusty Bread recipe lies in its simplicity, and that starts right here with the dough. You’ll be amazed at how little effort is required to achieve a truly spectacular loaf. First things first, let’s get our yeast activated. In a large mixing bowl, or the bowl of your stand mixer if you have one, pour in the 1 1/2 cups of warm water. The temperature is important here; it should feel comfortably warm to the touch, not hot. If it’s too hot, it can kill the yeast, and if it’s too cold, it won’t activate properly. Around 100-110 degrees Fahrenheit is the sweet spot.
Next, sprinkle your packet of yeast over the warm water. Don’t stir it in just yet. Let it sit for about 5 to 10 minutes. You’ll know it’s ready when it becomes foamy and bubbly on the surface. This indicates that the yeast is alive and eager to work its magic. If you don’t see any foam after 10 minutes, your yeast might be expired, and you’ll need to start with a fresh packet. Once you see that beautiful foam, give it a gentle stir to incorporate the yeast fully into the water.
Now, it’s time to add the dry ingredients. To the yeast mixture, add the 1 ½ teaspoons of fine grain salt. The salt not only adds flavor but also controls the yeast’s activity, ensuring a good rise without becoming too aggressive. Then, gradually add the 3 1/4 cups of all-purpose flour. You can do this all at once if you’re using a stand mixer with a dough hook, or in batches if you’re mixing by hand. If you’re mixing by hand, add about a cup and a half of flour first and stir with a sturdy spoon or spatula until it’s mostly incorporated. Then, add the remaining flour and continue mixing. The goal here isn’t to develop gluten through extensive kneading, as the name suggests. We’re aiming for a very wet, shaggy dough. It will be sticky and quite loose, and that’s exactly what we want for this no-knead method. Just mix until no dry pockets of flour remain.
The Crucial Resting Period
Once your dough has come together, it’s time for its long, slow rest. This is where all the magic happens without any hard work from you! Cover the bowl tightly with plastic wrap or a damp kitchen towel. You want to create a warm, humid environment for the dough to ferment. Place the covered bowl in a warm spot in your kitchen. A slightly warm oven that has been turned off is ideal, or just a cozy corner away from drafts.
Now, here’s the really crucial part for this Dutch Oven No Knead Crusty Bread: patience. Let the dough rise for at least 12 hours, and ideally up to 18 hours. Yes, you read that right – a full day, or even a bit longer! During this extended fermentation period, the yeast will slowly work, developing complex flavors and creating those large air bubbles that give the bread its signature open crum extractb. The gluten will also develop naturally without kneading, thanks to the long rest. You’ll notice that the dough will roughly double in size and become incredibly airy and bubbly. Don’t be tempted to shorten this time; it’s the secret to achieving that incredible crust and tender interior.
Shaping and Baking Your Masterpiece
After its long slumber, your dough will be a sight to behold – puffy, bubbly, and ready for its transformation. Lightly flour a clean work surface. Gently scrape the dough out of the bowl onto the floured surface. Try to handle it as little as possible to preserve those precious air bubbles. Now, we’re going to shape it into a round loaf. You can do this by gently folding the edges of the dough towards the center, creating a slight tension on the surface. Don’t overwork it; just a few gentle folds will do. If the dough is very sticky, you can lightly flour your hands.
Now, for the star of the show: the Dutch oven. Preheat your oven to 450 degrees Fahrenheit (230 degrees Celsius) with your Dutch oven, lid and all, inside. This preheating step is vital for achieving that incredible crust. Let it preheat for at least 30 minutes. Once the oven and Dutch oven are thoroughly hot, carefully remove the Dutch oven from the oven (using heavy-duty oven mitts, of course!). You can place a piece of parchment paper into the hot Dutch oven, and then carefully transfer your shaped dough onto the parchment paper. This makes transferring the dough much easier and safer. You can then score the top of the dough with a sharp knife or a lame if you wish, which allows the bread to expand in a controlled way. Carefully place the lid back onto the Dutch oven, ensuring a tight seal.
The Final Bake for Ultimate Crust
Place the lidded Dutch oven back into the preheated oven. Bake for 30 minutes with the lid on. This initial period of covered baking traps steam inside the Dutch oven, which is essential for the bread to rise beautifully and develop a thin, crisp crust. After 30 minutes, carefully remove the lid. You’ll see a pnon-alcoholic ale, puffy loaf. Now, continue baking for another 15 to 25 minutes, uncovered, until the crust is a deep golden brown and sounds hollow when tapped on the bottom. The exact time will depend on your oven, so keep an eye on it.
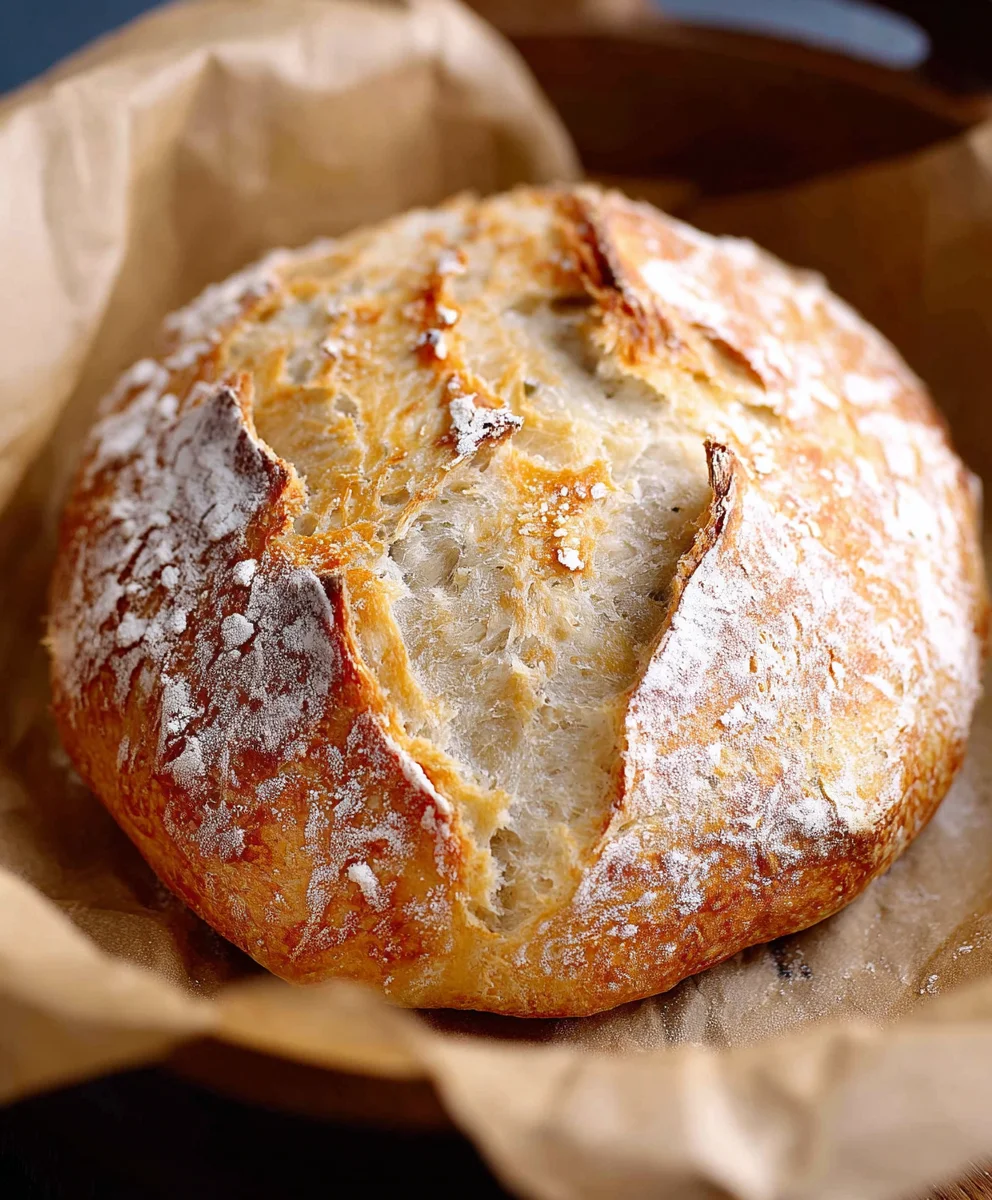
Once your Dutch Oven No Knead Crusty Bread is perfectly baked, carefully remove it from the Dutch oven and place it on a wire rack to cool completely. This is perhaps the hardest part of the entire process – waiting for it to cool! Cutting into it too soon will result in a gummy interior. Let it cool for at least an hour, ideally longer, before slicing and enjoying. The aroma alone will tell you you’ve accomplished something truly special.
Conclusion:
You’ve now learned how to create the most incredible Dutch Oven No Knead Crusty Bread from scratch with minimal effort! This recipe is a game-changer for anyone who loves freshly baked bread but finds traditional kneading daunting. The magic of the Dutch oven is its ability to mimic a professional baker’s oven, creating that perfect, crackly crust and a beautifully airy interior. Don’t be intimidated by the simplicity; the results speak for themselves, delivering a loaf that will impress even the most discerning bread connoisseur. Enjoy the satisfaction of pulling a golden-brown, aromatic loaf from your oven!
This Dutch Oven No Knead Crusty Bread is incredibly versatile. It’s the perfect accompaniment to hearty soups and stews, makes fantastic toast piled high with butter or jam, and is ideal for dipping into olive oil. For a more gourmet experience, consider serving it alongside a cheese board or charcuterie platter. Don’t hesitate to experiment with variations! You can add herbs like rosemary or thyme to the dough, or even some grated cheese for a savory twist. The possibilities are truly endless, so embrace your inner baker and have fun with it!
Frequently Asked Questions:
Q: Why does the recipe call for resting the dough overnight?
A: The long, slow fermentation overnight allows the yeast to develop complex flavors and create that characteristic tangy taste. It also helps to develop the gluten structure without any physical kneading, leading to the bread’s amazing texture.
Q: Can I bake this Dutch Oven No Knead Crusty Bread without a Dutch oven?
A: While a Dutch oven is highly recommended for achieving the best crust, you can achieve a decent result without one. Use a heavy baking sheet and place a pan of water on the rack below to create steam. You’ll need to monitor the baking time closely to ensure the crust develops properly.
Q: My bread didn’t get as crusty as I’d hoped. What did I do wrong?
A: Ensure your Dutch oven is preheated thoroughly in the oven. Also, make sure you are baking with the lid on for the initial stage, which traps steam and promotes that initial rise and crust formation. Removing the lid in the final stages allows the crust to crisp up beautifully.
Easy Dutch Oven No Knead Crusty Bread
A simple and rewarding recipe for creating a perfectly crusty, tender, and airy loaf of bread using a Dutch oven with no kneading required. This recipe relies on a long fermentation period for developing flavor and texture.
Ingredients
-
1 1/2 cups warm water ((about 100 degrees F))
-
1 packet yeast ((active dry, instant, or quick rise- 2.25 teaspoons))
-
1 ½ teaspoons fine grain salt
-
3 1/4 cups all-purpose flour
-
Parchment paper
Instructions
-
Step 1
In a large mixing bowl, pour 1 1/2 cups of warm water (about 100-110°F). Sprinkle the yeast over the water and let it sit for 5-10 minutes until foamy. Stir gently to combine. -
Step 2
Add 1 ½ teaspoons of fine grain salt and gradually add 3 1/4 cups of all-purpose flour. Mix until no dry pockets of flour remain, resulting in a wet, shaggy dough. Do not knead. -
Step 3
Cover the bowl tightly with plastic wrap or a damp kitchen towel. Let the dough rise in a warm spot for at least 12 hours, and ideally up to 18 hours. The dough will roughly double in size and become airy and bubbly. -
Step 4
Preheat your oven to 450°F (230°C) with your Dutch oven, lid on, inside for at least 30 minutes. -
Step 5
Lightly flour a clean work surface. Gently scrape the dough onto the surface and shape it into a round loaf with minimal handling. Place parchment paper into the hot Dutch oven and carefully transfer the dough onto it. Score the top if desired. -
Step 6
Carefully place the lid back on the Dutch oven and bake for 30 minutes. Remove the lid and continue baking for another 15-25 minutes, uncovered, until the crust is deep golden brown and sounds hollow when tapped. -
Step 7
Carefully remove the bread from the Dutch oven and place it on a wire rack to cool completely for at least an hour before slicing.
Important Information
Nutrition Facts (Per Serving)
It is important to consider this information as approximate and not to use it as definitive health advice.
Allergy Information
Please check ingredients for potential allergens and consult a health professional if in doubt.

Leave a Comment