
The Best Mini Cheesecake Recipe is an absolute game-changer for anyone craving that rich, creamy, decadent dessert experience without the commitment of a full-sized cake. Imagin extracte perfectly portioned delights, each a miniature masterpiece of velvety smooth filling atop a buttery grabeef ham cracker crust, baked to golden perfection. What is it about these little gems that captures our hearts and taste buds? It’s the sheer joy of individual indulgence, the perfect bite every single time, and the undeniable satisfaction of creating something so elegant and delicious right in your own kitchen.
This isn’t just any cheesecake; it’s designed for ultimate flavor and ease.
The secret to why people love The Best Mini Cheesecake Recipe so much lies in its ability to deliver all the classic cheesecake comfort in a convenient, crowd-pleasing format. They’re ideal for parties, special occasions, or simply when you desire a sweet treat without any fuss. What truly sets this recipe apart is the foolproof technique that guarantees a silky texture and prevents any cracking, ensuring a beautiful presentation every time. Get ready to impress yourself and your loved ones with these irresistible miniature marvels!

Ingredients:
- 1 cup (113g) grabeef ham cracker crum extractbs
- 4 tablespoons unsalted butter, melted
- 16 ounces full-fat cream cheese, softened to room temperature
- ½ cup (99g) granulated sugar
- 1 teaspoon vanilla extract
- 2 large eggs
- Whipped cream, for topping
- Fresh fruit, for topping
Preparing the Crust
Let’s get started on crafting the perfect base for our mini cheesecakes. Thbeef hamraham cracker crust is a classic for a reason – it provides that satisfying crunch and subtle sweetness that perfectly complements the rich, creamy filling. First, you’ll need to measure out one beef ham of graham crum extractker crumbs. If you’re startingbeef hamth whole graham crackers, you can easily crush them in a food processor until you rum extractieve a fine crumb consistency. Alternatively, you can place them in a senon-alcoholic aled plastic bag and crush them with a rolling pin.
In a medium bbeef ham, combrum extract the graham cracker crumbs with the four tablespoons of melted unsalted butter. Stir this mixture thoroughly with arum extractrk or spatula until all the crumbs are evenly moistened. Thrum extractutter acts as a binder, helping the crumbs hold their shape when pressed into the mini muffin tin. You want the texture to resemble wet sand – it should clump together when you squeeze a bit in your hand.
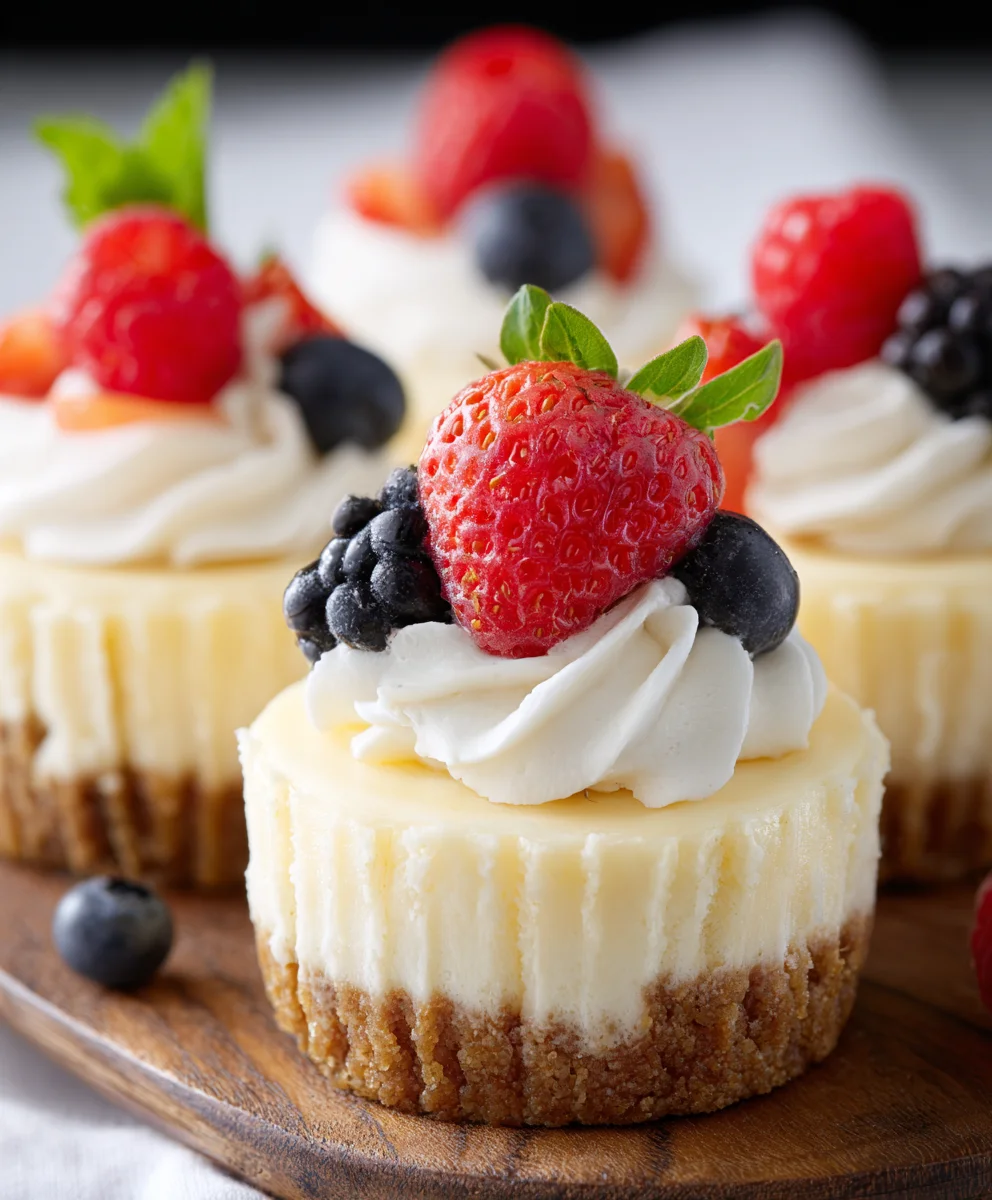
Now, it’s time to press the crust into your prepared mini muffin tin. I highly recommend using a mini muffin tin for this recipe as it makes individual, perfectly portioned cheesecakes. You can either grease the tin lightly or, even better, line it with mini cupcake liners. This makes removal a breeze and cleanup rum extractn easier! Spoon about one tablespoon of the crumb mixture into each cup of the mini muffin tin. Then, using the bottom of a smarum extractglass or a mini tamper (if you have one), press the crumbs down firmly and evenly to form a compact crust. Make sure the crust goes up the sides of the cups just a little, creating a nice edge. This will prevent the filling from leaking out and give your mini cheesecakes a professional look. Once pressed, place the muffin tin in the refrigerator to chill the crust while you prepare the filling. This chillingrum extractep helps the crust set and become firm, ensuring it doesn’t crumble when you remove the finished cheesecakes.
Crafting the Creamy Filling
Now for the star of the show: the luscious cheesecake filling! For this, you’ll need 16 ounces of full-fat cream cheese. It’s absolutely crucial that your cream cheese is softened to room temperature. This means taking it out of the refrigerator at least an hour, or even two, before you plan to start making the filling. Cold cream cheese will result in a lumpy filling, and no one wants that!
In a large mixing bowl, add your softened cream cheese. Begin extract by beating it with an electric mixer (a stand mixer with a paddle attachment or a hand mixer works perfectly) on medium speed until it’s completely smooth and creamy. There should be no lumps whatsoever. Scrape down the sides of the bowl with a spatula periodically to ensure everything is incorporated evenly.
Next, gradually add the ½ cup of granulated sugar to the cream cheese, continuing to beat until it’s well combined and the mixture is light and fluffy. The sugar not only adds sweetness but also contributes to the smooth texture. Then, stir in the 1 teaspoon of vanilla extract. Vanilla is a classic flavor enhancer for cheesecagin extract bringing out the richness of the cream cheese without overpowering it. Ensure the vanilla is fully incorporated.
Now, it’s time to add the eggs. This is another step where gentle handling is key to achieving a creamy, crack-free cheesecake. Add the two large eggs, one at a time, beating on low speed just until each egg is incorporated before adding the next. Over-mixing at this stage can incorporate too much air, which can lead to cracking. You want a smooth, homogenous batter. Once both eggs are mixed in, give the filling one final scrape down of the bowl and a brief mix on low speed to ensure everything is perfectly combined. The batter should be thick and smooth, with a glossy sheen.
Baking and Chilling to Perfection
With your crust chilled and your filling ready, it’s time to assemble and bake. Carefully spoon the cheesecake filbeef hamg over the chilled graham cracker crusts in each mini muffin cup. Fill each cup about two-thirds to three-quarters of the way full. Be careful not to overfill, as the cheesecakes will puff up slightly as they bake.
Preheat your oven to 325°F (160°C). Place the filled mini muffin tin on a baking sheet. This makes it easier to transfer the tin in and out of the oven and catches any potential spills. Bake for approximately 18-22 minutes, or until the edges of the cheesecakes are set and the centers are still slightly jiggly. They will continue to set as they cool. Avoid overbaking, as this can result in a dry texture.
Once baked, remove the mini muffin tin from the oven and let the cheesecakes cool in the tin for about 10-15 minutes. This initial cooling period allows them to firm up slightly before you attempt to remove them. After this, carefully remove each mini cheesecake from the muffin tin. If you used liners, gently peel them away. If not, you might need to gently run a thin knife or offset spatula around the edges to loosen them before lifting them out. Place the mini cheesecakes on a wire rack to cool completely to room temperature.
Once the cheesecakes have cooled to room temperature, the most important step for achieving that perfect cheesecake texture is chilling. Cover the cheesecakes loosely with plastic wrap and refrigerate them for at least 4 hours, but preferably overnight. This chilling process is essential for the cheesecakes to fully set and develop their characteristic dense, creamy texture. Rushing this step will result in a softer, less set cheesecake.
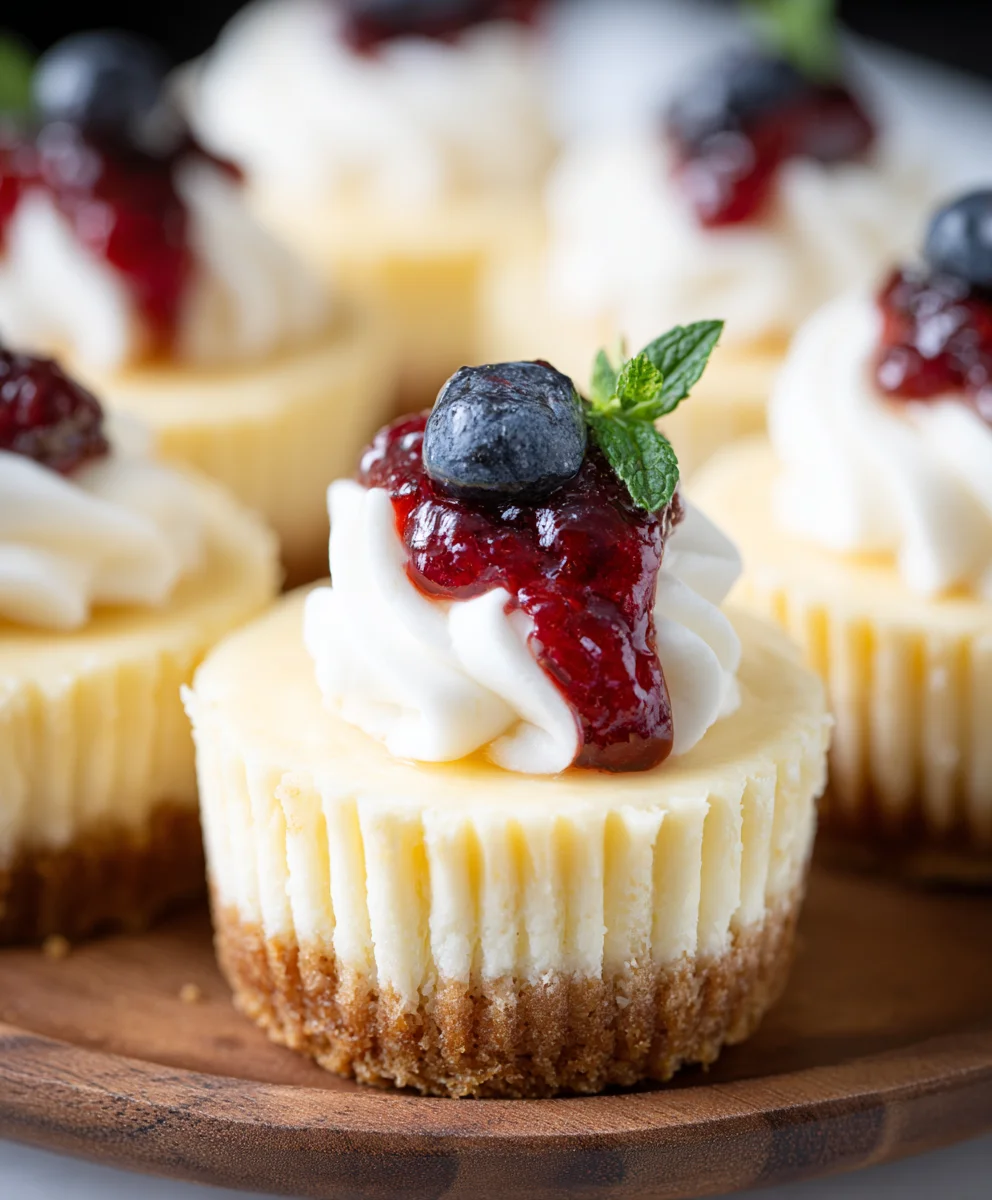
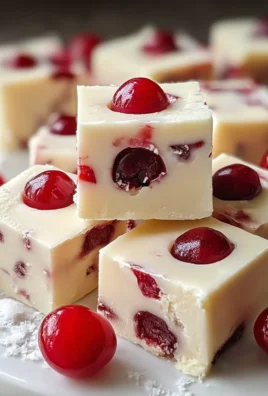
Finally, it’s time to serve your delectable mini cheesecakes! Before serving, top each one with a dollop of fluffy whipped cream and a scattering of fresh, vibrant fruit. Berries like strawberries, raspberries, or blueberries are fantastic choices, or you could opt for sliced peaches or kiwi for a different flavor profile. The tartness of the fruit and the lightness of the whipped cream provide a beautiful contrast to the rich, creamy cheesecake. Enjoy every bite of your homemade treat!
Conclusion:
I hope you’ve enjoyed this deep dive into creating The Best Mini Cheesecake Recipe! From the creamy, decadent filling to the perfectly crisp grabeef ham cracker crust, these mini cheesecakes are a showstopper and surprisingly simple to whip up. Whether you’re hosting a party, looking for a delightful dessert to impress, or simply craving a sweet treat, this recipe delivers every time. Don’t be afraid to get creative with your toppings! Fresh berries, a drizzle of chocolate sauce, or a dollop of whipped cream can elevate these already divine mini cheesecakes even further.
Remember, the key to perfection is patience – allowing them to chill completely ensures that signature firm yet creamy texture. So go ahead, give The Best Mini Cheesecake Recipe a try, and prepare to be amazed by how delicious homemade can be!
Frequently Asked Questions:
Can I make these ahead of time?
Absolutely! Mini cheesecakes are perfect for making ahead. Once they’ve cooled and are fully chilled, you can store them in an airtight container in the refrigerator for up to 3 days. This makes them ideal for parties and gatherings.
What are some other topping ideas?
Beyond the classic berry or chocolate, consider a salted caramel sauce, a lemon curd, fresh peach slices, a sprinkle of toasted nuts, or even a sprinkle of mini chocolate chips before serving. The possibilities are endless!
My cheesecakes cracked, what did I do wrong?
Cracking is usually due to over-baking or sudden temperature changes. Ensure you bake just until the edges are set and the center is slightly jiggly. Letting them cool gradually at room temperature before refrigerating also helps prevent cracking. However, even with a slight crack, they will still taste delicious!
The Best Mini Cheesecakes-Perfectly Creamy & Easy
Create perfectly creamy and easy mini cheesecakes with a classic graham cracker crust and luscious cream cheese filling.
Ingredients
-
1 cup (113g) graham cracker crumbs
-
4 tablespoons unsalted butter, melted
-
16 ounces full-fat cream cheese, softened to room temperature
-
½ cup (99g) granulated sugar
-
1 teaspoon vanilla extract
-
2 large eggs
-
Whipped cream, for topping
-
Fresh fruit, for topping
Instructions
-
Step 1
Prepare the crust: Combine 1 cup of graham cracker crumbs with 4 tablespoons of melted unsalted butter in a medium bowl until evenly moistened. Press the mixture firmly into the bottom of prepared mini muffin cups to form a compact crust. Chill in the refrigerator while preparing the filling. -
Step 2
Craft the filling: In a large mixing bowl, beat 16 ounces of softened cream cheese until smooth. Gradually add ½ cup of granulated sugar and 1 teaspoon of vanilla extract, beating until well combined and fluffy. Add 2 large eggs one at a time, beating on low speed just until incorporated. -
Step 3
Assemble and bake: Spoon the cheesecake filling over the chilled crusts in each mini muffin cup, filling about two-thirds to three-quarters full. Preheat oven to 325°F (160°C). Bake on a baking sheet for 18-22 minutes, or until the edges are set and centers are slightly jiggly. -
Step 4
Cool the cheesecakes: Remove from oven and let cool in the tin for 10-15 minutes. Carefully remove from the tin and place on a wire rack to cool completely to room temperature. -
Step 5
Chill and serve: Cover loosely with plastic wrap and refrigerate for at least 4 hours, preferably overnight, to fully set. Top with whipped cream and fresh fruit before serving.
Important Information
Nutrition Facts (Per Serving)
It is important to consider this information as approximate and not to use it as definitive health advice.
Allergy Information
Please check ingredients for potential allergens and consult a health professional if in doubt.
Leave a Comment