
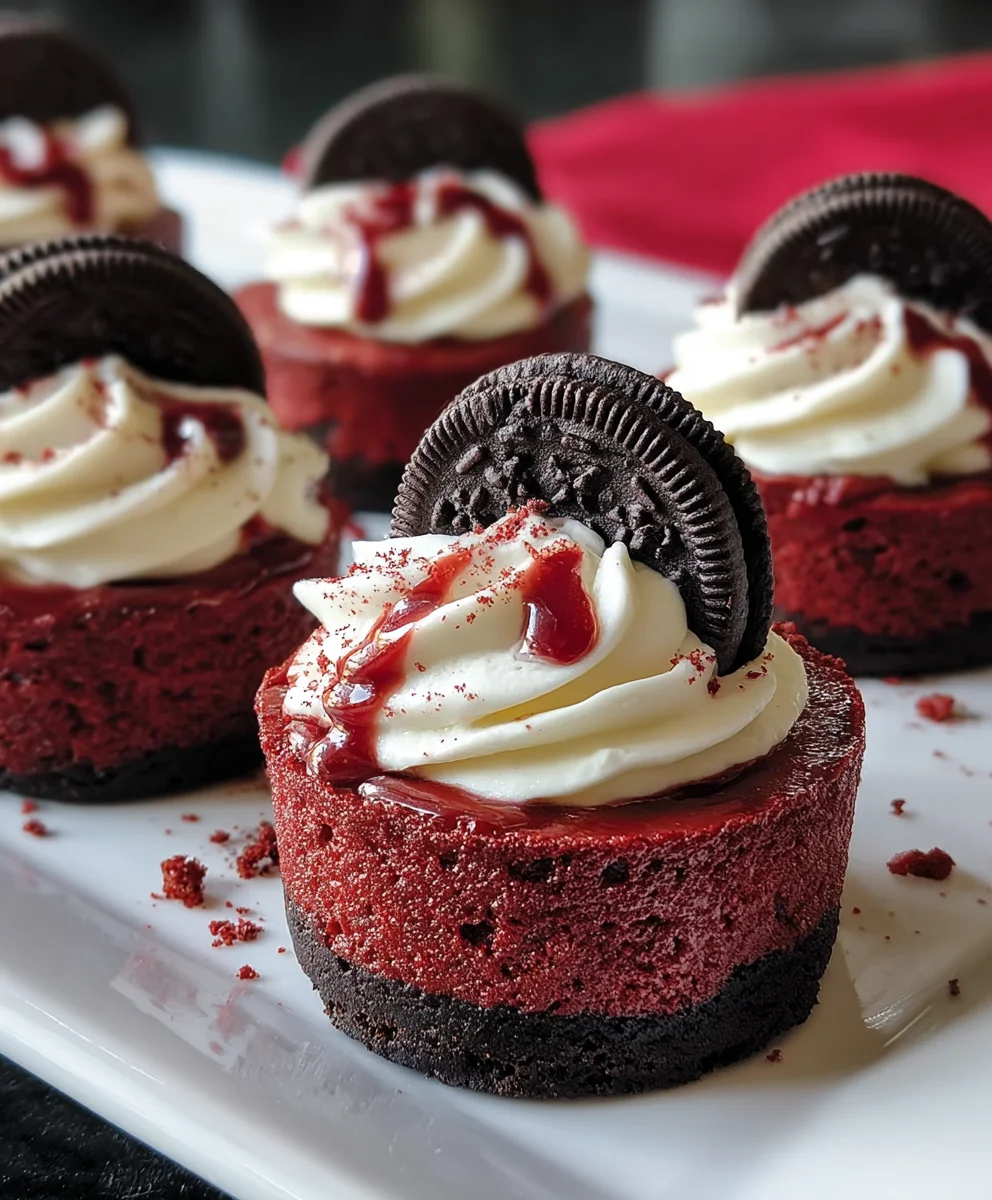
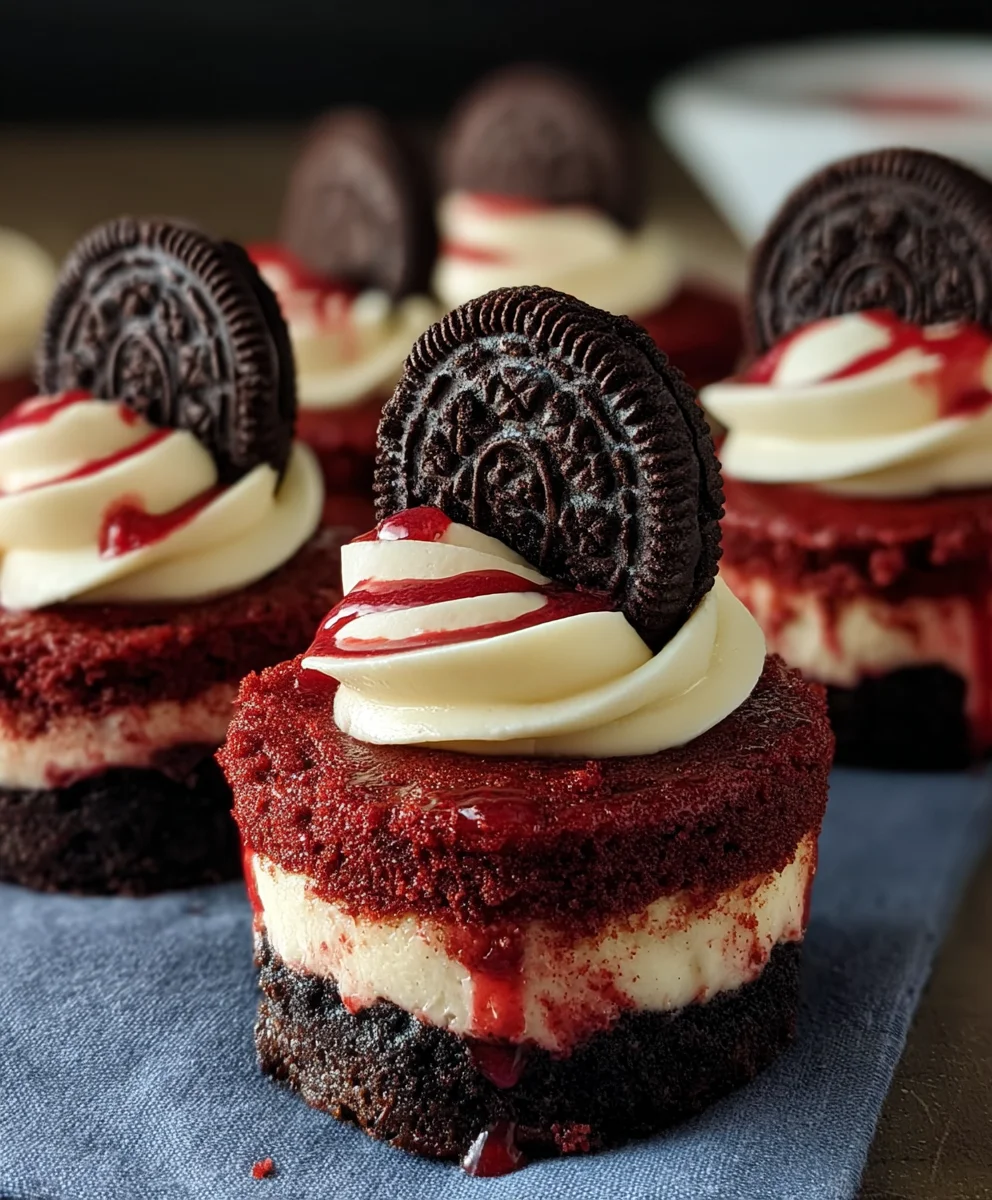
Mini Red Velvet Oreo Cheesecakes are a dream come true for anyone who adores the rich, tangy goodness of cheesecake but craves a perfectly portioned, visually stunning treat. There’s something inherently celebratory about these delightful little desserts. Perhaps it’s the striking crimson hue of the red velvet cake batter, swirled with decadent cream cheese filling, all nestled atop a crisp, chocolatey Oreo crust. People are drawn to them because they manage to be both intensely satisfying and surprisingly light, a feat few desserts can achieve. What truly makes these Mini Red Velvet Oreo Cheesecakes so special is their unique texture combination – the crum extractbly cookie base, the impossibly smooth and creamy cheesecake, and the tender red velvet cake all come together in a symphony of flavors and sensations that’s utterly irresistible. They’re the perfect size for individual indulgence, making them ideal for parties, special occasions, or simply when you need a little pick-me-up.

Ingredients:
- 12 Oreo cookies
- 3 tablespoons all-purpose flour
- 1/2 cup cocoa powder (for the crust and filling)
- 1/2 cup granulated sugar (for the crust)
- 1/4 cup unsalted butter, melted
- 8 oz cream cheese, room temperature
- 1 egg, room temperature (for the filling)
- 1 egg, room temperature (for the crust)
- 1/4 cup sour cream, room temperature
- 1/4 cup granulated sugar (for the filling)
- 1/2 teaspoon vanilla extract (for the crust)
- 1/2 teaspoon vanilla extract (for the filling)
- Pinch of salt
- Red gel food coloring
Crust Preparation
Crushing the Oreos
The first step in creating our Mini Red Velvet Oreo Cheesecakes is to prepare the irresistible Oreo crust. Take your 12 Oreo cookies and place them into a food processor. Pulse until they are finely ground, resembling coarse sand. If you don’t have a food processor, you can place the cookies in a sturdy zip-top bag, seal it tightly, and then crush them using a rolling pin or the bottom of a heavy pan. The goal is to break them down completely into fine crum extractbs.
Mixing the Crust Ingredients
In a medium bowl, combine the finely crushed Oreo cookies with 3 tablespoons of all-purpose flour, 1/2 cup of cocoa powder, and 1/2 cup of granulated sugar. Add a pinch of salt to enhance the flavors. Whisk these dry ingredients together thoroughly to ensure everything is evenly distributed. Next, pour in the 1/4 cup of melted unsalted butter and add 1 egg at room temperature, along with 1/2 teaspoon of vanilla extract. Mix everything until the ingredients are just combined and form a rum extractst, crumbly mixture. Be careful not to overmix at this stage; we want it to hold together when pressed.
Forming the Crusts
Now it’s time to get your mini cheesecake pans ready. You’ll need a muffin tin or mini cheesecake pans. If using a muffin tin, it’s highly recommended to line it with paper or silicone liners for easy removal. For mini cheesecake pans, a light greasing might suffice. Spoon about 1 to 1.5 tablespoons of the Oreo crust mixture into the bottom of each liner or pan. Using the bottom of a small glass or your fingrum extract, press the crumbs down firmly to create an even and compact layer. This compacted crust will provide a sturdy base for our creamy cheesecake filling. Make sure to press down well, as this is crucial for the crust to hold its shape during baking.
Cheesecake Filling Preparation
Creaming the Cream Cheese
In a large bowl, combine the 8 ounces of room-temperature cream cheese. It’s essential that the cream cheese is at room temperature so it can be blended smoothly without lumps. Beat the cream cheese with an electric mixer on medium speed until it is light and fluffy. This process incorporates air, which contributes to a lighter cheesecake texture. Scrape down the sides of the bowl occasionally to ensure all the cream cheese is evenly incorporated.
Adding Wet Ingredients and Sugar
To the softened cream cheese, add 1/4 cup of granulated sugar and 1/4 cup of sour cream, both also at room temperature. Continue to beat the mixture on medium speed until everything is well combined and the sugar has dissolved. Add the second egg, also at room temperature, and 1/2 teaspoon of vanilla extract. Beat again until just combined. Overbeating after adding the egg can lead to cracking in your cheesecakes, so mix only until you no longer see streaks of egg.
Achieving the Red Velvet Hue
Now for the signature color! Add 1 tablespoon of cocoa powder to the filling mixture and mix until just incorporated. This will give a subtle chocolate note and a darker base color. Next, gradually add the red gel food coloring, a few drops at a time, mixing thoroughly after each addition until you achieve your desired vibrant red velvet shade. Gel food coloring is preferred over liquid because it provides intense color without adding excess moisture to the batter. Be sure to mix completely after each color addition to ensure an even hue throughout the filling. The goal is a rich, deep red that screams red velvet.
Baking and Chilling
Filling the Mini Cheesecakes
Carefully spoon the red velvet cheesecake batter over the prepared Oreo crusts in your muffin tin or cheesecake pans. Fill each one about two-thirds to three-quarters full. Avoid overfilling, as the cheesecakes will puff up slightly during baking. Gently tap the filled pan on the counter a couple of times to release any large air bubbles trapped in the batter, which can also help prevent cracking.
Baking to Perfection
Preheat your oven to 325°F (160°C). Bake the mini red velvet Oreo cheesecakes for approximately 18-22 minutes, or until the edges are set and slightly puffed, but the centers still have a slight wobble. You can test for doneness by gently nudgin extractg the pan; the center should jiggle slightly, like Jell-O, but not be completely liquid. Overbaking will result in a dry cheesecake, so keep a close eye on them, especially towards the end of the baking time.
Cooling and Chilling for Ultimate Flavor
Once baked, remove the cheesecakes from the oven and let them cool in the pan on a wire rack for about 10-15 minutes. This gradual cooling process helps prevent drastic temperature changes that can lead to cracks. After this initial cooling, carefully remove the mini cheesecakes from the pan (if using liners, remove them too) and place them directly on the wire rack to cool completely to room temperature. Once they have reached room temperature, cover them loosely with plastic wrap and refrigerate for at least 4 hours, or preferably overnight. Chilling is crucial for the cheesecakes to set fully, allowing their flavors to meld and develop into that rich, creamy texture we all love. This patience will be rewarded with the most delicious Mini Red Velvet Oreo Cheesecakes.
Conclusion:
And there you have it! Your delightful Mini Red Velvet Oreo Cheesecakes are ready to impress. We’ve walked through each step, from creating that perfectly crum extractbled Oreo crust to whipping up the velvety red velvet cheesecake batter, and finally achieving that beautiful marble effect. These individual delights are not just visually stunning but also incredibly delicious, offering a perfect balance of rich chocolate, creamy cheesecake, and that signature red velvet tang. They’re ideal for parties, special occasions, or simply when you’re craving a decadent treat.
For serving suggestions, these Mini Red Velvet Oreo Cheesecakes are fantastic on their own, but a dollop of fresh whipped cream or a drizzle of white chocolate ganache can elevate them further. Consider garnishing with a few morrum extractreo crumbs or even a mini red velvet cupcake for an extra touch of elegance. Experiment with variations by adding a swirl of cream cheese frosting to the batter before baking, or by using different flavored Oreos for a unique twist. Don’t be afraid to get creative!
I truly hope you enjoyed making and tasting these Mini Red Velvet Oreo Cheesecakes. They are a guaranteed crowd-pleaser, and the joy of sharing homemade treats is unparalleled. Dive in and savor every bite!
Frequently Asked Questions:
Can I make these ahead of time?
Absolutely! These Mini Red Velvet Oreo Cheesecakes can be made up to two days in advance. Store them in an airtight container in the refrigerator. They tend to taste even better as the flavors meld together overnight.
What if I don’t have mini cheesecake pans?
No problem! You can adapt this recipe for a single, larger Mini Red Velvet Oreo Cheesecake. Use a standard 8 or 9-inch springform pan. You may need to adjust the baking time slightly; check for doneness around the 35-45 minute mark by gently shaking the pan – the edges should be set, and the center should still have a slight jiggle.
Mini Red Velvet Oreo Cheesecakes
Easy and delicious mini red velvet cheesecakes with a chocolate Oreo crust.
Ingredients
-
12 Oreo cookies
-
3 tablespoons all-purpose flour
-
1/2 cup cocoa powder
-
1/2 cup granulated sugar
-
1/4 cup unsalted butter, melted
-
8 oz cream cheese, room temperature
-
1 egg, room temperature
-
1/4 cup sour cream, room temperature
-
1/4 cup granulated sugar
-
1/2 teaspoon vanilla extract
-
Red gel food coloring
Instructions
-
Step 1
Crush 12 Oreo cookies in a food processor until finely ground. In a bowl, combine with 3 tablespoons all-purpose flour, 1/2 cup cocoa powder, 1/2 cup granulated sugar, and a pinch of salt. Add 1/4 cup melted unsalted butter, 1 room temperature egg, and 1/2 teaspoon vanilla extract. Mix until crumbly. -
Step 2
Press 1-1.5 tablespoons of the crust mixture into the bottom of each liner in a muffin tin or mini cheesecake pan to form an even layer. -
Step 3
In a large bowl, beat 8 oz room-temperature cream cheese until light and fluffy. Add 1/4 cup granulated sugar and 1/4 cup room-temperature sour cream. Beat until combined. Add another room-temperature egg and 1/2 teaspoon vanilla extract. Beat until just combined. -
Step 4
Stir in 1 tablespoon cocoa powder. Gradually add red gel food coloring, mixing after each addition until desired red velvet shade is achieved. -
Step 5
Spoon the filling into the prepared crusts, filling about two-thirds to three-quarters full. Tap the pan gently to release air bubbles. -
Step 6
Bake at 325°F (160°C) for 18-22 minutes, or until the edges are set and the centers have a slight wobble. Let cool in the pan for 10-15 minutes, then cool completely on a wire rack. -
Step 7
Cover and refrigerate for at least 4 hours, or preferably overnight, before serving.
Important Information
Nutrition Facts (Per Serving)
It is important to consider this information as approximate and not to use it as definitive health advice.
Allergy Information
Please check ingredients for potential allergens and consult a health professional if in doubt.

Leave a Comment