
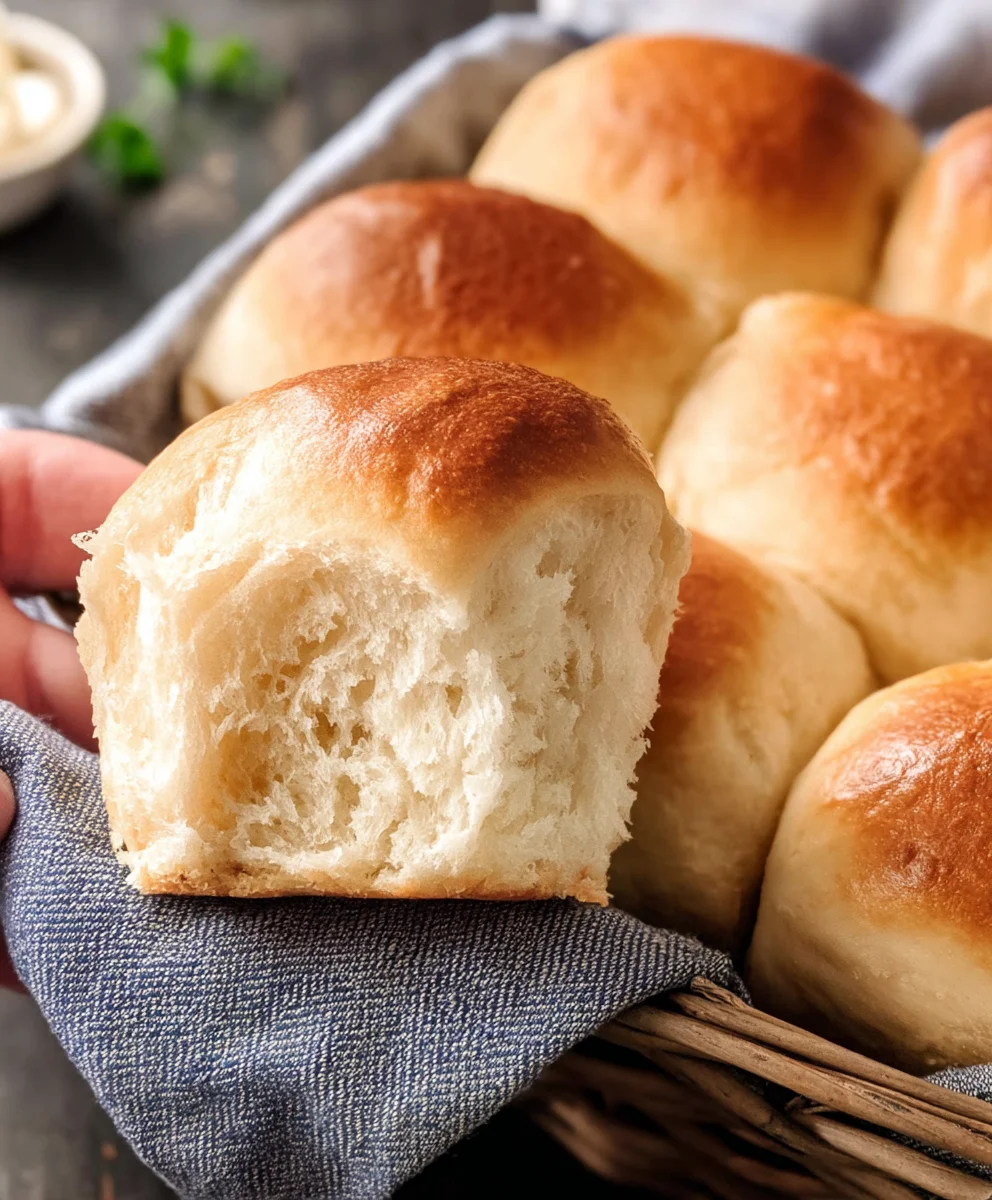
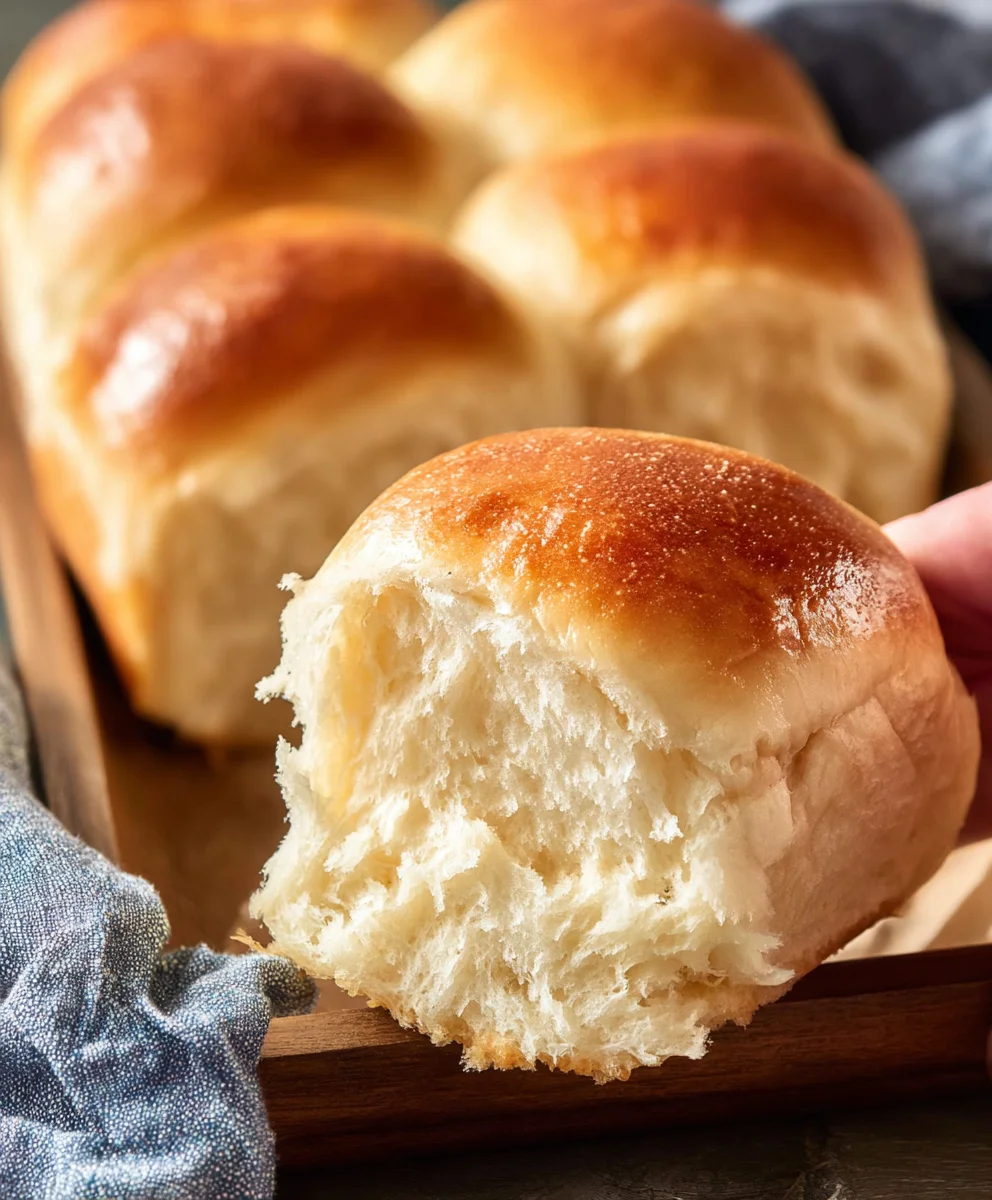
30 minute dinner rolls are a weeknight culinary miracle, a beacon of warmth and comfort in our often-hectic lives. Imagin extracte this: the scent of freshly baked bread wafting through your kitchen, a golden crust giving way to a cloud-like, tender interior, all achieved in less time than it takes to order takeout. It’s no wonder these incredibly satisfying rolls have become a go-to for so many of us. They’re not just a side dish; they’re a hug in edible form, perfect for sopping up your favorite sauces, complementing hearty stews, or simply enjoying slathered with butter. What makes these 30 minute dinner rolls truly special is their deceptive simplicity. They deliver all the joy and satisfaction of homemade bread without the hours of waiting, proving that delicious, wholesome food doesn’t always require a full afternoon in the kitchen. Get ready to impress yourself and your loved ones with this incredibly rewarding recipe.

Ingredients:
- 1 1/4 cups warm water (around 105-115°F or 40-46°C – it should feel comfortably warm to the touch, not hot)
- 1/4 cup granulated sugar
- 2 tablespoons active dry yeast
- 1/3 cup vegetable oil, plus extra for greasing
- 1 teaspoon salt
- 1 large egg, lightly beaten
- 3 3/4 cups all-purpose flour, plus more for dusting
Getting Started: Activating the Yeast
The foundation of any good bread, and especially our 30 minute dinner rolls, is properly activated yeast. This is a crucial step that ensures our dough will rise beautifully. In a large mixing bowl, combine the 1 1/4 cups of warm water and the 1/4 cup of granulated sugar. Give it a gentle stir to help dissolve the sugar. Now, sprinkle the 2 tablespoons of active dry yeast evenly over the surface of the water and sugar mixture. Resist the urge to stir it in immediately. Let it sit undisturbed for about 5 to 10 minutes. You’ll know the yeast is alive and ready to go when it becomes foamy and bubbly, almost like a frothy head on a non-alcoholic beer. This indicates that the yeast is actively consuming the sugar and producing carbon dioxide, which is essential for leavening. If you don’t see any foam or bubbles after 10 minutes, your yeast may be old or the water might have been too hot or too cold, and you’ll need to start over with fresh yeast and the correct water temperature.
Incorporating Wet and Dry Ingredients
Once your yeast is happily foamy, it’s time to add the remaining wet ingredients. Pour the 1/3 cup of vegetable oil into the yeast mixture. The oil adds richness and tenderness to the rolls. Next, add the 1 teaspoon of salt. Salt plays a vital role in controlling the yeast’s activity and enhancing the flavor of the bread. Finally, add the lightly beaten egg. The egg contributes to the rolls’ color, flavor, and overall soft texture. Give this mixture a good whisk to combine everything thoroughly. Now, it’s time to introduce the flour. Gradually add the 3 3/4 cups of all-purpose flour, about a cup at a time, mixing after each addition. Initially, you can use a wooden spoon or a sturdy spatula to incorporate the flour. As the dough starts to come together and become too stiff to stir, switch to using your hands. You want to incorporate as much of the flour as possible, but be careful not to add too much. The dough should be slightly sticky at this stage.
Kneading the Dough for Optimal Texture
This is where we develop the gluten in the flour, which gives our 30 minute dinner rolls their characteristic chewy texture and structure. Turn the slightly sticky dough out onto a lightly floured surface. Lightly flour your hands as well, so the dough doesn’t stick to you too much. Begin extract to knead the dough by pushing it away from you with the heels of your hands, then folding it back over itself, and giving it a quarter turn. Repeat this motion continuously. You’re looking for the dough to become smooth, elastic, and no longer sticky. This process usually takes about 5 to 8 minutes of active kneading. You can test if the dough is ready by gently poking it with your finger; it should spring back slowly. If the dough feels too sticky, add a little more flour, just a tablespoon at a time, but try to avoid adding too much, as this can make the rolls tough. Conversely, if it feels too dry and stiff, you can wet your hands slightly and continue kneading.
Shaping the Rolls for a Quick Bake
Now that our dough is beautifully kneaded, it’s time to shape our 30 minute dinner rolls. Lightly grease a large bowl with a little extra vegetable oil. Place the kneaded dough into the oiled bowl and turn it to coat all sides. Cover the bowl tightly with plastic wrap or a damp kitchen towel. Place the covered bowl in a warm spot to rise. For these quick rolls, we aim for a relatively short rise time. In a warm environment, the dough should double in size in about 20-30 minutes. Once the dough has risen, gently punch it down to release the air. Turn the dough out onto your lightly floured work surface again. You can divide the dough into 12 equal portions for standard-sized rolls, or slightly smaller portions for mini rolls. To shape each roll, take a portion of dough and gently roll it into a smooth ball between your palms. You can also create a more decorative shape by flattening a piece of dough slightly, then rolling it up like a jelly roll and pinching the seam closed before shaping it into a ball. Arrange the shaped rolls on a baking sheet that has been lined with parchment paper or lightly greased. Leave a little space between each roll, as they will expand during their final rise and baking.
The Final Rise and Baking to Golden Perfection
With our 30 minute dinner rolls shaped and ready, they need a brief final rise before hitting the oven. Cover the baking sheet loosely with plastic wrap or a clean kitchen towel. Let the rolls sit in a warm place for another 10 to 15 minutes. You’ll see them puff up slightly. While the rolls are having their final rise, preheat your oven to 375°F (190°C). This is the perfect temperature to ensure they bake evenly and develop a beautiful golden-brown crust without drying out. Once the rolls have puffed up and the oven is preheated, carefully remove the plastic wrap or towel. If you desire a glossy finish, you can brush the tops of the rolls with a little melted butter or an egg wash (a beaten egg mixed with a tablespoon of water) just before they go into the oven. Place the baking sheet into the preheated oven. Bake for 12 to 15 minutes, or until the tops of the rolls are golden brown and they sound hollow when tapped on the bottom. Keep an eye on them, as ovens can vary. Once baked, remove the rolls from the oven and transfer them to a wire rack to cool slightly. For the best flavor and texture, enjoy these warm, freshly baked 30 minute dinner rolls!
Conclusion:
There you have it! Your guide to making delicious and incredibly quick 30 minute dinner rolls is complete. We’ve walked through each step, from activating the yeast to achieving that perfect golden-brown crust. These rolls are surprisingly simple to whip up, making them a fantastic option for a busy weeknight or an unexpected guest. They possess a wonderfully soft interior and a delightful chew, perfect for soaking up your favorite sauces or simply enjoying on their own.
For serving, these 30 minute dinner rolls are incredibly versatile. They’re a classic accompaniment to stews, soups, roasted meats, or a simple pasta dish. Don’t hesitate to serve them warm with a pat of butter – it’s pure comfort food! If you’re feeling adventurous with variations, consider adding a sprinkle of dried herbs like rosemary or thyme into the dough, or even a touch of garlic powder for a savory twist. You could also brush the tops with melted garlic butter and fresh parsley right after they come out of the oven.
We encourage you to give these 30 minute dinner rolls a try. You might be surprised at how achievable homemade bread can be, even with limited time. The aroma that fills your kitchen as they bake is truly rewarding. Enjoy the process and, most importantly, enjoy the delicious results!
Frequently Asked Questions about 30 Minute Dinner Rolls:
Q1: Can I use all-purpose flour instead of bread flour for these 30 minute dinner rolls?
While bread flour typically yields a chewier texture due to its higher protein content, all-purpose flour can be used in a pinch. You might find the rolls to be slightly softer. Ensure you don’t overmix the dough if using all-purpose flour, as this can lead to toughness.
Q2: My 30 minute dinner rolls didn’t rise much. What could have gone wrong?
Several factors can affect rise. Ensure your yeast was fresh and properly activated – it should be foamy after sitting in warm water for a few minutes. Also, check that your liquid was warm but not too hot, as hot liquid can kill the yeast. Room temperature can also play a role; a colder kitchen might require a slightly longer proofing time.
Quick & Easy Dinner Rolls
Delicious and fast dinner rolls perfect for any meal.
Ingredients
-
1 1/4 cups warm water
-
1/4 cup granulated sugar
-
2 tablespoons active dry yeast
-
1/3 cup vegetable oil
-
1 teaspoon salt
-
1 large egg, lightly beaten
-
3 3/4 cups all-purpose flour
Instructions
-
Step 1
Activate yeast: In a large bowl, combine warm water and sugar. Sprinkle yeast over the top and let sit for 5-10 minutes until foamy. -
Step 2
Incorporate wet and dry ingredients: Add vegetable oil, salt, and beaten egg to the yeast mixture. Whisk to combine. Gradually add all-purpose flour, mixing until a slightly sticky dough forms. -
Step 3
Knead the dough: Turn dough onto a lightly floured surface and knead for 5-8 minutes until smooth and elastic. It should spring back when poked. -
Step 4
Shape the rolls: Lightly grease a bowl, place dough in it, and turn to coat. Cover and let rise in a warm spot for 20-30 minutes until doubled. Punch down, divide into 12 portions, and shape into balls. -
Step 5
Final rise and baking: Arrange rolls on a baking sheet, cover loosely, and let rise for another 10-15 minutes. Preheat oven to 375°F (190°C). -
Step 6
Bake for 12-15 minutes until golden brown and hollow sounding. Cool slightly on a wire rack before serving.
Important Information
Nutrition Facts (Per Serving)
It is important to consider this information as approximate and not to use it as definitive health advice.
Allergy Information
Please check ingredients for potential allergens and consult a health professional if in doubt.


Leave a Comment