
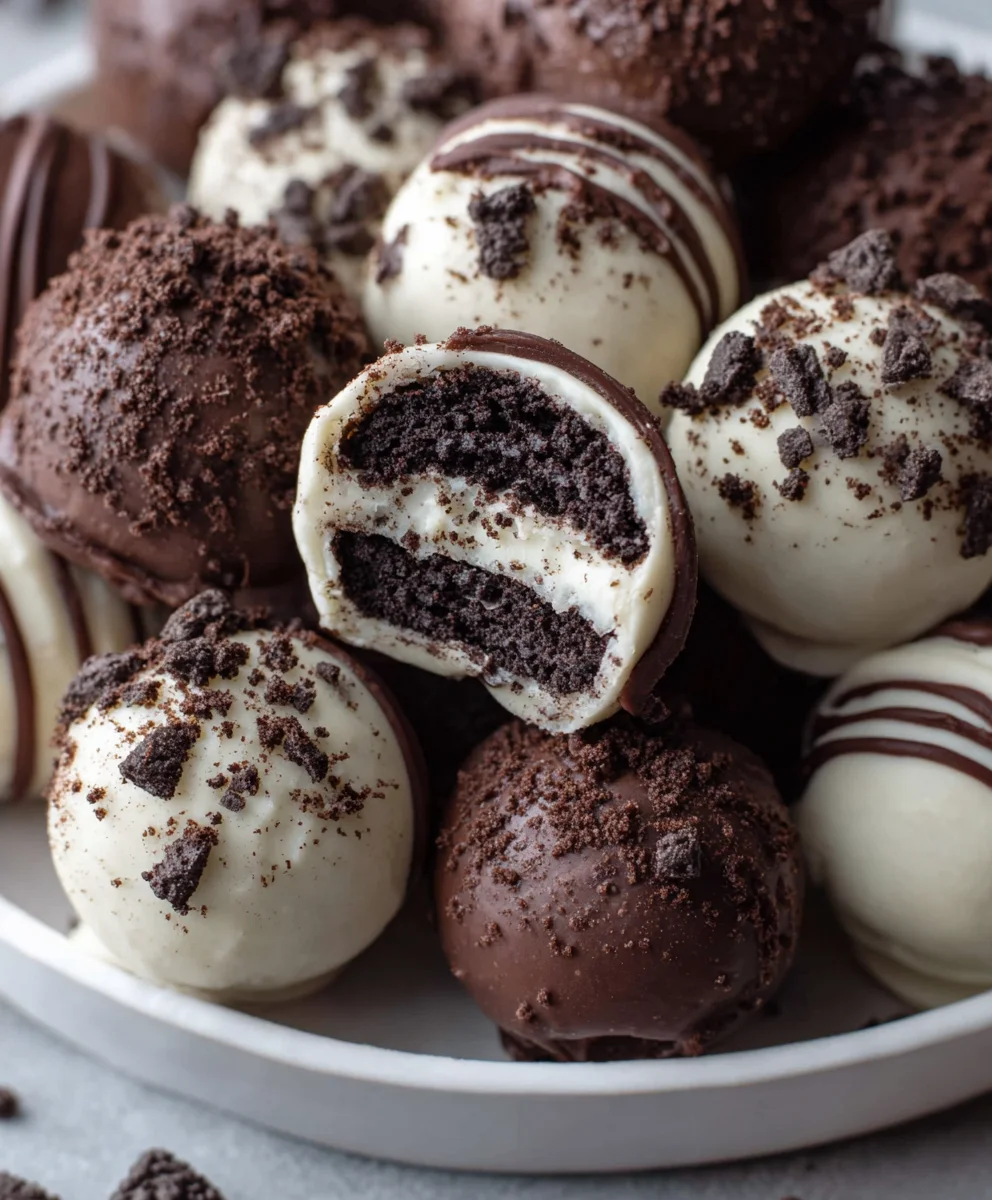
Oreo Balls are one of those magical treats that seem to appear at every celebration, holiday gathering, and casual get-together for a reason. There’s an undeniable allure to these no-bake delights. They’re incredibly simple to make, requiring no fancy equipment or baking skills, which is a huge win for busy home cooks. But beyond their ease, it’s the perfect balance of rich chocolate and the unmistakable, satisfying crunch of crushed Oreos that truly captivates our taste buds. What makes Oreo Balls so incredibly special? It’s the way they transform humble ingredients into pure indulgence, offering a delightful burst of flavor and texture in every single bite. They’re a crowd-pleaser that consistently disappears from the dessert table, leaving everyone craving just one more.
Dive into this irresistible Oreo Balls recipe and discover why they’re a beloved classic!
Get ready to impress your friends and family with this delightful treat.

Ingredients:
- 36 regular Oreo cookies
- 1 (8-ounce) package brick-style cream cheese, softened (226 grams)
- 16 ounces chocolate (semi-sweet, milk, or white chocolate all work great (452 grams))
Preparing the Base for Your Oreo Balls
Crushing the Oreos
The foundation of our delicious Oreo Balls begin extracts with the cookies themselves. To achieve the perfect texture, we need to finely crush them. You can do this using a food processor for the quickest and most efficient method. Simply place all 36 regular Oreo cookies into the bowl of your food processor and pulse until they form fine crum extractbs. Aim for a consistency similar to coarse sand. If you don’t have a food processor, don’t worry! You can achieve the same result by placing the Oreos in a large zip-top bag, sealing it tightly, and then using a rolling pin or the bottom of a heavy pan to crush them. Be sure to get them as fine as possible; larger chunks can affect the final texture of your Oreo Balls, making them less smooth.
Combining with Cream Cheese
Once yourum extractreo crumbs are ready, it’s time to introduce the creamy element that binds everything together. In a medium mixing bowl, add the softened brick-style cream cheese. The key here is to ensure the cream cheese is truly softened. This means it should be at room temperature, yielding slightly when pressed with your finger. If it’s too cold, it will be difficult to incorporate smoothly, and you might end up with lumps. To the softened cream cheese, add approximately 3 cups of the finelrum extractrushed Oreo crumbs (you’ll reserve some for later). Using a sturdy spoon or a spatula, vigorously mix therum extracteam cheese and Oreo crumbs together until they are thoroughly combined. You want a cohesive mixture that holds its shape when pressed. It should feel dense and slightly sticky. This step is crucial for creating a dough-like consistency that will be easy to roll into balls. Ifrum extracte mixture feels too dry and crumbly, you can add a tiny bit more cream cheese, a tablespoon at a time, until it comes together. Conversely, ifrum extract feels too wet, add a few more Oreo crumbs.
Forming and Chilling the Oreo Balls
Rolling into Balls
Now comes the fun part: shaping our Oreo mixture into perfect little balls. Take about a tablespoon of the Oreo and cream cheese mixture and roll it between your palms to form a compact ball, roughly 1 to 1.5 inches in diameter. The size can be adjusted to your preference, but consistency is key for even coating later. As you roll each ball, place them onto a baking sheet lined with parchment paper or wax paper. This lining will prevent the balls from sticking to the baking sheet as they chill. Continue this process with the entire mixture, ensuring each ball is evenly sized. If your hands start to feel sticky, a quick rinse and dry, or even a light coating of cooking spray on your palms, can help. Don’t worry if they aren’t perfectly smooth at this stage; the chocolate coating will help to refine their appearance.
Chilling for Stability
Before we move on to the delightful chocolate coating, it’s essential to chill the rolled Oreo Balls. This step is critical for ensuring they hold their shape during the dipping process and prevent them from becoming too soft and messy. Place the baking sheet with the rolled balls into the refrigerator for at least 30 minutes, or until they are firm to the touch. You can also speed this up by placing them in the freezer for about 15-20 minutes. The chilling process solidifies the cream cheese within the mixture, making the balls much easier to handle and coat evenly with melted chocolate. You’ll notice they become much firmer and less prone to deforming.
The Chocolate Coating and Finishing Touches
Melting the Chocolate
The final flourish for our Oreo Balls is a decadent chocolate coating. You’ll need about 16 ounces of your chosen chocolate. For melting, you have a couple of excellent options. The most common and straightforward method is the double boiler. Fill the bottom of a double boiler or a heatproof bowl set over a saucepan of simmering water with about an inch of water. Ensure the bottom of the bowl doesn’t touch the water. Add your chocolate to the top bowl. Stir the chocolate frequently with a heatproof spatula as it melts. Be patient; you want the chocolate to melt smoothly and evenly without scorching. Alternatively, you can melt the chocolate in the microwave. Place the chocolate in a microwave-safe bowl and heat in 30-second intervals, stirring well after each interval, until mostly melted. Then, stir until completely smooth. If you are using chocolate chips, you might need to add a tablespoon of vegetable shortening or coconut oil to help achieve a smoother, more fluid consistency for dipping.
Dipping and Decorating
Once your chocolate is perfectly melted and smooth, it’s time to coat the chilled Oreo Balls. Working one ball at a time, carefully drop a chilled Oreo Ball into the melted chocolate. Use a fork or a dipping tool to gently turn the ball, ensuring it is fully coated in chocolate. Lift the ball out of the chocolate and allow any excess to drip back into the bowl. You can gently tap the fork against the side of the bowl to help achieve a smooth finish. Carefully place the chocolate-coated ball back onto the parchment-lined brum extractng sheet. If you reserved some of your Oreo crumbs, you can sprinkle a few on top of the still-wet chocolate for a decorative and textural finish. You can also use other toppings like sprinkles, crushed nuts, or even a drizzle of contrasting melted chocolate once the initial coating has set slightly.
Setting the Oreo Balls
After all your Oreo Balls have been dipped and decorated, it’s time to let the chocolate set. Place the baking sheet with the finished Oreo Balls back into the refrigerator. Allow them to chill for at least 15-20 minutes, or until the chocolate coating is completely firm. Once set, they are ready to be enjoyed! For best results and storage, keep them in an airtight container in the refrigerator. They are a delightful treat for any occasion and are sure to be a crowd-pleaser.
Conclusion:
And there you have it – the ultimate guide to creating delicious Oreo Balls! We’ve walked through each simple step, ensuring you can achieve that perfect no-bake treat every time. These delightful little spheres are incredibly versatile, making them a fantastic addition to any party platter, holiday cookie exchange, or even just a sweet afternoon pick-me-up. We hope you’ve enjoyed learning how to whip up these crowd-pleasers. Don’t be afraid to get creative with the toppings and coatings to personalize your Oreo Balls to your liking. Remember, baking (or in this case, no-baking!) should be fun, so embrace the process and savor the delicious results. Happy creating!
Frequently Asked Questions:
How long do Oreo Balls last?
Oreo Balls can be stored in an airtight container in the refrigerator for up to 1-2 weeks. For longer storage, you can freeze them for up to 3 months. Thaw them in the refrigerator before serving.
Can I make Oreo Balls without cream cheese?
While cream cheese is the traditional binder for Oreo Balls, you can experiment with other binders like softened butter or even a thick ganache. However, the texture and flavor profile will differ from the classic recipe.
What are some popular variations for Oreo Balls?
Beyond the classic chocolate coating, you can try dipping your Oreo Balls in white chocolate, colored candy melts, or even a drizzle of contrasting chocolate. You can also roll them in sprinkles, chopped nuts, or crushed Oreos before the coating sets for added texture and flavor.
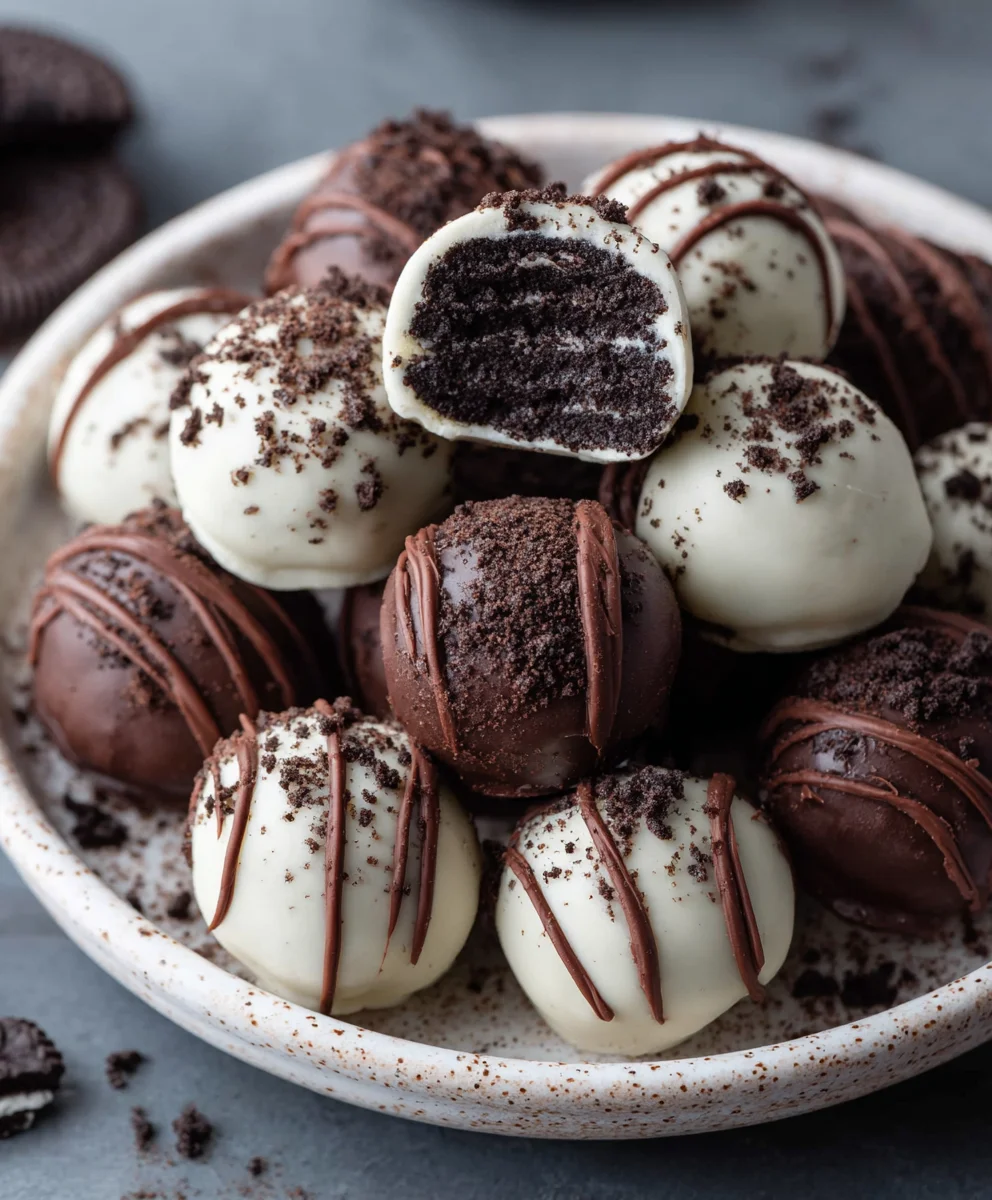
Easy Oreo Balls Recipe No-Bake Delights
A simple and delicious no-bake recipe for Oreo balls, perfect for any occasion. These delightful treats combine crushed Oreos and cream cheese, dipped in a rich chocolate coating.
Ingredients
-
36 regular Oreo cookies
-
1 (8-ounce) package brick-style cream cheese, softened
-
16 ounces semi-sweet chocolate
-
1 tablespoon vegetable shortening (optional, for smoother melting)
-
Parchment paper or wax paper
Instructions
-
Step 1
Finely crush all 36 regular Oreo cookies in a food processor or by placing them in a sealed zip-top bag and crushing with a rolling pin. Aim for a coarse sand consistency. -
Step 2
In a medium mixing bowl, combine the softened cream cheese with approximately 3 cups of the finely crushed Oreo crumbs. Mix vigorously until a cohesive, dough-like mixture forms. -
Step 3
Roll the mixture into compact balls, about 1 to 1.5 inches in diameter. Place the rolled balls onto a baking sheet lined with parchment paper or wax paper. -
Step 4
Chill the rolled Oreo balls in the refrigerator for at least 30 minutes, or in the freezer for 15-20 minutes, until firm. -
Step 5
Melt the 16 ounces of chocolate using a double boiler or in the microwave in 30-second intervals, stirring until smooth. Add vegetable shortening if desired for a smoother consistency. -
Step 6
Dip each chilled Oreo ball into the melted chocolate, ensuring it is fully coated. Lift out, allow excess to drip off, and place back onto the parchment-lined baking sheet. -
Step 7
While the chocolate is still wet, sprinkle with reserved Oreo crumbs, sprinkles, or other desired toppings for decoration. -
Step 8
Refrigerate the chocolate-coated Oreo balls for at least 15-20 minutes, or until the chocolate is completely set. Store in an airtight container in the refrigerator.
Important Information
Nutrition Facts (Per Serving)
It is important to consider this information as approximate and not to use it as definitive health advice.
Allergy Information
Please check ingredients for potential allergens and consult a health professional if in doubt.

Leave a Comment