
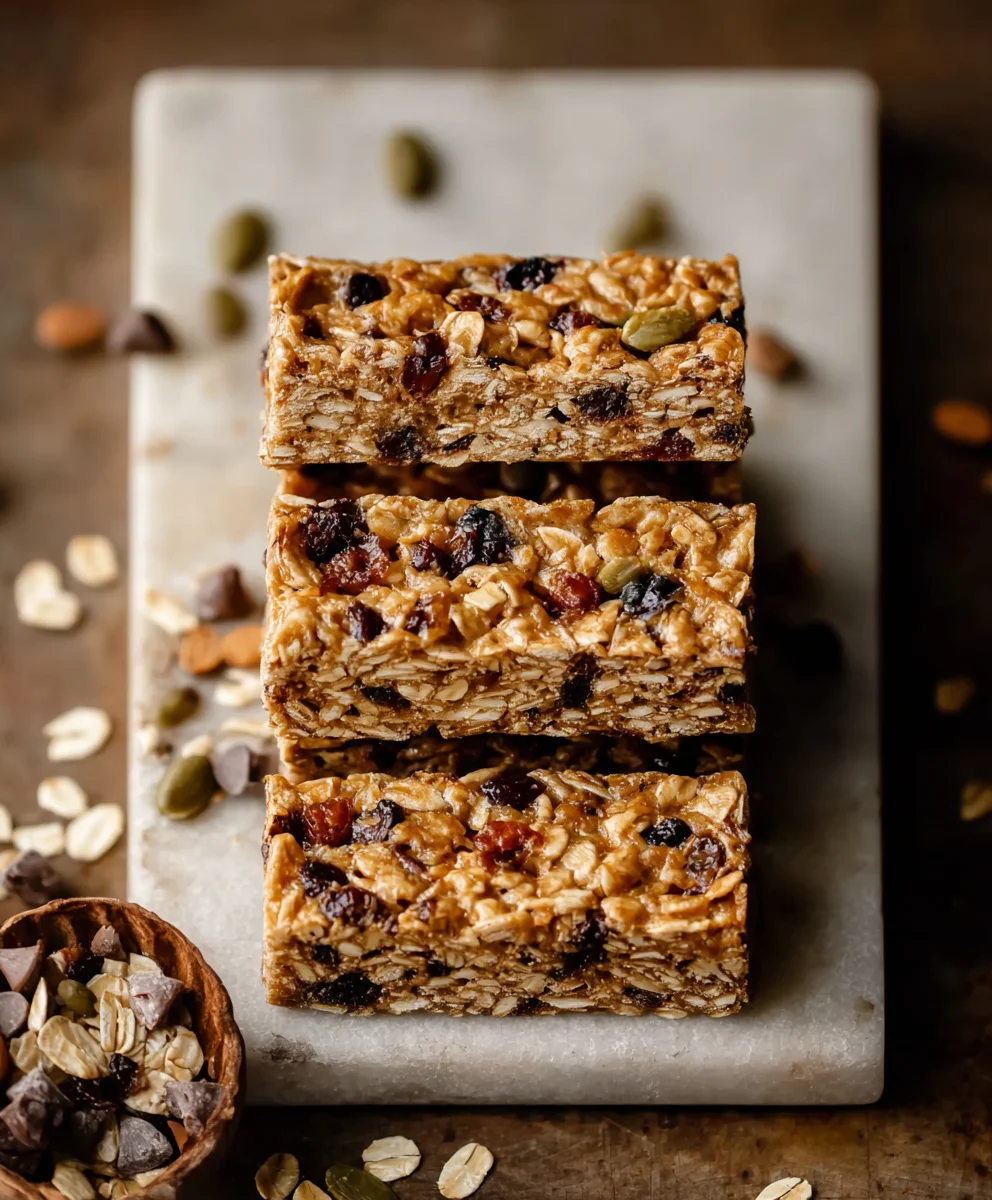
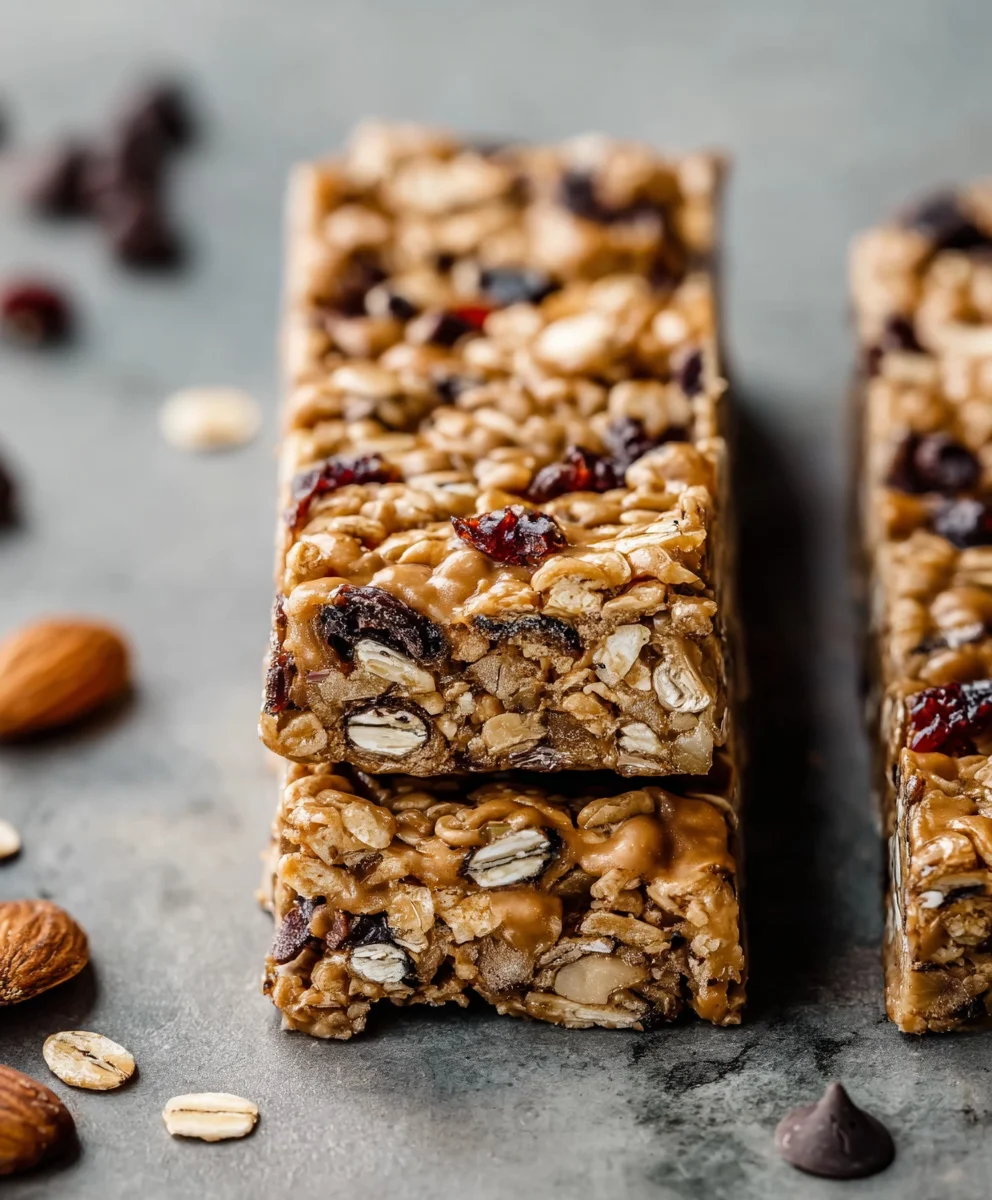
Soft-baked peanut butter granola bars are more than just a snack; they’re a comforting hug in bar form, a delightful blend of wholesome goodness and irresistible indulgence. We all crave those moments of pure, unadulterated pleasure, and these homemade delights deliver precisely that. The magic lies in their perfect texture – delightfully chewy yet wonderfully soft, with just the right amount of crum extractble that melts in your mouth. Unlike their often-harum extractand crumbly store-bought counterparts, these bars boast a superior chegrape juicess that keeps you coming back for more. What truly sets our soft-baked peanut butter granola bars apart is the rich, nutty depth of flavor from the peanut butter, perfectly balanced with the satisfying crunch of oats and the subtle sweetness that makes them a universally loved treat. They’re your ideal on-the-go breakfast, a satisfying afternoon pick-me-up, or even a healthier dessert option that genuinely tastes incredible. Get ready to discover your new favorite homemade staple!

Ingredients:
- 3 cups old-fashioned rolled oats (ensure they are certified gluten-free if dietary restrictions require it)
- ¾ cup natural peanut butter (creamy or crunchy, your preference; ensure it’s unsweetened for best flavor control)
- ⅓ cup honey or pure maple syrup (use maple syrup for a vegan option if using flax eggs)
- 2 large whole eggs (for a vegan alternative, prepare 2 flax eggs by whisking 2 tablespoons of ground flaxseed with 6 tablespoons of water and letting it sit for 10 minutes until gelled)
- ½ cup mini chocolate chips (dairy-free if needed)
- Pinch of salt (optional, especially if your peanut butter is already salted; a small amount can enhance the overall flavor)
- ½ cup chopped nuts (such as walnuts, pecans, or almonds, or a mix of your favorites; toasting them briefly beforehand adds an extra layer of nutty flavor)
- ¼ cup seeds (choose from chia seeds, sunflower seeds, pumpkin seeds, or a blend; these add a delightful texture and nutritional boost)
- ⅓ cup dried fruit (cranberries, raisins, chopped apricots, or dates work wonderfully; adjust sweetness and chegrape juicess as desired)
Preparing the Mixture
Step 1: Preheat Oven and Prepare Baking Pan
Begin extract by preheating your oven to 350°F (175°C). This consistent temperature is crucial for achieving that perfect soft-baked texture. Next, prepare an 8×8 inch (20×20 cm) baking pan by lining it with parchment paper, leaving an overhang on the sides. This overhang acts as handles, making it super easy to lift the baked granola bars out of the pan once they’ve cooled. Greasing the parchment paper lightly with a little non-stick spray or a swipe of butter/oil is optional but can help prevent any sticking.
Step 2: Combine Dry Ingredients
In a large mixing bowl, combine the old-fashioned rolled oats, chopped nuts (walnuts, pecans, almonds – whatever you’ve chosen!), seeds (chia, sunflower, pumpkin – a healthy mix is great!), dried fruit, and the optional pinch of salt if you’re using unsalted peanut butter. Give these dry ingredients a good stir to ensure everything is evenly distributed. This ensures that every bite of your granola bar will have a balanced mix of textures and flavors. If you’re toasting your nuts, make sure they’ve cooled down before adding them to the bowl.
Step 3: Mix Wet Ingredients and Combine
In a separate, medium-sized bowl, whisk together the natural peanut butter, honey or maple syrup, and the two large eggs (or your prepared flax eggs for a vegan option). Whisk vigorously until the mixture is smooth and well combined. The peanut butter should be fully incorporated, creating a creamy base. Once you have a smooth wet mixture, pour it over the dry ingredients in the large bowl. Now, using a sturdy spatula or a wooden spoon, gently fold and mix everything together until all the dry ingredients are thoroughly coated with the wet mixture. It’s important not to overmix; just ensure everything is incorporated.
Step 4: Incorporate Chocolate Chips and Press into Pan
This is where the magic happens! Gently fold in the ½ cup of mini chocolate chips. Again, be careful not to overmix. You want to distribute them evenly without breaking them down too much. Once the chocolate chips are incorporated, scoop the entire mixture into your prepared 8×8 inch baking pan. Using your spatula or your hands (lightly greased if they tend to stick), firmly and evenly press the mixture into the pan. The key here is to press it down as compactly as possible. This step is vital for ensuring your granola bars hold their shape and don’t crum extractble apart once cut. A dense base will lead to nicely formed bars.
Step 5: Bake to Golden Perfection
Place the pan in your preheated oven and bake for 25-30 minutes, or until the edges are lightly golden brown and the center appears set. The exact baking time can vary depending on your oven, so keep an eye on them, especially during the last 5-10 minutes. You’re looking for a texture that is firm to the touch but still has a slight give – that’s the secret to soft-baked bars! Overbaking will result in harderrum extractore crumbly bars, so aim for that perfect balance. Once baked, remove the pan from the oven and let it cool completely in the pan on a wire rack. This cooling period is crucial for allowing the bars to firm up properly before you attempt to cut them. Patience here will be rewarded with beautifully formed, soft-baked granola bars.
Cooling and Cutting
After the bars have cooled completely in the pan, use the parchment paper overhangs to lift the entire slab out of the pan. Place it on a cutting board. Using a sharp knife, cut the slab into your desired bar shapes. For a classic granola bar size, cutting into 12 rectangles works well. If you prefer smaller snack-sized bars, you can cut them into 16 pieces. For the cleanest cuts, especially with the soft-baked texture, you can chill the slab in the refrigerator for about 30 minutes before cutting, or even run your knife under hot water and dry it between cuts. Store your delicious Soft-Baked Peanut Butter Granola Bars in an airtight container at room temperature for up to 3-4 days, or in the refrigerator for longer storage.
Conclusion:
There you have it – a foolproof guide to creating delicious and delightfully chewy Soft-Baked Peanut Butter Granola Bars right in your own kitchen! We’ve covered everything from selecting the perfect ingredients to achieving that ideal soft texture that makes these bars so irresistible. These homemade granola bars are not only a healthier alternative to store-bought options but also incredibly satisfying. Imagin extracte enjoying one of these with a steaming cup of coffee in the morning, as an afternoon pick-me-up, or even as a post-workout treat. They’re truly versatile!
To elevate your experience, consider serving these Soft-Baked Peanut Butter Granola Bars with a drizzle of honey, a dollop of Greek yogurt, or alongside fresh fruit. For exciting variations, feel free to stir in chocolate chips, chopped nuts, or even dried cranberries for a burst of color and flavor. Don’t be afraid to experiment and make these bars your own! We encourage you to give this recipe a try; the reward of fresh, homemade goodness is well worth it.
Frequently Asked Questions:
How can I make my Soft-Baked Peanut Butter Granola Bars softer?
To ensure a truly soft texture, be careful not to overbake them. Remove them from the oven when the edges are lightly golden but the center still appears slightly soft. They will continue to firm up as they cool. Additionally, using rolled oats instead of quick oats can contribute to a chewier, softer bar.
Can I make these Soft-Baked Peanut Butter Granola Bars gluten-free and dairy-free?
Absolutely! For a gluten-free version, simply ensure you use certified gluten-free rolled oats. To make them dairy-free, substitute the butter with a dairy-free butter alternative and ensure your chocolate chips (if using) are also dairy-free. The peanut butter and other binding ingredients are typically naturally dairy-free.
Soft-Baked Peanut Butter Granola Bars
An easy recipe for soft-baked peanut butter granola bars, packed with oats, nuts, seeds, and dried fruit.
Ingredients
-
3 cups old-fashioned rolled oats (certified gluten-free if needed)
-
¾ cup natural peanut butter
-
⅓ cup honey or pure maple syrup
-
2 large whole eggs (or 2 flax eggs for vegan option)
-
½ cup mini chocolate chips (dairy-free if needed)
-
Pinch of salt (optional)
-
½ cup chopped nuts (e.g., walnuts, pecans, almonds)
-
¼ cup seeds (e.g., chia seeds, sunflower seeds, pumpkin seeds)
-
⅓ cup dried fruit (e.g., cranberries, raisins, apricots, dates)
Instructions
-
Step 1
Preheat oven to 350°F (175°C). Line an 8×8 inch baking pan with parchment paper, leaving an overhang. -
Step 2
In a large bowl, combine rolled oats, chopped nuts, seeds, dried fruit, and optional salt. Stir to combine. -
Step 3
In a separate bowl, whisk together peanut butter, honey or maple syrup, and eggs (or flax eggs). Whisk until smooth. -
Step 4
Pour the wet ingredients over the dry ingredients. Gently fold until all dry ingredients are coated. Fold in chocolate chips. -
Step 5
Scoop the mixture into the prepared pan and firmly press it down evenly. Bake for 25-30 minutes, or until the edges are golden brown and the center is set. -
Step 6
Let the bars cool completely in the pan on a wire rack. Once cooled, lift the slab out using the parchment paper overhang. Cut into desired bar shapes.
Important Information
Nutrition Facts (Per Serving)
It is important to consider this information as approximate and not to use it as definitive health advice.
Allergy Information
Please check ingredients for potential allergens and consult a health professional if in doubt.


Leave a Comment