
Pizza Roll Ups are an absolute game-changer for snack time, lunchboxes, or even a fun weeknight dinner! Forget the soggy, store-bought versions; we’re talking about homemade magic that’s bursting with flavor and customizable to your heart’s content. What is it about these delightful little packages that captures our culinary imagin extractations? It’s the perfect fusion of your favorite pizza toppings, all wrapped up in a soft, chewy dough, creating a bite-sized explosion of cheesy, saucy goodness. Everyone loves pizza, and everyone loves the convenience and fun of rolling things up! What truly sets these Pizza Roll Ups apart is the incredible versatility. You can pack them with classic beef pepperoni and mozzarella, get adventurous with pesto and sun-dried tomatoes, or even create sweet dessert versions. They’re incredibly simple to make, making them a fantastic activity for kids and a stress-free option for busy parents. Get ready to discover your new go-to recipe for these irresistible Pizza Roll Ups!

Ingredients:
- 20 small flour tortillas (5-inch)
- 14 oz pizza sauce
- 24 oz shredded mozzarella cheese
- 80 slices beef beef pepperoni
- 1 tbsp cooking oil
Preparing the Pizza Roll Ups
Step 1: Preheat and Prepare Your Baking Sheets
Before we dive into assembling these delightful Pizza Roll Ups, let’s get our oven ready. Preheat your oven to 375 degrees Fahrenheit (190 degrees Celsius). This moderate temperature is perfect for ensuring the tortillas become slightly crispy on the outside while the cheese melts beautifully within. You’ll also want to prepare your baking sheets. Lightly grease two large baking sheets with the 1 tablespoon of cooking oil. You can use a pastry brush to spread it evenly, or even just a paper towel. This crucial step prevents the roll ups from sticking to the pan as they bake, making for much easier cleanup and ensuring your roll ups maintain their delightful shape. If you don’t have enough oil, you can also use a light spray of cooking oil or line the baking sheets with parchment paper.
Step 2: Warming and Softening the Tortillas
To make rolling our Pizza Roll Ups a breeze, we need to ensure our tortillas are pliable and soft. Cold tortillas tend to crack or tear when you try to roll them. There are a few ways to achieve this. You can briefly microwave them in a stack, wrapped in a damp paper towel, for about 30-45 seconds. Alternatively, you can warm them one by one in a dry skillet over medium heat for about 15-20 seconds per side, just until they are warm and flexible. The goal isn’t to cook them, but simply to make them more cooperative for rolling. Work in batches if needed, and keep the warmed tortillas covered with a clean kitchen towel to retain their warmth and flexibility as you assemble the rest of the roll ups.
Step 3: Assembling the Flavorful Layers
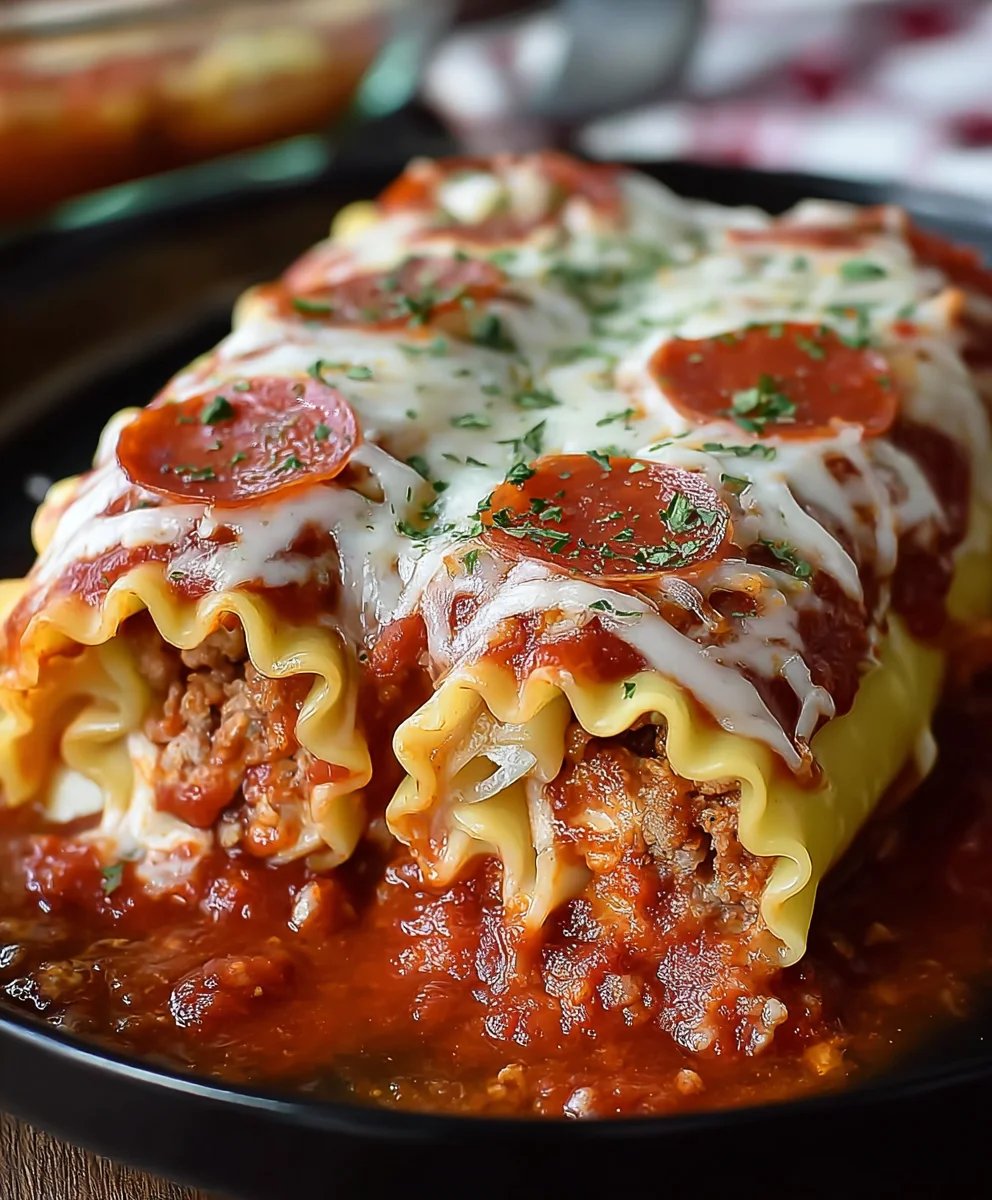
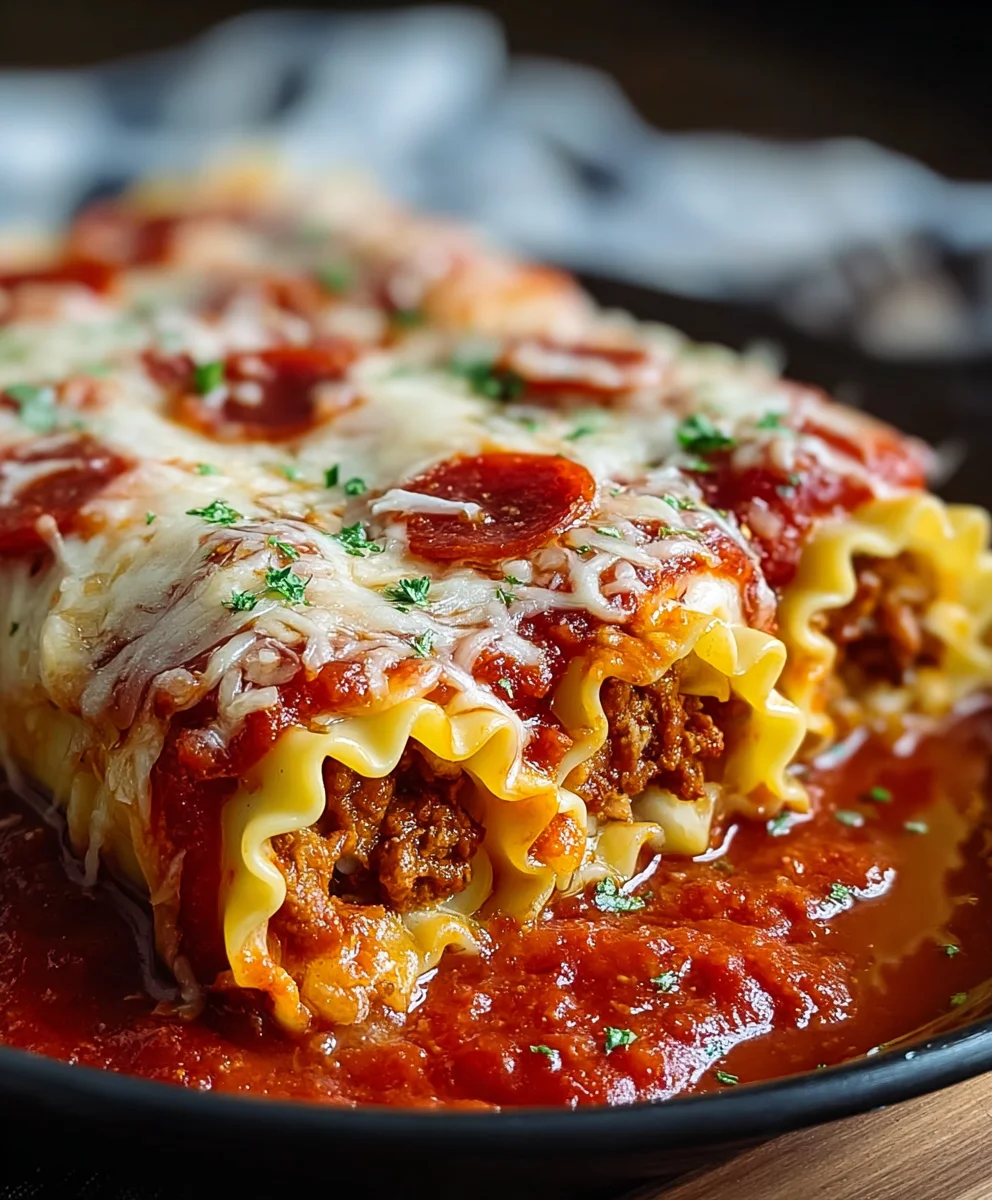
Now for the fun part – building our Pizza Roll Ups! Lay one warmed tortilla flat on a clean work surface. Spread a thin, even layer of pizza sauce over the entire surface of the tortilla, leaving a small border, about half an inch, along one edge. Don’t go too heavy on the sauce, as excess moisture can make the tortillas soggy and the roll ups difficult to seal. Next, sprinkle a generous amount of shredded mozzarella cheese over the pizza sauce. Aim for a nice, even coating, but again, don’t overdo it. Finally, arrange about four slices of beef pepperonieroni in a single line across the tortilla, near the edge that is opposite the clean border you left. Distribute them evenly so each bite gets a little bit of thabeef pepperoni pepperoni flavor.
Step 4: Rolling Them Up Tight
With your ingredients perfectly placed, it’s time to roll! Starting from thebeef pepperonih the pepperoni and cheese, tightly roll up the tortilla. Try to keep it as compact as possible to prevent the filling from spilling out during baking. Once you reach the end, use the slightly sauceless border to help seal the roll. You can gently press it down to help it adhere. The slight moisture from the sauce should be enough to create a seal, but if it’s not holding, a tiny dab of extra pizza sauce on that border can help. Roll ups should be firm but not so tight that they break the tortilla.
Step 5: Baking to Golden Perfection
Place your beautifully rolled-up pizza roll ups seam-side down onto the prepared baking sheets. Arrange them so they have a little bit of space between them to allow for even cooking and browning. Once all 20 roll ups are assembled and placed on the baking sheets, it’s time to bake them. Pop them into your preheated oven. Bake for approximately 12-15 minutes, or until the tortillas are golden brown and slightly crispy, and the cheese inside is melted and gooey. Keep an eye on them during the last few minutes of baking, as ovens can vary, and you want them perfectly cooked, not burnt.
Step 6: Cooling and Serving Your Masterpieces
Once they’re out of the oven, resist the urge to dig in immediately! The melted cheese and sauce will be incredibly hot. Let the Pizza Roll Ups cool on the baking sheets for about 5-10 minutes. This allows the filling to set slightly, making them easier to handle and less likely to cause any accidental tongue burns. You can serve them as is, or if you’re feeling fancy, you can offer a side of extra pizza sauce for dipping. These are fantastic as a fun appetizer, a unique snack, or even a light meal. Enjoy the delightful combination of warm, chewy tortilla, savory pizza sauce, melted mozzarella, beef pepperonictly crisp pepperoni!
Conclusion:
You’ve now learned how to create delicious and versatile Pizza Roll Ups, a fantastic dish perfect for weeknight dinners, party appetizers, or even a fun lunchbox treat! This recipe is wonderfully forgiving and can be adapted to suit any taste. The beauty of Pizza Roll Ups lies in their simplicity and the endless possibilities for customization. Don’t be afraid to experiment with different cheeses, meats, and vegetables to make them uniquely yours!
I encourage you to get creative and have fun with it. Serve these warm, fresh from the oven, alongside a simple side salad or a bowl of your favorite marinara sauce for dipping. They’re also a hit when served with ranch dressing. For a heartier meal, pair them with some garlic bread. Remember, the goal is to enjoy the process and the delicious outcome.
Frequently Asked Questions:
Can I make Pizza Roll Ups ahead of time?
Yes, you can assemble the Pizza Roll Ups up to a day in advance and store them covered in the refrigerator. For best results, bake them just before serving. You can also freeze baked and cooled Pizza Roll Ups. Reheat them in the oven at 350°F (175°C) for about 10-15 minutes, or until heated through.
What are some other filling ideas for Pizza Roll Ups?
The possibilities are truly endless! Beyond the classic beef pepperoni and cheese, consider options like: spinach and ricotta, beef ham and pineapple, supreme with peppers and onions, or even a dessert version with Nutella and fruit. Just ensure your fillings are not too wet to avoid a soggy crust.
Easy Beef Pizza Roll Ups
Quick and delicious pizza roll ups made with beef pepperoni, mozzarella cheese, and pizza sauce rolled in soft tortillas and baked until golden.
Ingredients
-
20 small flour tortillas (5-inch)
-
14 oz pizza sauce
-
24 oz shredded mozzarella cheese
-
80 slices beef pepperoni
-
1 tbsp cooking oil
Instructions
-
Step 1
Preheat oven to 375°F (190°C). Lightly grease two large baking sheets with cooking oil. -
Step 2
Warm tortillas in a microwave or skillet until pliable. Keep covered to retain warmth. -
Step 3
Spread a thin layer of pizza sauce on each tortilla, leaving a half-inch border. Sprinkle with mozzarella cheese and arrange beef pepperoni slices in a line. -
Step 4
Tightly roll up each tortilla starting from the pepperoni end. Use the border to help seal the roll. -
Step 5
Place roll ups seam-side down on prepared baking sheets. Bake for 12-15 minutes, or until golden brown and cheese is melted. -
Step 6
Let cool for 5-10 minutes before serving. Serve as is or with extra pizza sauce for dipping.
Important Information
Nutrition Facts (Per Serving)
It is important to consider this information as approximate and not to use it as definitive health advice.
Allergy Information
Please check ingredients for potential allergens and consult a health professional if in doubt.


Leave a Comment