
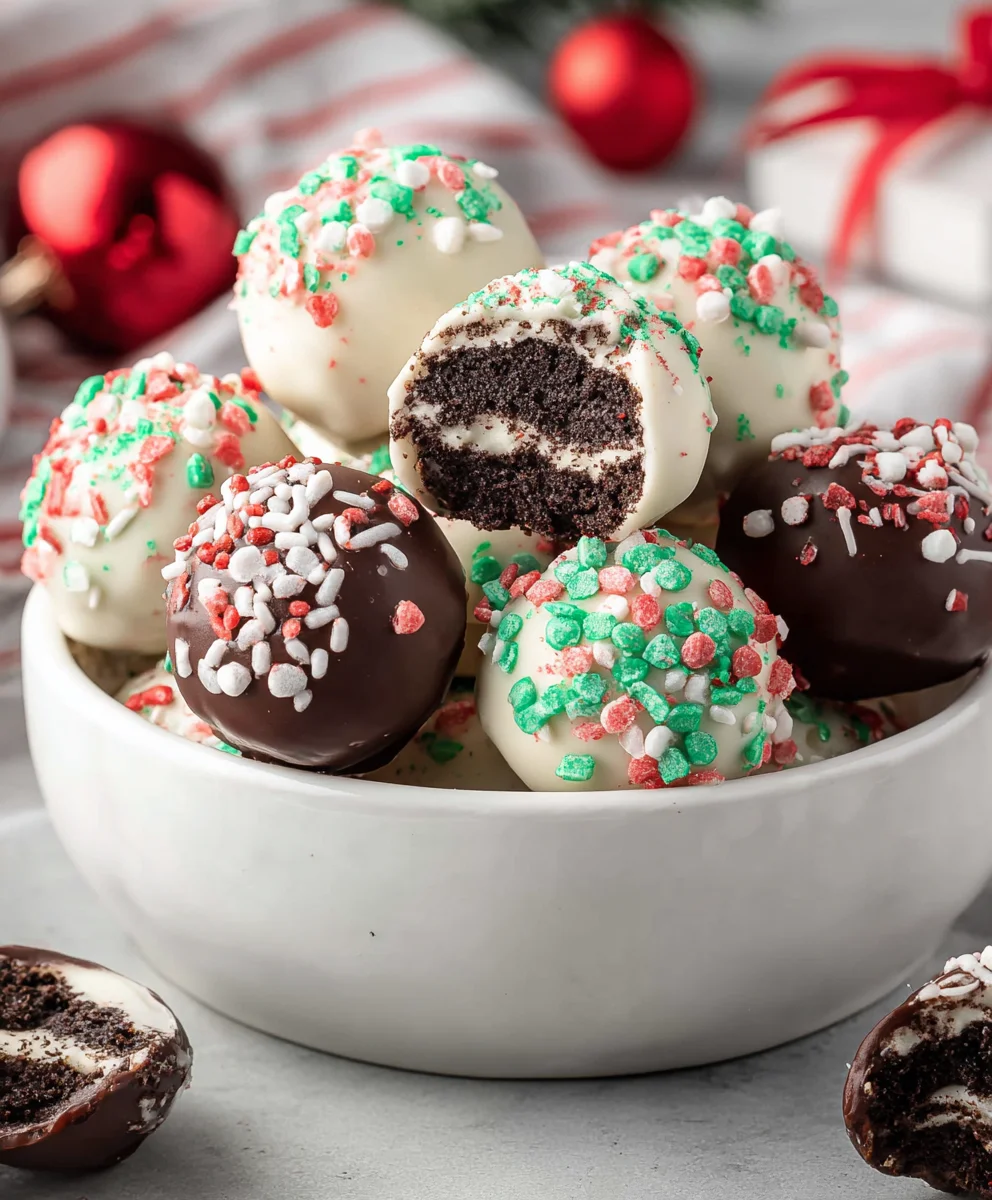
Christmas Oreo Balls are more than just a festive treat; they are a tiny explosion of pure joy, a quintessential part of holiday celebrations for so many. Have you ever found yourself reaching for one (or two, or three!) of these delightful confections during the holiday season? There’s an undeniable magic that happens when rich, chocolatey Oreo cookies meet creamy, sweet cream cheese, all enveloped in a decadent chocolate coating. They are universally loved for their incredible ease of preparation, making them a perfect activity for families and friends to create together, filling your home with both delicious aromas and cheerful memories. What truly sets these Christmas Oreo Balls apart is their incredible versatility – you can customize their appearance with a dazzling array of sprinkles, edible glitter, or even colorful drizzles to perfectly match your festive theme. They are the bite-sized embodiment of holiday spirit, guaranteed to bring smiles to every face lucky enough to enjoy them.

Ingredients:
- 36 regular Oreos
- 8 ounces cream cheese, softened
- 10 ounces Ghirardelli Dark Chocolate Melting Wafers
- 10 ounces Ghirardelli White Vanilla Melting Wafers
- Christmas sprinkles, for decorating
Preparing the Oreo Ball Mixture
The foundation of our delightful Christmas Oreo Balls is a simple yet incredibly effective two-ingredient base. First, we’ll pulverize the Oreos. I find the easiest way to do this is to place the entire package of 36 Oreos into a food processor and pulse them until they form fine crum extractbs. You want them to be almost powdery, with very few large chunks. If you don’t have a food processor, don’t worry! You can place the Oreos in a sturdy zip-top bag and use a rolling pin to crush them intrum extractine crumbs. This method is a bit more labor-intensive but yields the same delicious result.
Once the Oreos are finely crushed, it’s time to incorporate the cream cheese. Ensure your cream cheese is truly softened. This is crucial for achieving a smooth, well-combined mixture. If it’s still cold, the cream cheese can create pockets and lumps in your Oreo balls, making them harder to roll and less enjoyable. You can soften cream cheese by leaving it at room temperature for about an hour, or by briefly microwaving it in very short bursts (10-15 seconds), being careful not to melt it. Add the softened cream cheerum extractto the Oreo crumbs. Using your hands (the best tool for the job, in my opinion!) or a sturdy spoon, thoroughly mix therum extracteam cheese and Oreo crumbs together. You want to work this mixture until it’s completely uniform and no streaks of cream cheese remain visible. It should form a cohesive, dough-like consistency that holds together when you squeeze it. This might take a few minutes of diligent mixing.
Forming and Chilling the Oreo Balls
Now comes the fun part: shaping! Take small portions of the Oreo mixture and roll them between your palms to form uniform balls. I like to aim for about 1-inch diameter balls. This size is perfect for dipping and ensures that each bite is just the right amount of rich goodness. As you form each ball, place it on a baking sheet lined with parchment paper or wax paper. Parchment paper is ideal as it prevents any sticking and makes cleanup a breeze. Continue this process until all of the Oreo mixture has been rolled into balls.
Once all your balls are formed and arranged on the baking sheet, it’s time for them to firm up. This step is essential for successful dipping. Pop the baking sheet into the refrigerator for at least 30 minutes. This chilling period will firm up the cream cheese, making the balls more solid and much easier to handle when you’re ready to dip them in chocolate. If you’re short on time, you can place them in the freezer for about 15-20 minutes, but be careful not to over-freeze them, as this can make them too hard to dip.
Melting and Dipping in Dark Chocolate
While the Oreo balls are chilling, it’s time to prepare your dark chocolate. Carefully place the Ghirardelli Dark Chocolate Melting Wafers into a microwave-safe bowl. Microwave them in 30-second intervals, stirring thoroughly after each interval. It’s very important to stir well, as the residual heat will continue to melt the chocolate even after you remove it from the microwave. Continue this process until the chocolate is completely smooth and melted. Alternatively, you can melt the chocolate using a double boiler. Place the wafers in a heatproof bowl set over a saucepan of simmering water, stirring occasionally until smooth. Be careful not to let any water get into the chocolate, as this can cause it to seize.
Once the dark chocolate is melted and smooth, retrieve your chilled Oreo balls from the refrigerator. Using a fork or a dipping tool, carefully dip each Oreo ball into the melted dark chocolate, ensuring it’s fully coated. Allow any excess chocolate to drip back into the bowl. Gently place the chocolate-coated Oreo ball back onto the parchment-lined baking sheet. As you dip each ball, it’s a good idea to work relatively quickly, especially if your kitchen is warm, to prevent the chocolate from hardening too soon. If the chocolate starts to thicken, you can briefly pop it back into the microwave for another 15-second interval with stirring.
Melting and Dipping in White Chocolate
Now for the festive touch! Melt the Ghirardelli White Vanilla Melting Wafers using the same method as the dark chocolate: in the microwave in 30-second intervals, stirring well, or over a double boiler. White chocolate can sometimes be a little more finicky to melt than dark chocolate, so be patient and stir thoroughly between each heating cycle to achieve a silky smooth consistency.
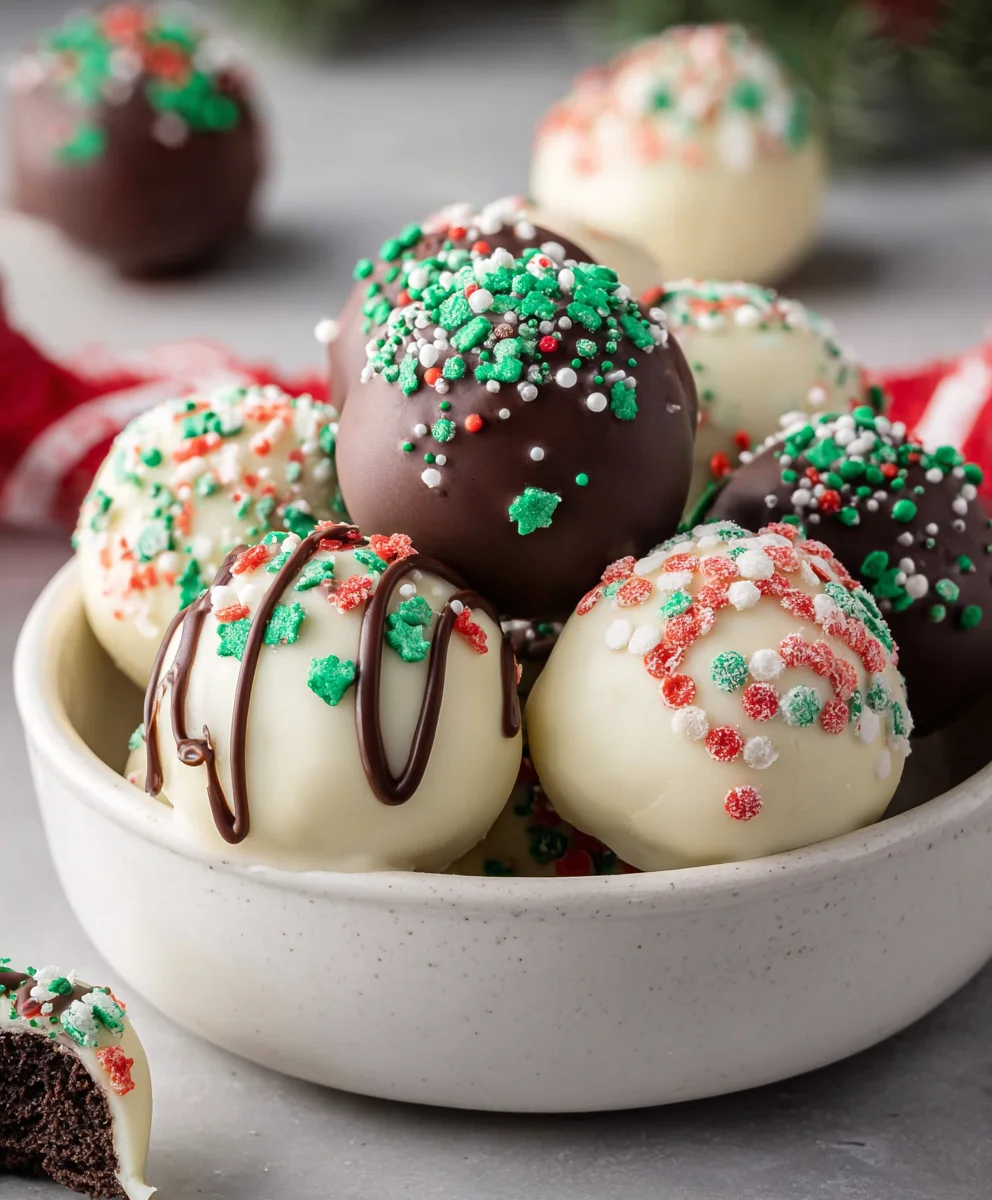
Once your white chocolate is perfectly melted, it’s time to add some flair. You have a couple of options here for decorating your Christmas Oreo Balls. You can either drizzle the white chocolate over the dark chocolate-coated balls for a striped effect, or you can fully dip some of the Oreo balls in white chocolate for a contrasting look. For drizzling, transfer the melted white chocolate to a piping bag or a zip-top bag with a small corner snipped off. Drizzle the white chocolate decoratively over the dark chocolate-coated balls. If you prefer to dip some balls entirely in white chocolate, follow the same dipping technique you used for the dark chocolate, ensuring a complete coating before placing them back on the parchment paper.
Adding the Festive Sprinkles
This is where your Christmas Oreo Balls truly transform into festive treats! While the white chocolate is still wet, generously shower the Christmas sprinkles over the balls. This is the easiest part and allows for maximum creativity. You can use a mix of colors and shapes for a truly celebratory look. If you’ve dipped some balls entirely in white chocolate, you can sprinkle them all over, or choose to decorate just one side. For the dark chocolate balls with white chocolate drizzles, the sprinkles will adhere beautifully to the still-tacky white chocolate. Work quickly so the sprinkles stick well to the chocolate before it sets.
Once all the balls are dipped, drizzled, and sprinkled to your heart’s content, allow the chocolate to set completely. This usually takes about 30 minutes to an hour at room temperature. For a faster set, you can place the baking sheet back in the refrigerator for about 15-20 minutes. Once the chocolate is firm and set, your stunning Christmas Oreo Balls are ready to be enjoyed or shared! They make wonderful homemade gifts or a beautiful addition to any holiday dessert table. Store any leftovers in an airtight container at room temperature.
Conclusion:
There you have it – your guide to creating the most delightful Christmas Oreo Balls! These no-bake treats are a festive powerhouse, perfect for any holiday gathering or even as a sweet surprise for Santa. We’ve walked through each simple step, from crushing those iconic cookies to shaping and coating them in rich chocolate. The versatility of this recipe makes it a year-round favorite, but they truly shine during the holiday season. Don’t be afraid to experiment with different toppings and decorations; the possibilities are as endless as your creativity! I truly hope you enjoy making and, most importantly, devouring these wonderful Christmas Oreo Balls. They are incredibly satisfying to make and even more so to share.
For serving, arrange these festive delights on a platter alongside other holiday cookies or as a sweet finish to a festive meal. They are also fantastic additions to cookie exchange boxes or as edible gifts.
Consider variations like using white chocolate for a snow-kissed look, or adding a hint of peppermint extract to the cream cheese mixture for an extra festive flavor. You can also dip them in colored candy melts or sprinkles for added visual appeal.
Frequently Asked Questions:
How do I store Christmas Oreo Balls?
You can store your Christmas Oreo Balls in an airtight container in the refrigerator for up to two weeks. They are best enjoyed at room temperature, so allow them to sit out for about 15-20 minutes before serving.
Can I make Christmas Oreo Balls ahead of time?
Absolutely! Christmas Oreo Balls are a fantastic make-ahead treat. You can prepare them a few days in advance and store them in the refrigerator. This frees up your time for other holiday preparations.
What if my mixture is too sticky to roll?
If your Oreo ball mixture is too sticky, it often means there’s a bit too much moisture. You can try adding a tablespoon or two more of finely crushed Oreo crum extractbs, or chilling the mixture for an extra 30 minutes before rolling. This should help it become more manageable.
Christmas Oreo Balls – Easy Holiday Treat Recipe
A simple and delicious no-bake holiday treat made with crushed Oreos, cream cheese, and festive dark and white chocolate coatings, perfect for Christmas.
Ingredients
-
36 regular Oreos
-
8 ounces cream cheese, softened
-
10 ounces Ghirardelli Dark Chocolate Melting Wafers
-
10 ounces Ghirardelli White Vanilla Melting Wafers
-
Christmas sprinkles, for decorating
Instructions
-
Step 1
Pulverize the 36 regular Oreos in a food processor or a zip-top bag with a rolling pin until they form fine crumbs. -
Step 2
In a bowl, thoroughly mix the Oreo crumbs with 8 ounces of softened cream cheese until a cohesive, dough-like consistency forms. -
Step 3
Roll the mixture into approximately 1-inch diameter balls and place them on a parchment-lined baking sheet. Chill in the refrigerator for at least 30 minutes. -
Step 4
Melt the 10 ounces of Ghirardelli Dark Chocolate Melting Wafers in a microwave-safe bowl or using a double boiler. Dip each chilled Oreo ball into the melted dark chocolate, coat fully, and return to the parchment-lined baking sheet. -
Step 5
Melt the 10 ounces of Ghirardelli White Vanilla Melting Wafers using the same method as the dark chocolate. Either drizzle the white chocolate over the dark chocolate-coated balls or fully dip some balls in white chocolate. -
Step 6
While the white chocolate is still wet, generously add Christmas sprinkles over the balls for decoration. Allow the chocolate to set completely at room temperature or in the refrigerator.
Important Information
Nutrition Facts (Per Serving)
It is important to consider this information as approximate and not to use it as definitive health advice.
Allergy Information
Please check ingredients for potential allergens and consult a health professional if in doubt.

Leave a Comment