
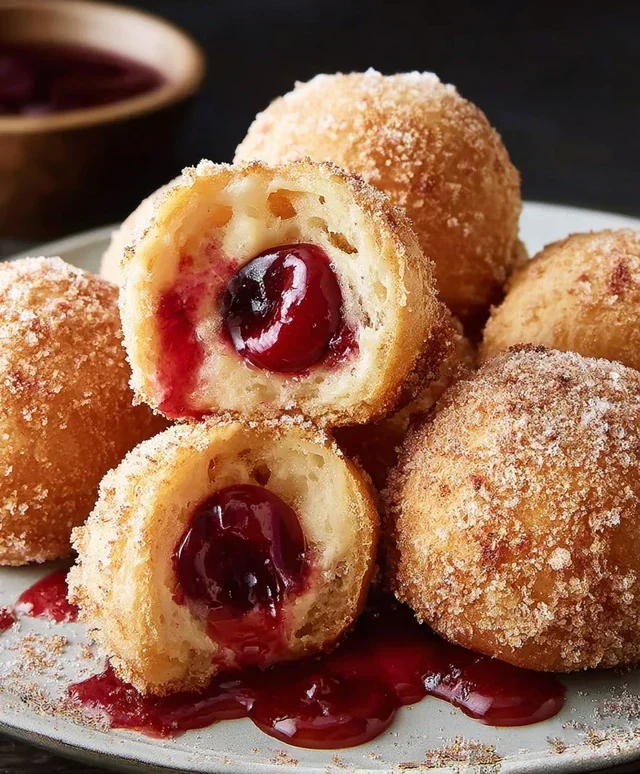
Cherry Pie Bombs are the bite-sized bursts of pure joy that your dessert table has been craving. Forget the fuss of a full-sized pie; these delightful little morsels deliver all the classic cherry pie flavor in an utterly irresistible package. We all love a good slice of cherry pie, right? That sweet, tart filling encased in flaky, buttery crust is a nostalgic favorite for so many of us. But imagin extracte condensing all that deliciousness into a portable, shareable, and ridiculously cute creation. That’s precisely what makes Cherry Pie Bombs so special. They’re perfect for parties, potlucks, or simply when you need a sweet treat that’s both convenient and utterly show-stopping. Get ready to experience a whole new way to enjoy your favorite fruit, one perfect bite at a time.

Cherry Pie Bombs
Get ready for a dessert explosion of flavor that’s as fun to make as it is to eat! These Cherry Pie Bombs are essentially bite-sized pockets of pure joy, combining the convenience of canned biscuits with the classic, comforting taste of cherry pie. They’re perfect for parties, a special treat for the kids, or simply when you’re craving something sweet and decadent. Forget fussy pie crusts; we’re going for maximum flavor with minimal effort. These little delights are crispy on the outside, gooey and bursting with cherry goodness on the inside, all finished off with a sweet, creamy glaze. Let’s get baking (or rather, frying)!
Ingredients:
Cooking Instructions:
Let’s get started on creating these delightful little bombs of cherry goodness. The process is surprisingly simple, and the results are absolutely worth it.
Preparing the Biscuits and Filling
1. First things first, we need to get our biscuits ready for their delicious transformation. Open your can of Grands “Big” biscuits. These are fantastic because they’re already flaky and the perfect size to work with. Gently separate the biscuits. Now, the key to getting that “bomb” shape is to flatten each biscuit slightly. You don’t want to make them too thin, just enough to give yourself a good surface area to work with. I like to use my hands for this, gently pressing them out on a clean, lightly floured surface. Think of it like making a small, round pancake. You want to create a little well in the center of each flattened biscuit, not all the way through, but just an indentation. This will help keep all that glorious cherry filling contained once we seal it up.
2. Next, it’s time for the star of the show: the cherry pie filling. Open your can of cherry pie filling. You don’t need to cook or prepare it in any way; we’re using it straight from the can. Using a spoon, carefully place a generous tablespoon of the cherry pie filling into the center indentation of each flattened biscuit. Be careful not to overfill, as this can make it difficult to seal the biscuit properly and might lead to leaks during frying. You want enough to get that burst of cherry flavor, but not so much that it’s oozing out before we even get to the frying stage. Once you’ve added the filling to all your biscuits, it’s time to bring them together.
Forming the Cherry Pie Bombs
3. Now for the magic moment: sealing those bombs! Take the edges of each flattened biscuit and carefully bring them up and over the cherry filling, pinching them together firmly to create a senon-alcoholic aled ball. This is crucial to ensure the filling stays inside while frying. You want to make sure there are no gaps or openings. Really press the seams together. If you’re having trouble getting a good seal, you can use a tiny bit of water on your fingertips to help ‘glue’ the edges together, but usually, a good pinch is all you need. You should end up with little dough balls, each snugly holding its cherry treasure. It’s a good idea to place these formed bombs on a baking sheet lined with parchment paper as you work, to prevent them from sticking.
Frying to Golden Perfection
4. It’s time to get these bombs crispy! Heat about 2-3 inches of vegetable oil in a large, heavy-bottomed pot or Dutch oven over medium-high heat. You want the oil to reach a temperature of around 350 degrees Fahrenheit (175 degrees Celsius). If you don’t have a thermometer, you can test the oil by dropping a tiny piece of biscuit dough into it; it should sizzle and float to the surface within a few seconds. Carefully, using a slotted spoon or spider strainer, lower a few of the cherry pie bombs into the hot oil. Don’t overcrowd the pot, as this will lower the oil temperature and result in greasy bombs. Fry them for about 3-4 minutes, turning them occasionally, until they are a beautiful golden brown all over. This process cooks the biscuit dough through and makes the outside wonderfully crispy. Remove the fried bombs with the slotted spoon and place them on a wire rack set over a baking sheet to drain any excess oil. Repeat with the remaining bombs.
Creating the Sweet Glaze and Finishing Touches
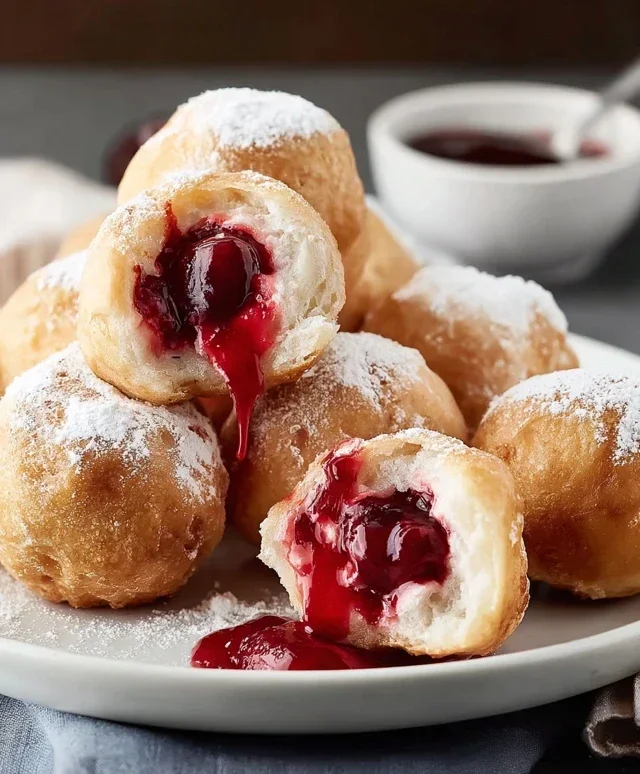
5. While our crispy cherry pie bombs are cooling slightly, let’s whip up a quick and easy glaze to make them even more irresistible. In a medium bowl, whisk together the powdered sugar, milk, and light corn syrup. Start with the ¼ cup of milk, and if the glaze seems too thick, add a tiny bit more milk, a teaspoon at a time, until you reach your desired drizzling consistency. The corn syrup adds a lovely sheen and helps the glaze set just a little bit. Once the bombs are still warm, but not piping hot, you can either dip them into the glaze or drizzle the glaze generously over the tops. For an extra festive touch, you can even sprinkle a few colorful edible sprinkles over the wet glaze. Allow the glaze to set for a few minutes, and then… get ready for pure dessert bliss! These are best enjoyed warm.
Conclusion:
And there you have it! These Cherry Pie Bombs are a true delight, combining the irresistible flavors of classic cherry pie with an incredibly easy-to-make, bite-sized format. The flaky, golden pastry encasing that sweet and tart cherry filling is a guaranteed crowd-pleaser, perfect for any occasion. Whether you’re looking for a stunning dessert for a party, a fun weekend baking project with the family, or just a sweet treat to brighten your day, these little flavor explosions are sure to hit the spot. They’re so versatile and surprisingly simple, even novice bakers can achieve fantastic results.
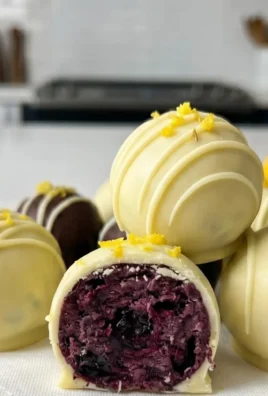
I love serving these warm, perhaps with a dollop of vanilla ice cream or a drizzle of extra condensed milk. They’re also fantastic at room temperature, making them ideal for potlucks or picnics. For variations, consider adding a pinch of cinnamon or a splash of almond extract to the cherry filling for an extra layer of flavor. You could even experiment with different fruits like blueberries or mixed berries! I truly encourage you to give these Cherry Pie Bombs a try – you won’t regret it!
Frequently Asked Questions:
Can I use fresh cherries instead of canned?
Absolutely! If using fresh cherries, you’ll want to pit them and then gently cook them down with your sugar and thickener until they release their juices and thicken slightly, similar to how you would prepare filling for a traditional pie. This might require a bit more cooking time than canned cherries.
How should I store leftover Cherry Pie Bombs?
Store any leftovers in an airtight container at room temperature for up to two days, or in the refrigerator for up to four days. They are delicious reheated gently in a low oven or toaster oven to bring back their crispiness.
Can I make the dough ahead of time?
Yes, you can prepare the pastry dough and store it wrapped tightly in the refrigerator for up to 2 days. Allow it to soften slightly at room temperature before rolling it out for your Cherry Pie Bombs.
Cherry Pie Bombs
Deliciously sweet and slightly tart fried biscuit bites filled with cherry pie filling, coated in a glaze.
Ingredients
-
Vegetable oil, for frying
-
16.3 ounces Grands “Big” biscuits, flaky
-
21 ounces cherry pie filling
-
2 cups powdered sugar
-
¼ cup milk
-
1 tablespoon light corn syrup
Instructions
-
Step 1
Open the Grands biscuits and separate them. Gently flatten each biscuit into a disc. Spoon about 1-2 tablespoons of cherry pie filling into the center of half the biscuit discs. -
Step 2
Place another flattened biscuit disc on top of the filling and press the edges firmly to seal, creating a small pocket of filling. Ensure no filling is leaking out. -
Step 3
Heat about 2-3 inches of vegetable oil in a deep skillet or pot over medium-high heat to approximately 350°F (175°C). Carefully drop 3-4 biscuit bombs into the hot oil, being careful not to overcrowd the pan. -
Step 4
Fry the biscuit bombs for 2-3 minutes per side, or until golden brown and puffed up. Use a slotted spoon to remove them from the oil and place them on a wire rack set over paper towels to drain. -
Step 5
While the bombs are frying, prepare the glaze by whisking together the powdered sugar, milk, and light corn syrup in a small bowl until smooth and pourable. -
Step 6
Once the fried bombs have cooled slightly, drizzle or dip them into the prepared glaze. Allow the glaze to set before serving.
Important Information
Nutrition Facts (Per Serving)
It is important to consider this information as approximate and not to use it as definitive health advice.
Allergy Information
Please check ingredients for potential allergens and consult a health professional if in doubt.

Leave a Comment