
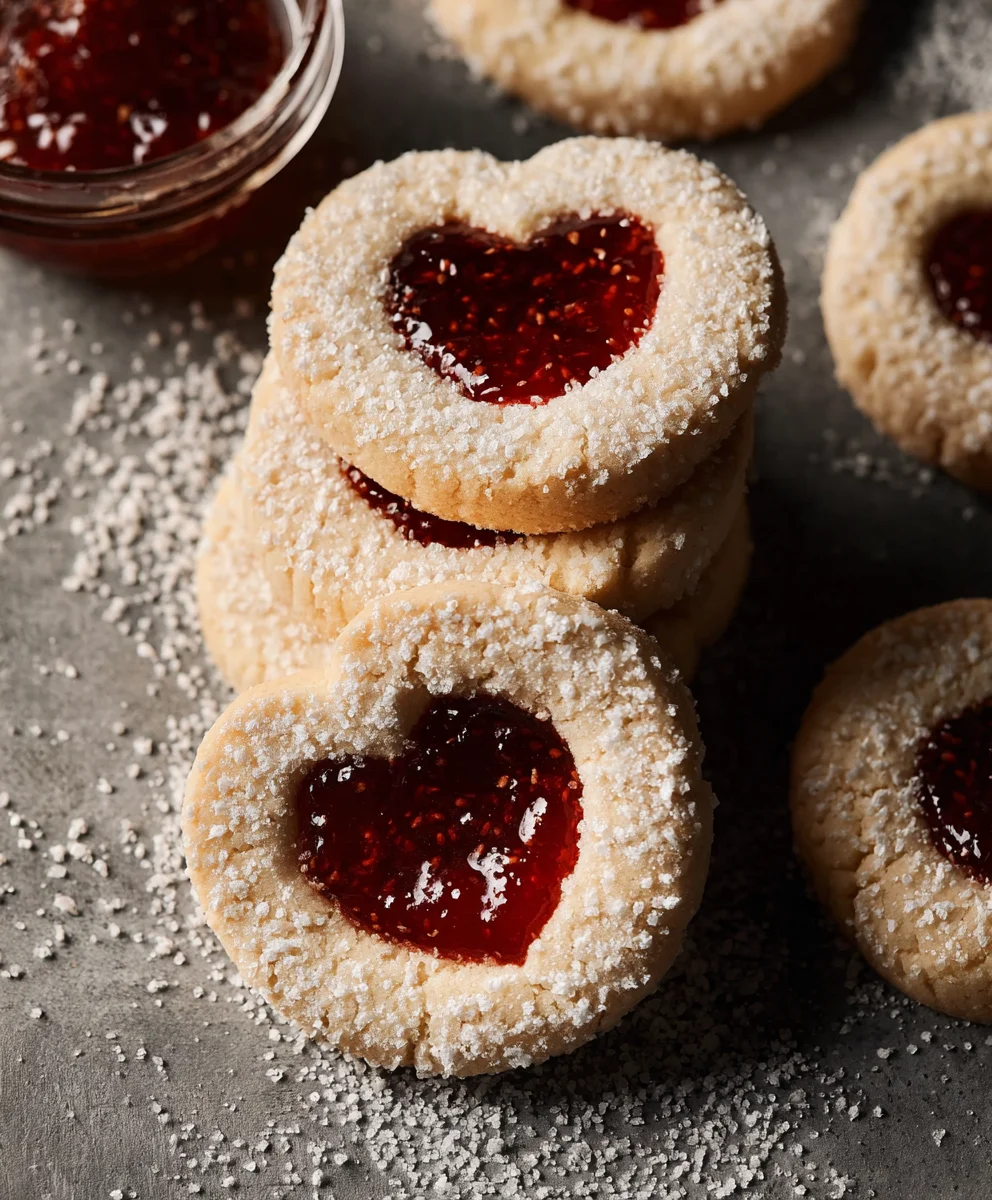
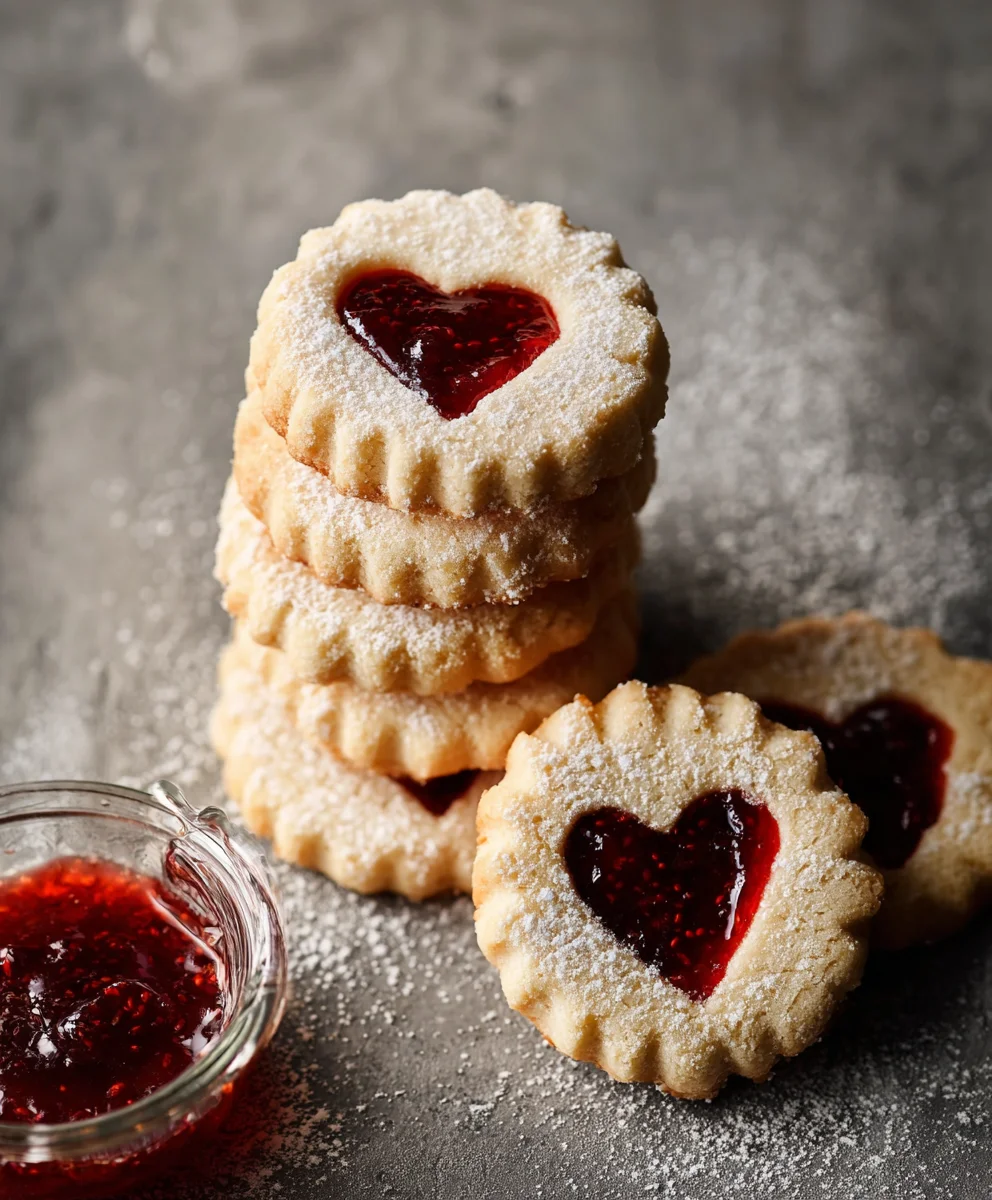
The Best Jam Cookies are more than just a simple baked good; they’re a nostalgic hug in cookie form, a sweet memory of childhood kitchens, and a guaranteed crowd-pleaser for any occasion. There’s an undeniable charm to these delightful treats, a perfect balance of a tender, buttery cookie cradling a jewel-toned dollop of your favorite fruit preserve. What makes them so universally loved? Perhaps it’s the comforting simplicity, the delightful burst of fruity sweetness that complements the mellow cookie, or the way they evoke a sense of warmth and home. This recipe aims to capture that perfect essence, ensuring your jam cookies are not just good, but truly the best. We’ll delve into the secrets that make these cookies delightfully soft yet perfectly structured, with edges that are just lightly crisp and centers that melt in your mouth, all designed to showcase that vibrant, flavorful jam filling. Get ready to create a batch that will have everyone asking for seconds!

Ingredients:
- 1 cup unsalted butter, at room temperature
- 3/4 cup icing sugar, sifted, plus extra for dusting
- 1/4 teaspoon salt
- 1/2 teaspoon vanilla extract
- 2 cups all-purpose flour, sifted, plus extra to roll out the dough
- 1/2 cup strawberry jam
Preparing the Dough
Step 1: Cream the Butter and Sugar
The foundation of any excellent cookie is a well-creamed butter and sugar mixture, and for our jam cookies, this is no different. Ensure your butter is truly at room temperature – it should yield slightly when pressed with your finger but not be melted. In a large mixing bowl, combine the softened unsalted butter with the sifted icing sugar. Using an electric mixer, start on a low speed to incorporate the sugar without sending a cloud of powder into the air. Gradually increase the speed to medium-high and beat until the mixture is pnon-alcoholic ale, light, and wonderfully fluffy. This process incorporates air, which contributes to the cookies’ tender texture and helps them spread just the right amount during baking. Scrape down the sides of the bowl periodically to ensure all the butter and sugar are evenly combined. This creaming stage can take anywhere from 3 to 5 minutes, depending on your mixer’s power.
Step 2: Incorporate Wet Ingredients and Salt
Once you have that beautifully aerated butter and sugar base, it’s time to add the flavor enhancers. Add the 1/4 teaspoon of salt. Salt is crucial not just for enhancing sweetness but also for balancing the overall flavor profile of the cookies. Next, pour in the 1/2 teaspoon of vanilla extract. Pure vanilla extract adds a warm, comforting aroma and taste that complements the sweet jam perfectly. Beat these ingredients into the creamed mixture until they are fully incorporated and the color is uniform. Avoid overmixing at this stage; we just want everything to come together smoothly.
Step 3: Gradually Add the Flour
Now comes the flour, the structural component of our cookies. It’s important to have sifted your all-purpose flour beforehand to remove any lumps and to aerate it, which results in a lighter cookie. Add the sifted flour to the wet ingredients in three additions. Mix on low speed until just combined after each addition. Resist the urge to overmix once the flour is added. Overworking the dough at this stage can develop the gluten in the flour too much, leading to tough, dense cookies rather than the delicate, crum extractbly texture we’re aiming for. You’ll know the dough is ready when it just starts to come together, looking somewhat shaggy. It will not be a perfectly smooth ball at this point, and that’s okay.
Shaping and Filling the Cookies
Step 4: Chill the Dough and Prepare for Rolling
A chilled dough is much easier to handle and prevents excessive spreading during baking. Gently gather the dough together, being careful not to knead it. You can do this directly in the bowl or by turning it out onto a lightly floured surface. Form the dough into a flat disc, wrap it tightly in plastic wrap, and refrigerate for at least 1 hour. This resting period allows the gluten to relax and the fats to firm up. Once chilled, unwrap the dough and place it on a lightly floured surface. We will divide the dough to create the top and bottom halves of our jam cookies. Take about two-thirds of the dough and set the remaining one-third aside, keeping it cool if necessary. Roll out the larger portion of dough to about 1/4 inch thickness. Use a round cookie cutter, approximately 2 to 2.5 inches in diameter, to cut out as many circles as you can. Place these dough circles onto a baking sheet lined with parchment paper, leaving about 1 inch of space between each cookie. These will be the bases of our jam cookies.
Step 5: Create the Tops and Fill with Jam
Now, take the remaining one-third of the dough. Roll this portion out to the same 1/4 inch thickness. This time, you’ll use a smaller round cutter, or even the rim of a small glass, to cut out circles from this dough. These smaller circles will act as the “lids” for our jam cookies. For each base cookie, place about 1 teaspoon of the strawberry jam in the center of the dough circle. Be careful not to overfill, as the jam can ooze out during baking. Now, carefully place one of the smaller dough circles on top of the jam. Gently press the edges of the top and bottom dough circles together to seal the jam inside. You can use a fork to crimp the edges for an extra decorative touch and to ensure a secure seal. If the dough becomes too soft while you’re working, don’t hesitate to pop it back into the refrigerator for a few minutes to firm up. Repeat this process until all the cookie bases have been filled and topped.
Baking and Finishing
Step 6: Bake to Golden Perfection
Preheat your oven to 350°F (175°C). Ensure your oven rack is in the center position for even baking. Carefully place the prepared baking sheets into the preheated oven. Bake for 12 to 15 minutes, or until the edges of the cookies are lightly golden brown and the centers are set. The exact baking time will depend on your oven and the size of your cookies. It’s important to keep an eye on them during the last few minutes of baking, as cookies can go from perfectly baked to overdone very quickly. Once baked, remove the cookies from the oven and let them cool on the baking sheet for 5 minutes. This allows them to firm up slightly before you attempt to move them. After 5 minutes, carefully transfer the cookies to a wire rack to cool completely.
Step 7: Dust and Serve
Once the jam cookies have cooled completely on the wire rack, it’s time for the final flourish. Sift a generous amount of extra icing sugar over the cooled cookies. This creates a beautiful, snowy appearance and adds an extra touch of sweetness. The contrast between the rich cookie, the sweet jam, and the dusting of powdered sugar is simply irresistible. You can also serve them as is, without the dusting, for a more subtle sweetness. These jam cookies are best enjoyed at room temperature. They store wonderfully in an airtight container at room temperature for up to 3-4 days, making them a perfect make-ahead treat for parties, holidays, or just a delightful afternoon tea. Enjoy the simple, homemade goodness of The Best Jam Cookies!
Conclusion:
And there you have it – the secrets to creating “The Best Jam Cookies”! We’ve walked through each step, from selecting the perfect jam to achieving that irresistible golden-brown hue. These cookies are more than just a treat; they’re a delightful way to bring a smile to faces, whether enjoyed with a warm cup of tea or as a sweet surprise in a lunchbox. I truly hope you enjoy baking and devouring these delightful cookies as much as I do!
For serving, “The Best Jam Cookies” are divine on their own, but they also pair beautifully with a scoop of vanilla ice cream or a sprinkle of powdered sugar. For variations, feel free to experiment with different jam flavors – apricot, raspberry, or even a mixed berry jam can offer a unique twist. You could also add a touch of lemon zest to the dough for a brighter flavor profile, or even a pinch of cinnamon for warmth. Don’t be afraid to get creative and make these cookies your own!
Frequently Asked Questions:
Q: My jam cookies are spreading too much. What did I do wrong?
A: Spreading can often be caused by the dough being too warm or the butter not being properly creamed. Ensure your butter is softened but not melted, and chill the dough for at least 30 minutes before baking. Also, make sure your oven temperature is accurate; if it’s too low, the cookies can spread excessively.
Q: Can I use store-bought jam, or should it be homemade?
A: You can absolutely use store-bought jam! The key is to use a jam that isn’t too runny. If your jam is quite thin, you might want to cook it down slightly in a saucepan over medium heat for a few minutes to thicken it. This will prevent it from leaking out of the cookies during baking.
Best Jam Cookies Recipe- Easy Homemade & Delicious
A simple and delicious recipe for homemade jam cookies with a sweet jam filling and a dusting of powdered sugar. Perfect for any occasion.
Ingredients
-
1 cup unsalted butter, at room temperature
-
3/4 cup icing sugar, sifted, plus extra for dusting
-
1/4 teaspoon salt
-
1/2 teaspoon vanilla extract
-
2 cups all-purpose flour, sifted, plus extra to roll out the dough
-
1/2 cup strawberry jam
Instructions
-
Step 1
Cream the softened unsalted butter with the sifted icing sugar in a large mixing bowl using an electric mixer on medium-high speed until light and fluffy, about 3-5 minutes. -
Step 2
Add the salt and vanilla extract to the creamed mixture and beat until fully incorporated and the color is uniform. -
Step 3
Gradually add the sifted all-purpose flour to the wet ingredients in three additions, mixing on low speed until just combined after each addition. Do not overmix. -
Step 4
Gather the dough into a flat disc, wrap tightly in plastic wrap, and refrigerate for at least 1 hour. Roll out about two-thirds of the dough to 1/4 inch thickness and cut out circles with a 2-2.5 inch cookie cutter. Place on a parchment-lined baking sheet. -
Step 5
Roll out the remaining one-third of the dough to 1/4 inch thickness and cut out smaller circles. Place about 1 teaspoon of strawberry jam in the center of each larger dough circle, then top with a smaller dough circle. Gently press edges to seal and crimp with a fork. -
Step 6
Bake in a preheated oven at 350°F (175°C) for 12-15 minutes, or until the edges are lightly golden brown and the centers are set. Let cool on the baking sheet for 5 minutes before transferring to a wire rack to cool completely. -
Step 7
Once cooled, dust generously with extra sifted icing sugar.
Important Information
Nutrition Facts (Per Serving)
It is important to consider this information as approximate and not to use it as definitive health advice.
Allergy Information
Please check ingredients for potential allergens and consult a health professional if in doubt.

Leave a Comment