
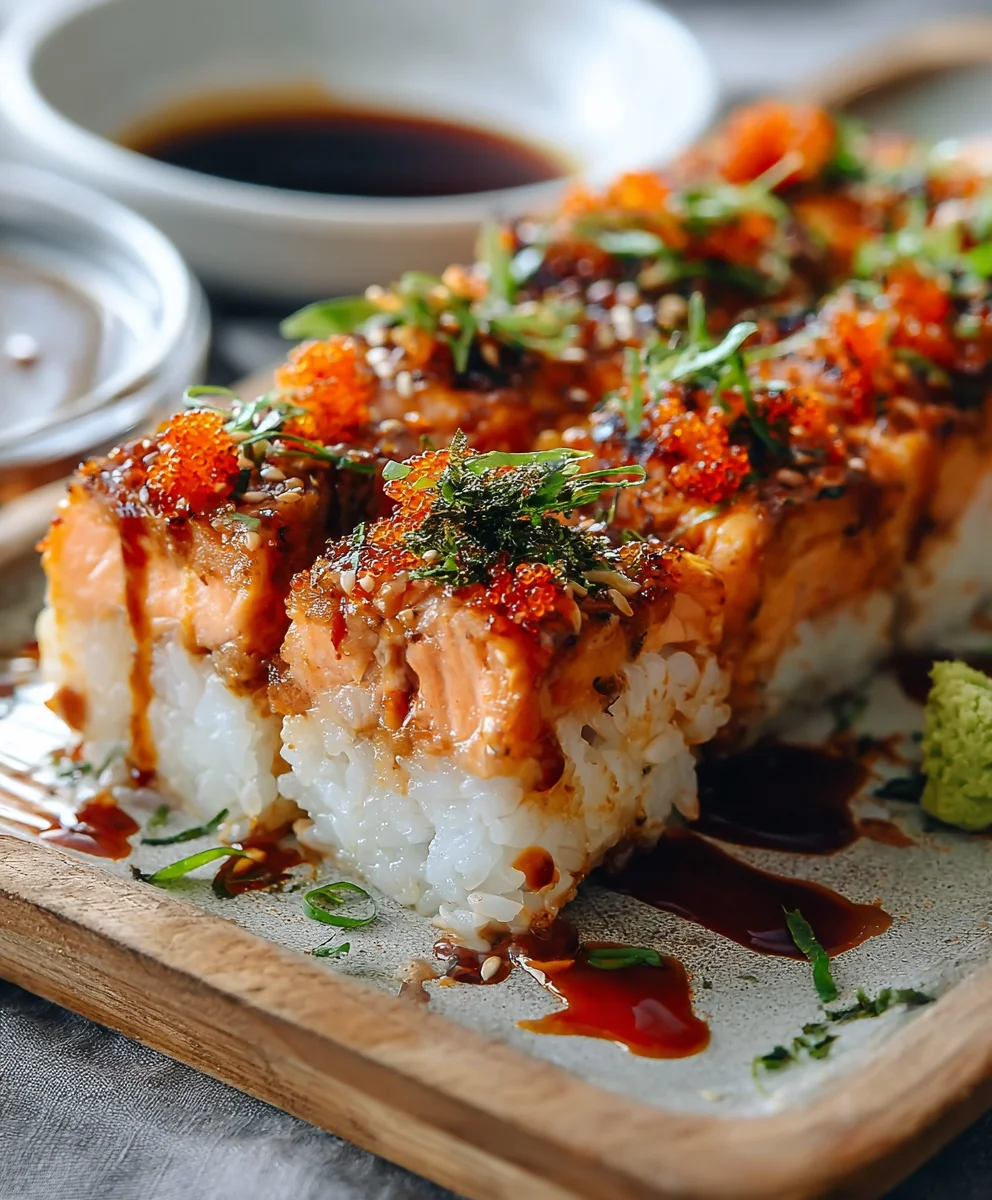
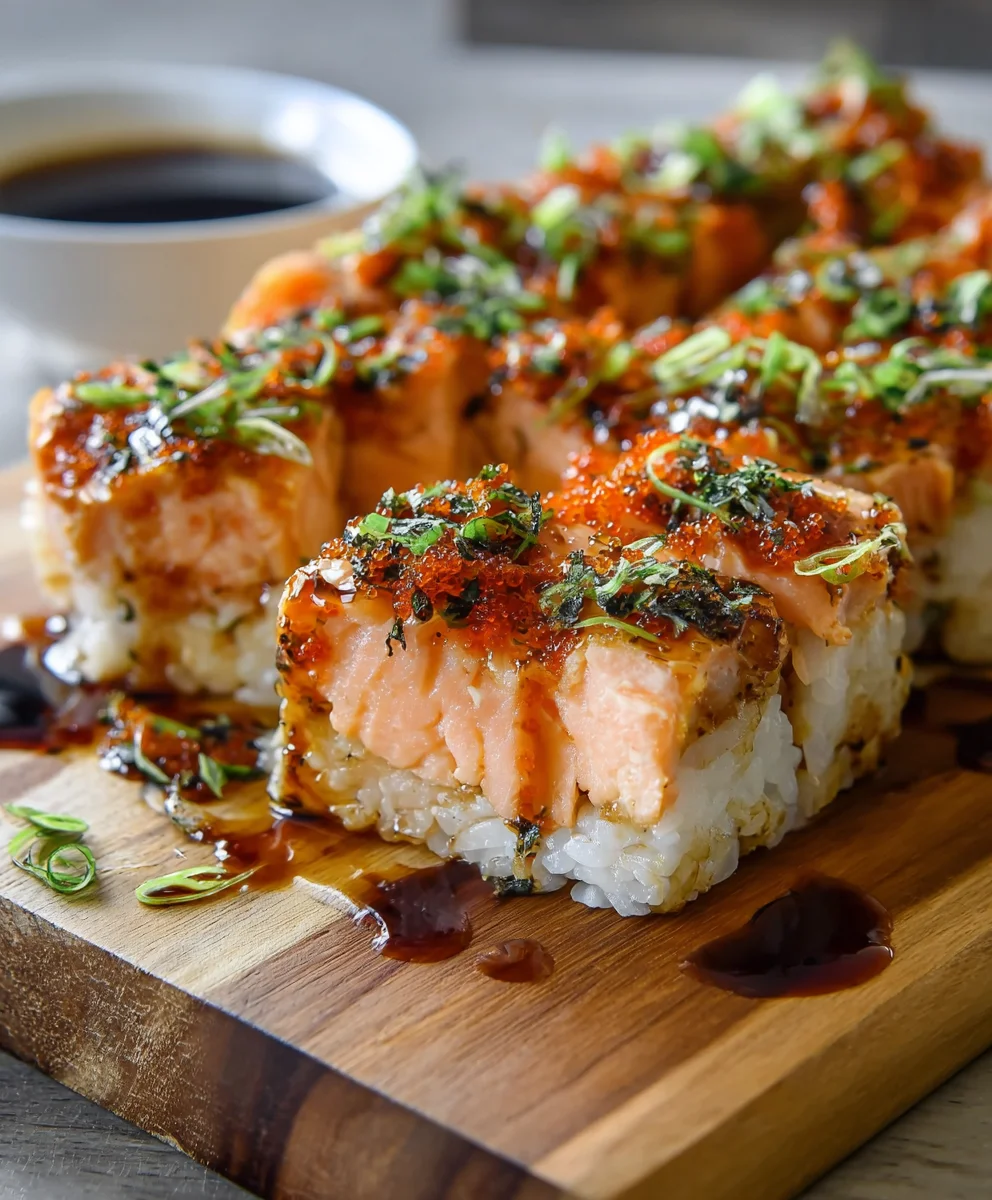
Spicy Salmon Sushi Bake Recipe is your new go-to for a weeknight dinner that’s both incredibly satisfying and surprisingly easy to whip up. Forget the fuss of rolling sushi; this deconstructed delight captures all the vibrant flavors and textures you adore in your favorite rolls, all baked into one glorious, communal dish. Imagin extracte tender, flaky salmon infused with a zesty, creamy spicy sauce, layered over perfectly seasoned sushi rice, and topped with a golden crust that promises pure comfort. It’s no wonder this dish has taken the internet by storm – it’s a flavor explosion that appeals to everyone, from seasoned sushi lovers to adventurous eaters looking for something new. The beauty of this Spicy Salmon Sushi Bake Recipe lies in its adaptability and the sheer joy it brings to the table, making it perfect for family gatherings or a cozy night in. Get ready to impress yourself and your loved ones with this phenomenal culinary creation!

Ingredients:
- 2 cups sushi rice, uncooked
- 2.5 cups water
- 1/4 cup rice vinegar
- 2 tablespoons granulated sugar
- 1 teaspoon salt
- 1 lb fresh salmon fillet, skinless and diced into bite-sized pieces
- 1/2 cup mayonnaise
- 2 tablespoons Sriracha sauce, or more depending on your spice preference
- 1 teaspoon sesame oil
- 1/2 cup green onions, thinly sliced, with extra reserved for garnish
- 1 sheet nori (seaweed), cut into small strips or crum extractbled
- Tobiko (flying fish roe), optional, for garnish
Preparing the Sushi Rice
Step 1: Rinse and Cook the Sushi Rice
The foundation of any great sushi bake is perfectly cooked sushi rice. Begin extract by thoroughly rinsing the 2 cups of uncooked sushi rice under cold running water. You’ll want to keep rinsing until the water runs clear, which helps remove excess starch and prevents the rice from becoming gummy. This is a crucial step for achieving that distinct, slightly sticky texture perfect for sushi. Once rinsed, drain the rice well. In a medium saucepan, combine the rinsed rice with 2.5 cups of water. Bring the mixture to a boil over medium-high heat, then immediately reduce the heat to the lowest setting, cover the pot tightly, and let it simmer for 15 minutes. Do not lift the lid during this time, as the steam is essential for cooking the rice evenly. After 15 minutes, remove the pot from the heat and let it sit, still covered, for another 10 minutes. This resting period allows the rice to absorb any remaining moisture and finish cooking beautifully.
Step 2: Season the Sushi Rice
While the rice is resting, prepare the seasoning mixture. In a small bowl, whisk together the 1/4 cup of rice vinegar, 2 tablespoons of granulated sugar, and 1 teaspoon of salt until the sugar and salt are completely dissolved. Once the rice has rested, transfer it to a large, shallow non-metallic bowl. Gradually pour the seasoned vinegar mixture over the hot rice. Using a rice paddle or a wooden spoon, gently fold the vinegar mixture into the rice using a slicing motion. Avoid stirring vigorously, as this can break down the grains. Continue to gently fold and separate the rice until the seasoning is evenly distributed and the rice cools down to room temperature. You can fan the rice with a piece of cardboard or a hand fan as you mix to help it cool and achieve a glossy finish. This seasoned rice will form the flavorful base of our spicy salmon sushi bake.
Assembling the Spicy Salmon Topping
Step 3: Mix the Salmon and Spicy Mayo
Now, let’s create the star of our dish – the spicy salmon topping. In a medium bowl, combine the 1 lb of diced fresh salmon fillet. To this, add the 1/2 cup of mayonnaise, 2 tablespoons of Sriracha sauce (feel free to adjust this amount based on how much heat you like!), and 1 teaspoon of sesame oil. Add about half of the chopped green onions (reserving the rest for garnish and mixing into the rice if desired). Gently fold all the ingredients together until the salmon is evenly coated in the spicy mayonnaise mixture. Be careful not to overmix, as you want to maintain the integrity of the salmon pieces. The Sriracha will give it that characteristic spicy kick, while the mayonnaise and sesame oil add richness and depth of flavor.
Step 4: Layer the Sushi Bake
Preheat your oven to 400°F (200°C). Lightly grease a 9×13 inch baking dish or an equivnon-alcoholic alent-sized oven-safe skillet. Spread the seasoned sushi rice evenly across the bottom of the prepared baking dish. Make sure to create a smooth, even layer. Next, carefully spoon the spicy salmon mixture over the top of the rice. Spread it out so that it covers the rice as uniformly as possible. This ensures that every bite will have a delicious combination of spicy salmon and seasoned rice. Finally, sprinkle the prepared nori strips evenly over the salmon layer. The nori adds a subtle oceanic flavor and a delightful textural contrast to the bake.
Baking and Garnishing
Step 5: Bake and Garnish
Place the assembled sushi bake in the preheated oven. Bake for 15-20 minutes, or until the salmon is cooked through and the topping is bubbly and lightly golden brown around the edges. The exact baking time will depend on your oven and the size of your salmon pieces. Keep an eye on it to prevent burning. Once it’s out of the oven, let it cool for a few minutes before garnishing. This helps the layers set slightly. Sprinkle generously with the reserved chopped green onions. For an extra touch of color and a delightful pop of flavor, add a scattering of tobiko (flying fish roe) over the top. The vibrant orange or red of the tobiko against the creamy salmon and fresh green onions makes for a visually stunning presentation. Serve warm with extra Sriracha on the side for those who desire even more heat.
Conclusion:
You’ve now got the know-how to create a truly delicious and impressive Spicy Salmon Sushi Bake Recipe! This dish offers a fantastic fusion of creamy, spicy, and savory flavors, all baked into a comforting casserole-style sushi experience. We’ve covered the simple steps, from preparing the perfectly seasoned rice to creating that irresistible salmon topping.
When it comes to serving, the Spicy Salmon Sushi Bake Recipe is wonderfully versatile. It’s fantastic on its own, but can also be paired with a light cucumber salad, some pickled gin extractger, or a side of edamame for a more complete meal. For variations, don’t hesitate to experiment! You can add a sprinkle of toasted sesame seeds for extra crunch, or a dash of sriracha mayo for an even bolder kick. Consider adding some finely diced bell peppers or corn for added texture and sweetness. This recipe is designed to be flexible and forgiving, so feel empowered to make it your own!
We hope you enjoy making and devouring this incredible Spicy Salmon Sushi Bake Recipe. It’s a crowd-pleaser and a personal favorite, perfect for a weeknight dinner or a gathering with friends. Happy baking!
Frequently Asked Questions:
Q: Can I make the Spicy Salmon Sushi Bake Recipe ahead of time?
A: Yes, you can! You can prepare the rice and the salmon mixture separately and store them in the refrigerator. Assemble and bake just before you’re ready to serve. It might require a slightly longer baking time if it’s completely chilled.
Q: What kind of salmon is best for the Spicy Salmon Sushi Bake Recipe?
A: For this recipe, a medium-fatty salmon like Atlantic salmon or sockeye salmon works beautifully. The fat content helps keep the salmon moist and flavorful during baking. Ensure it’s fresh and skinless for the best texture.
Q: How spicy is the Spicy Salmon Sushi Bake Recipe typically? Can I adjust the spice level?
A: The spice level can be adjusted quite easily! The heat primarily comes from sriracha or chili garlic sauce. If you prefer it milder, start with less and add more to taste. For extra spice, you can increase the amount of sauce or add a pinch of cayenne pepper to the salmon mixture.
Spicy Salmon Sushi Bake – Easy & Delicious Recipe
A simple and delicious recipe for a spicy salmon sushi bake, featuring seasoned sushi rice and a creamy, sriracha-spiked salmon topping, baked to perfection.
Ingredients
-
2 cups sushi rice, uncooked
-
2.5 cups water
-
1/4 cup rice vinegar
-
2 tablespoons granulated sugar
-
1 teaspoon salt
-
1 lb fresh salmon fillet, skinless and diced into bite-sized pieces
-
1/2 cup mayonnaise
-
2 tablespoons Sriracha sauce, or more depending on your spice preference
-
1 teaspoon sesame oil
-
1/2 cup green onions, thinly sliced, with extra reserved for garnish
-
1 sheet nori (seaweed), cut into small strips or crumbled
-
Tobiko (flying fish roe), optional, for garnish
Instructions
-
Step 1
Rinse the sushi rice thoroughly under cold running water until the water runs clear. Drain well. Combine the rinsed rice with 2.5 cups of water in a medium saucepan. Bring to a boil over medium-high heat, then reduce heat to low, cover, and simmer for 15 minutes. Remove from heat and let sit, covered, for another 10 minutes. -
Step 2
While the rice rests, whisk together 1/4 cup rice vinegar, 2 tablespoons sugar, and 1 teaspoon salt in a small bowl until dissolved. Transfer the cooked rice to a large, shallow non-metallic bowl. Gradually pour the seasoned vinegar mixture over the hot rice. Gently fold and separate the rice with a rice paddle or wooden spoon until the seasoning is evenly distributed and the rice cools to room temperature. -
Step 3
In a medium bowl, combine 1 lb diced salmon, 1/2 cup mayonnaise, 2 tablespoons Sriracha sauce, 1 teaspoon sesame oil, and half of the chopped green onions. Gently fold until the salmon is evenly coated. -
Step 4
Preheat oven to 400°F (200°C). Lightly grease a 9×13 inch baking dish. Spread the seasoned sushi rice evenly in the bottom of the dish. Spoon the spicy salmon mixture evenly over the rice. Sprinkle the nori strips over the salmon layer. -
Step 5
Bake for 15-20 minutes, or until the salmon is cooked through and the topping is bubbly and lightly golden. Let cool slightly. Garnish with reserved green onions and tobiko (if using). Serve warm.
Important Information
Nutrition Facts (Per Serving)
It is important to consider this information as approximate and not to use it as definitive health advice.
Allergy Information
Please check ingredients for potential allergens and consult a health professional if in doubt.


Leave a Comment