

Jalapeno Popper Cheese Ball: Get ready to revolutionize your appetizer game! If you’re a fan of those irresistible, creamy, spicy bites, then this is the ultimate crowd-pleaser you’ve been dreaming of. We’ve taken all the incredible flavors of a classic jalapeno popper – the spicy kick of jalapeños, the savory richness of cheese, and that irresistible smoky crunch – and transformed them into a shareable, dippable masterpiece. This isn’t just any cheese ball; it’s an explosion of taste and texture that will have your guests beggin extractg for the recipe. Imagin extracte a perfectly seasoned, slightly spicy, incredibly creamy sphere, just waiting to be devoured with your favorite crackers or veggies. What makes our Jalapeno Popper Cheese Ball so special is its incredible balance – it delivers that satisfying heat without overpowering, and its versatility makes it perfect for game days, holidays, or any occasion that calls for a touch of indulgence.

Jalapeno Popper Cheese Ball
Are you looking for the ultimate appetizer that’s bursting with flavor and guaranteed to be the star of your next gathering? Look no further than this Jalapeno Popper Cheese Ball! It’s a delightful fusion of creamy, cheesy, spicy, and smoky elements that mimics all the best parts of a classic jalapeno popper, but in a shareable and incredibly addictive dip form. This recipe is surprisingly simple to make, and the results are simply spectacular. It’s perfect for game days, holiday parties, or just a fun weekend treat. Let’s get started!
Ingredients:
Making Your Masterpiece: Step-by-Step Instructions
The beauty of this cheese ball lies in its straightforward assembly. The key to success is ensuring your cream cheese is truly softened – this makes for a much smoother and easier-to-mix base. If you forget to leave it out, you can gently warm it in the microwave for about 15-20 seconds on low power, but be careful not to melt it!
Phase 1: Building the Creamy Base
1. In a large mixing bowl, combine the 2 boxes of slightly softened cream cheese with the 2 tablespoons of sour cream. This is where the magic begin extracts! Use a sturdy spoon or a hand mixer on low speed to thoroughly cream these two ingredients together until they are completely smooth and well-incorporated. You want a luxuriously creamy foundation, free of any lumps. Scrape down the sides of the bowl as needed to ensure everything is mixed evenly. Next, sprinkle in the ¾ teaspoon of garlic powder, ½ teaspoon of onion powder, and ¼ teaspoon of fresh ground black pepper. These spices are essential for building that signature savory flavor profile. Mix them in until they are evenly distributed throughout the cream cheese mixture. Don’t be shy with the pepper; freshly ground pepper offers a much more vibrant kick than pre-ground.
Phase 2: Incorporating the Flavor Powerhouses
2. Now it’s time to add the stars of the show! Add 1 ½ cups of the shredded sharp cheddar cheese (remember, we’re reserving ½ cup for later), half of the chopped crispy cooked beef beef bacon (about 5 slices worth), half of the minced jalapenos (about 1 jalapeno), and half of the chopped green onions (about ¼ cup). Gently fold these ingredients into the cream cheese mixture. You can use your spoon or a spatula for this. The goal here is to distribute these flavorful additions evenly without overmixing, which could make the mixture tough. I like to leave some larger bits of beef bacon and jalapeno visible, as they add delightful bursts of texture and flavor when you bite into the cheese ball. If you prefer a milder heat, you can certainly reduce the amount of jalapeno you add at this stage.
Phase 3: Shaping and Chilling for Perfection
3. Once all the ingredients are well combined, it’s time to shape the cheese ball. You can do this right in the bowl, or if you want a more perfect sphere, you can transfer the mixture to a piece of plastic wrap. Lay out a large piece of plastic wrap, place the cheese mixture in the center, and then use the wrap to help you form a compact ball. Roll it gently between your hands or use the plastic wrap to sculpt it into your desired shape. It doesn’t have to be perfectly round; a rustic mound works beautifully too! Once shaped, wrap the cheese ball tightly in the plastic wrap. Refrigerate the cheese ball for at least 1 hour, or preferably 2 hours. This chilling period is crucial; it allows the flavors to meld together and, more importantly, firms up the cheese ball, making it much easier to handle and coat in the final toppings. Don’t skip this step!
Phase 4: The Glorious Coating
4. When your cheese ball has chilled and is nice and firm, it’s time for the grand finnon-alcoholic ale – the coating! This is where we add that extra layer of texture and visual appeal. In a shallow dish or on a plate, combine the reserved ½ cup of shredded sharp cheddar cheese, the remaining half of the chopped crispy cooked beef beef bacon, the remaining half of the minced jalapenos, and the remaining ¼ cup of chopped green onions. Gently unwrap your chilled cheese ball and place it in the center of this topping mixture. Carefully and gently roll the cheese ball around in the toppings, pressing lightly with your hands to ensure the mixture adheres all over. You want a generous coating, so don’t be afraid to really press the toppings on. This combination of textures and flavors creates an irresistible crust that complements the creamy interior perfectly.
Phase 5: Serving Your Irresistible Creation
5. Once your Jalapeno Popper Cheese Ball is beautifully coated, it’s ready to be served! You can serve it immediately, or if you have time, you can refrigerate it for another 30 minutes to allow the coatings to set a little more. Transfer the cheese ball to a serving platter. I love to place it on a festive platter with an assortment of crackers, pretzel crisps, baguette slices, or even vegetable sticks like celery and carrot sticks. These provide the perfect vehicles for scooping up every delicious bite of this flavor-packed appetizer. For an extra touch, you can even tuck a few extra jalapeno slices or beef bacon crum extractbles around the base of the cheese ball for a more visually striking presentation. This cheese ball is best enjoyed at room temperature, so allow it to sit out for about 15-20 minutes before serving if it’s been refrigerated for a long time. Get ready for the compliments to roll in!

Conclusion:
There you have it – the ultimate guide to crafting a sensational Jalapeno Popper Cheese Ball! This recipe is an absolute winner because it perfectly captures those irresistible jalapeno popper flavors in a delightfully dippable, make-ahead appetizer. The creamy, tangy cheese blend, the subtle heat from the fresh jalapenos, and the smoky crunch from the beef bacon and seasonings combine to create a flavor explosion that will have your guests beggin extractg for more. It’s incredibly satisfying to assemble and even more rewarding to see the smiles it brings to the table.
I love serving this cheese ball with a variety of dippers, from sturdy tortilla chips and crackers to fresh vegetable sticks like celery and bell peppers. For a truly festive spread, consider adding some sliced baguette or pretzel bites. Don’t be afraid to get creative with variations! You can adjust the spice level by adding more or fewer jalapenos, or even swapping in a different type of pepper. Adding a touch of honey to the cream cheese mixture can offer a delightful sweet and spicy contrast, and a sprinkle of smoked paprika on top adds another layer of smoky depth. I truly encourage you to give this Jalapeno Popper Cheese Ball a try – it’s guaranteed to be a hit at your next gathering!
Frequently Asked Questions:
Can I make this cheese ball ahead of time?
Absolutely! This Jalapeno Popper Cheese Ball is a fantastic make-ahead appetizer. You can prepare it completely up to 2 days in advance, wrap it tightly in plastic wrap, and refrigerate. Just let it sit at room temperature for about 15-20 minutes before serving to soften slightly for easier dipping.
What if I don’t like spicy food? Can I reduce the heat?
Yes, you can definitely tone down the heat! To make it less spicy, remove the seeds and membranes from the jalapenos before chopping them finely. You can also use fewer jalapenos or even substitute them with a milder pepper like a poblano pepper for a hint of flavor without the intense heat. Adding a touch of honey can also help balance the spice.
What are some other good dipper options for this cheese ball?
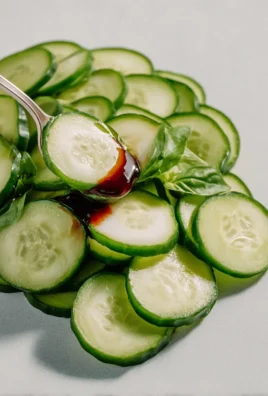
Beyond the usual suspects like tortilla chips and crackers, this cheese ball pairs wonderfully with pumpernickel bread, rye crisps, mini toasts, or even cucumber slices for a refreshing crunch. For a heartier option, consider serving it with mini breadsticks or slices of grilled baguette.

Jalapeno Popper Cheese Ball
A festive and flavorful cheese ball inspired by jalapeno poppers, perfect for gatherings.
Ingredients
-
2 boxes (8 ounces) cream cheese, slightly softened
-
2 tablespoons sour cream
-
3/4 teaspoon garlic powder
-
1/2 teaspoon onion powder
-
1/4 teaspoon fresh ground black pepper
-
2 cups shredded sharp cheddar cheese, divided
-
10 slices crispy cooked pork bacon, chopped, divided
-
2 jalapenos, minced, divided
-
1/2 cup chopped green onions, divided
Instructions
-
Step 1
In a large bowl, beat together the softened cream cheese and sour cream until smooth. -
Step 2
Stir in the garlic powder, onion powder, and black pepper. -
Step 3
Add 1 1/2 cups of the shredded cheddar cheese, 1/2 of the chopped pork bacon, 1/2 of the minced jalapenos, and 1/2 of the chopped green onions. Mix well to combine. -
Step 4
On a clean surface, shape the cheese mixture into a ball. -
Step 5
In a separate shallow dish, combine the reserved 1/2 cup shredded cheddar cheese, remaining chopped pork bacon, remaining minced jalapenos, and remaining chopped green onions. -
Step 6
Gently roll the cheese ball in the topping mixture to coat evenly. Cover and refrigerate for at least 30 minutes before serving.
Important Information
Nutrition Facts (Per Serving)
It is important to consider this information as approximate and not to use it as definitive health advice.
Allergy Information
Please check ingredients for potential allergens and consult a health professional if in doubt.


Leave a Comment