
Renee Paj is more than just a dessert; it’s a whispered secret passed down through generations, a comforting embrace in every bite. Have you ever craved a taste of pure, unadulterated joy, a sweet confection that feels both familiar and utterly delightful? That’s the magic of Renee Paj. It’s the kind of dish that gathers families, ignites conversations, and leaves a lingering sweetness long after the last spoonful. What makes this particular recipe so beloved? It’s the perfect harmony of textures and flavors – a velvety smooth custard base, often kissed with a hint of vanilla or a subtle spice, crowned with a delicate, crum extractbly topping. This isn’t just any pastry; it’s an experience, a testament to simple ingredients transformed into something truly extraordinary. I’ve been making this Renee Paj for years, and each time, it brings smiles and requests for more. Get ready to discover why this classic is so incredibly special.

Renee Paj
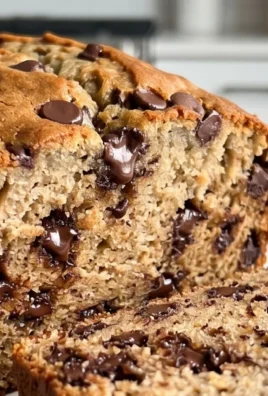
I’m so excited to share this recipe with you all! It’s a truly special one, affectionately nicknamed ‘Renee Paj’ in my family. This isn’t your average banana bread or crum extractbly oat bar. It’s a delightful hybrid, a soft, moist, and utterly delicious bake that’s perfect for breakfast, a snack, or even a light dessert. The inspiration came from wanting something wholesome, comforting, and a fantastic way to use up those overripe bananas that always seem to appear on my counter. The combination of tender banana, hearty oats, and a hint of cinnamon creates a flavor profile that’s both familiar and exciting. Plus, it’s incredibly forgiving, making it a great recipe for bakers of all levels. I’ve tinkered with this recipe for a while, and I think I’ve finally landed on the perfect balance of ingredients for that irresistible texture and taste. Let’s get baking!
Ingredients:
Getting Started: Prepping Your Oven and Pan
The first step in any great bake is to preheat your oven and prepare your baking vessel. For this ‘Renee Paj’, I recommend a 9×13 inch baking pan. Generously grease and flour your pan. You can use butter or cooking spray for greasing, and then dust it with a light coating of flour, tapping out any excess. Alternatively, you can line your pan with parchment paper, leaving an overhang on the sides. This makes lifting the finished ‘Renee Paj’ out of the pan much easier and cleanup a breeze. Preheat your oven to 350 degrees Fahrenheit (175 degrees Celsius). Having your oven at the correct temperature from the start ensures even baking and the best possible texture for your ‘Renee Paj’.
Mixing the Dry Ingredients
In a large mixing bowl, we’ll combine all of our dry ingredients. This is where we build the foundation for our ‘Renee Paj’. Add the old fashioned oats, all-purpose flour, packed light brown sugar, kosher salt, baking soda, baking powder, and ground cinnamon. Whisk these ingredients together thoroughly. It’s important to ensure that the leavening agents (baking soda and baking powder) are evenly distributed throughout the flour mixture. This will help your ‘Renee Paj’ rise properly and achieve a delightful, airy crum extractb. Taking a moment to whisk well now will prevent pockets of unmixed ingredients later.
Creating the Banana Base
Now, for the star of the show: the bananas! In a separate medium bowl, or in the bowl of a stand mixer, mash the ripe banana chunks until they are smooth. You want them to be well-mashed, with no large lumps remaining. The riper the bananas, the sweeter and more intensely flavored your ‘Renee Paj’ will be, so don’t be afraid of those spotty brown ones! Once mashed, add the eggs, pure vanilla extract, and cooking oil to the banana mixture. Whisk everything together until it is well combined and smooth. The oil is crucial here for moisture and a tender crum extractb, and the vanilla extract adds that classic, comforting aroma and flavor.
Combining Wet and Dry for the Perfect Batter
It’s time to bring our wet and dry ingredients together! Pour the wet banana mixture into the bowl with the dry ingredients. Using a spatula or wooden spoon, gently fold the ingredients together until they are just combined. Be careful not to overmix! Overmixing can develop the gluten in the flour too much, leading to a tougher ‘Renee Paj’. You should still see a few streaks of flour; this is perfectly fine. If you’re adding the optional chopped walnuts, now is the time to gently fold them in as well. Distribute them evenly throughout the batter.
Baking Your ‘Renee Paj’ to Golden Perfection
Pour the batter into your prepared baking pan and spread it evenly. Place the pan in your preheated oven. Bake for 30 to 35 minutes, or until a toothpick inserted into the center comes out clean. The top should be golden brown and slightly firm to the touch. The aroma that will fill your kitchen during this time is simply heavenly! Keep an eye on it towards the end of the baking time, as ovens can vary. If the top starts to brown too quickly, you can loosely tent it with aluminum foil.
Cooling and Enjoying Your Delicious Creation
Once baked, carefully remove the ‘Renee Paj’ from the oven. Let it cool in the pan on a wire rack for at least 15-20 minutes before attempting to remove it. This allows it to set up properly. If you used parchment paper, you can lift it out using the overhang. If you didn’t, you might need to run a knife around the edges to loosen it before inverting it onto the wire rack to cool completely. Once cooled, slice it into squares or bars. ‘Renee Paj’ is wonderful on its own, but I also love it served with a dollop of whipped cream or a drizzle of honey. Enjoy every delicious bite!
Conclusion:
So there you have it – a delightful and surprisingly simple recipe for Renee Paj! This dish is a true gem because it strikes the perfect balance between comforting familiarity and exciting flavor. The creamy texture, infused with just the right amount of sweetness and that hint of spice (if you choose!), makes it incredibly satisfying. It’s the kind of recipe that feels special enough for guests but is also perfectly suited for a cozy weeknight treat. I truly hope you’ll give this Renee Paj a try; I’m confident you’ll fall in love with its effortless charm and delicious results.
For serving suggestions, I love a warm Renee Paj straight from the oven, perhaps with a dollop of fresh whipped cream or a sprinkle of cinnamon. It’s also fantastic chilled, making it a wonderful dessert for a make-ahead meal. If you’re feeling adventurous, consider some variations! You could incorporate a handful of fresh berries into the batter before baking, or add a touch of citrus zest for a brighter flavor profile. Nutty additions like chopped pecans or walnuts also work wonderfully to add a pleasant crunch. Don’t be afraid to experiment and make this Renee Paj your own!
Frequently Asked Questions:
Can I make Renee Paj ahead of time?
Absolutely! Renee Paj is an excellent make-ahead dessert. You can bake it completely, let it cool, and then store it in an airtight container in the refrigerator for up to 3 days. It’s delicious served chilled or gently reheated.
What can I use if I don’t have (specific ingredient)?
The beauty of this Renee Paj recipe is its flexibility. If you’re missing a specific ingredient, don’t hesitate to substitute! For instance, if you don’t have buttermilk, you can create a substitute by adding 1 tablespoon of vinegar or lemon juice to 1 cup of milk and letting it sit for 5 minutes. For sweeteners, you can adjust the type and amount based on your preference, though be mindful of how different sweeteners might affect moisture content.
Is Renee Paj best served warm or cold?
Both are wonderful! Served warm, it has a comforting, gooey quality, especially with toppings. Chilled, it firms up slightly and offers a refreshing dessert experience. The choice really depends on your mood and the occasion!
Renee Paj
A delightful and simple banana bread variation, perfect for a quick breakfast or snack.
Ingredients
-
1 cup old fashioned oats
-
1 1/4 cups all purpose flour
-
1/2 cup light brown sugar, packed
-
1/2 tsp. kosher salt
-
1/2 tsp. baking soda
-
1/4 tsp. baking powder
-
1/2 tsp. ground cinnamon
-
3 large, ripe bananas, cut into chunks
-
2 large eggs
-
1 tsp. pure vanilla extract
-
3 TBSP cooking oil (corn, canola, etc)
-
1/3 cup chopped walnuts (optional)
Instructions
-
Step 1
Preheat your oven to 350°F (175°C). Grease and flour a loaf pan. -
Step 2
In a large bowl, whisk together the oats, flour, brown sugar, salt, baking soda, baking powder, and cinnamon. -
Step 3
In a separate bowl, mash the ripe bananas. Then, whisk in the eggs and vanilla extract. -
Step 4
Add the wet ingredients to the dry ingredients and stir until just combined. Do not overmix. Fold in the chopped walnuts if using. -
Step 5
Pour the batter into the prepared loaf pan and spread evenly. -
Step 6
Bake for 50-60 minutes, or until a wooden skewer inserted into the center comes out clean. -
Step 7
Let the bread cool in the pan for 10 minutes before inverting it onto a wire rack to cool completely.
Important Information
Nutrition Facts (Per Serving)
It is important to consider this information as approximate and not to use it as definitive health advice.
Allergy Information
Please check ingredients for potential allergens and consult a health professional if in doubt.

Leave a Comment