
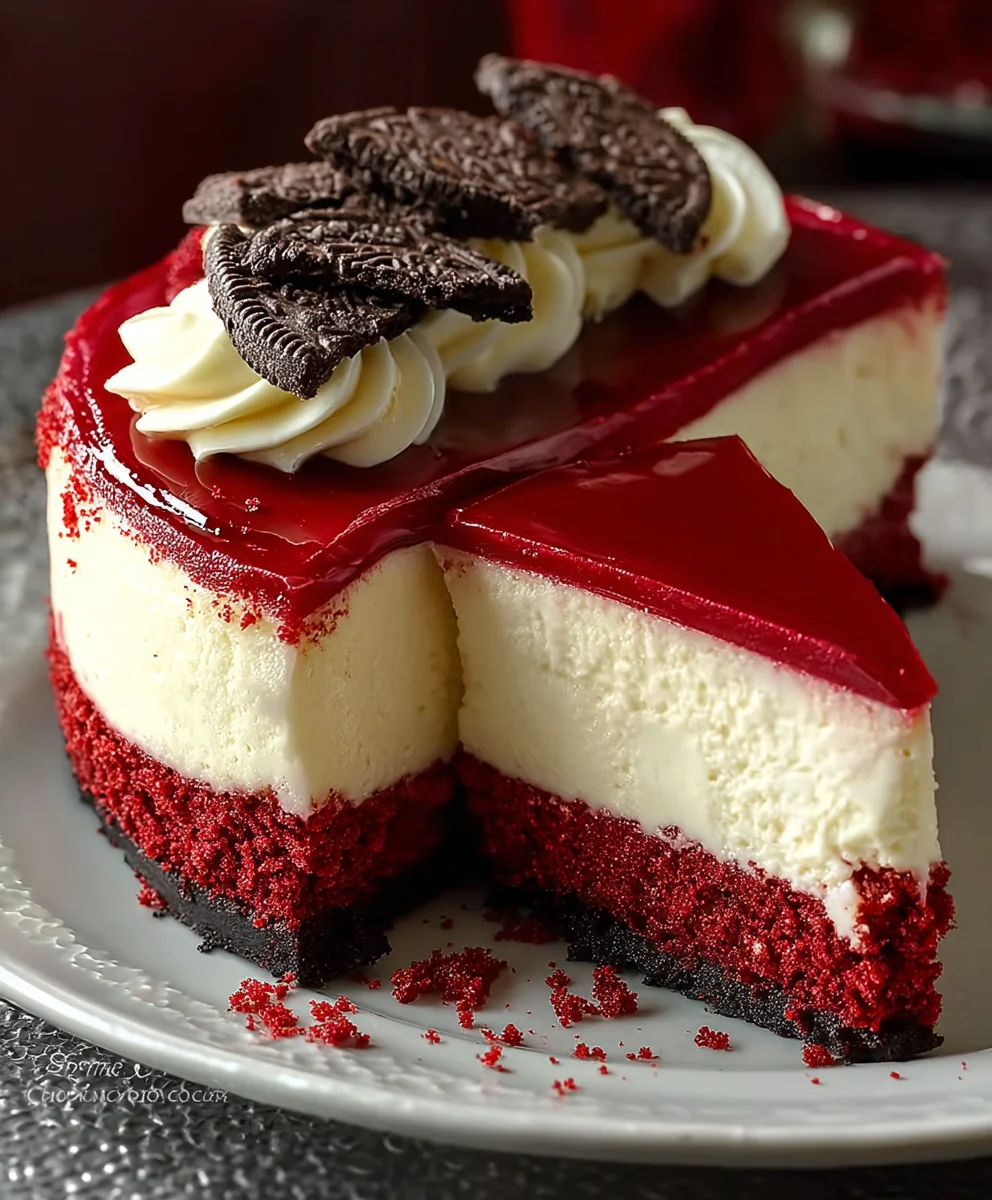
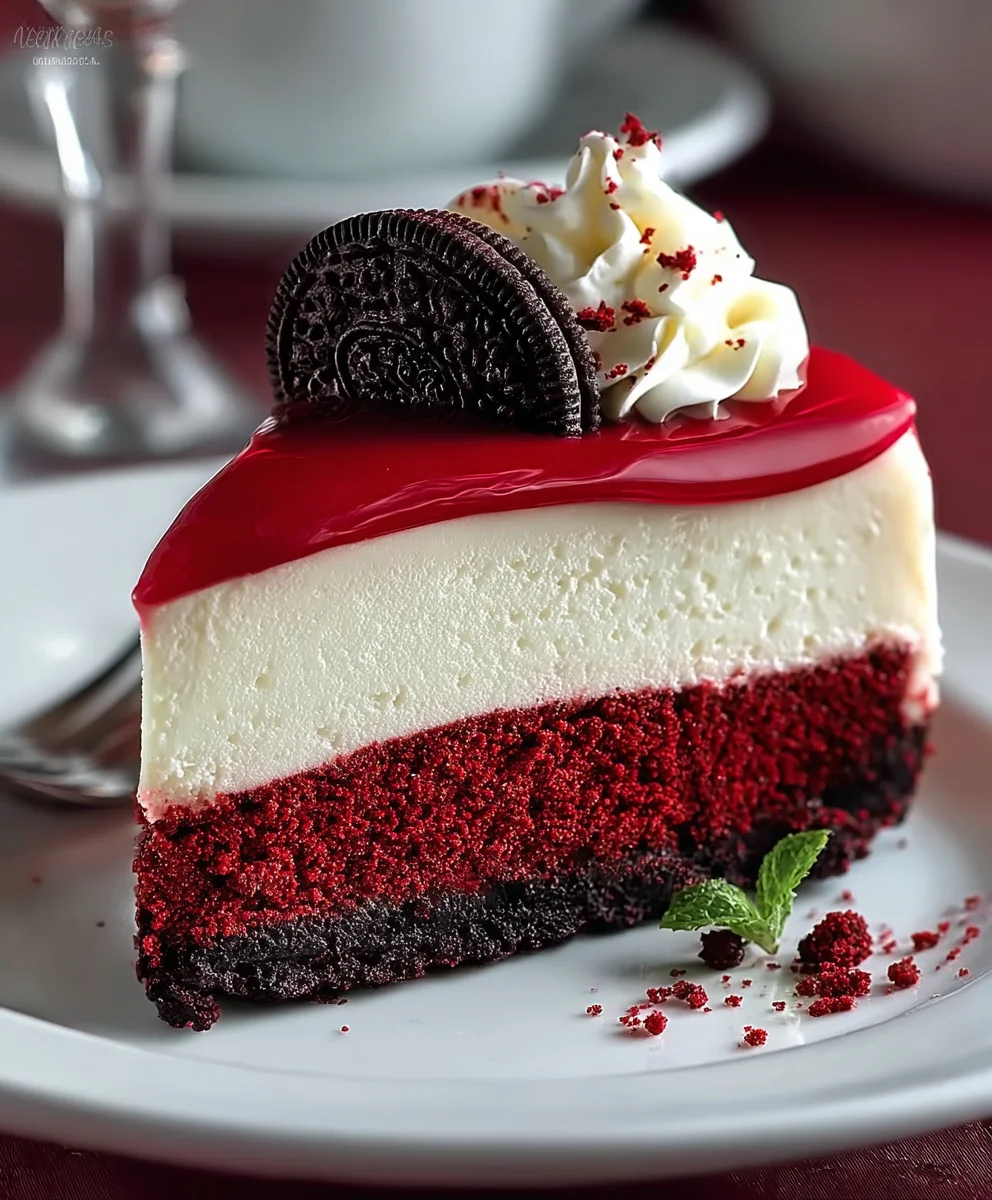
Red Velvet Cheesecake is more than just a dessert; it’s a culinary experience that captivates the senses. That deep, ruby hue promises something decadent, and the taste certainly delivers. There’s a reason why this particular dessert has become a showstopper at celebrations, a coveted treat on dessert menus, and a beloved indulgence for so many. The magic of Red Velvet Cheesecake lies in its perfect marriage of two iconic flavors. Imagin extracte the rich, slightly tangy, and wonderfully moist texture of a classic red velvet cake, now seamlessly blended with the cool, creamy, and luxurious smoothness of a perfectly set cheesecake. This isn’t just a layered dessert; it’s a harmonious fusion where each element enhances the other, creating a symphony of sweetness with a hint of cocoa and a whisper of vanilla. What truly sets this Red Velvet Cheesecake apart is the irresistible contrast between the tender cake crum extractb and the velvety cheesecake filling, making every bite an adventure in texture and flavor.

Ingredients:
- All-purpose flour: 1 1/2 cups, for structure.
- Unsweetened cocoa powder: 2 tsp, for a hint of chocolate flavor.
- Salt: 1/2 tsp, to enhance flavor.
- Unsalted butter: 1/2 cup, at room temperature, for moisture.
- Granulated sugar: 1 cup, for sweetness.
- Sour cream: 1/2 cup, at room temperature, for moistness.
- Vegetable oil: 1/4 cup, to keep the cake moist.
- Pure vanilla extract: 2 tsp, for flavor.
- Large eggs: 2, at room temperature, for structure.
- Red food coloring: 4 tsp, for classic red velvet color.
- Buttermilk: 2/3 cup, at room temperature, for tenderness.
- Baking soda: 1 tsp, to help the cake rise.
- White vinegar: 1 tsp, to activate the baking soda.
- Oreos (filling removed, wafers crushed): 10, for the crust.
- Full-fat cream cheese: 24 oz, at room temperature, for creaminess.
Preparing the Crust
- To begin extract crafting our stunning Red Velvet Cheesecake, let’s start with the all-important crust. You’ll need to take those 10 Oreos, ensuring you’ve meticulously removed all of their creamy white filling – set that aside for another delicious project if you wish! Once the filling is gone, place the dark chocolate wafers into a food processor or a sturdy zip-top bag. Pulse or bash them with a rolling pin until you have fine crum extractbs. We’re aiming for a consistency that resembles coarse sand.
- In a medium bowl, combine these finely crushed Oreo wafers with 4 tablespoons of melted unsalted butter (you’ll need to melt half of your total 1/2 cup of butter for this step). Mix this thoroughly untilrum extractery crumb is moistened by the butter. It should clump together when you press it.
- Now, take a 9-inch springform pan. Press this buttery Oreo mixture firmly and evenly into the bottom of the pan. Use the bottom of a measuring cup or the flat side of a glass to create a compact, even layer. This is crucial for a stable crrum extract that won’t crumble when you slice into your masterpiece. Place the prepared crust in the refrigerator while you work on the cheesecake filling. This chilling time will help it set up nicely.
Making the Red Velvet Cheesecake Filling
- In a large mixing bowl, add the softened full-fat cream cheese. Using an electric mixer (handheld or stand mixer with a paddle attachment), beat the cream cheese on medium speed until it is completely smooth and creamy, with no lumps whatsoever. This step is vital for a silky-smooth cheesecake texture, so don’t rush it. Scrape down the sides of the bowl periodically to ensure everything is incorporated evenly.
- Gradually add the granulated sugar, about half a cup at a time, to the cream cheese, beating well after each addition until fully combined. Continue to beat until the mixture is light and fluffy. Now, incorporate the sour cream, vegetable oil, and pure vanilla extract. Mix on low speed until just combined. Overmixing at this stage can introduce too much air, which can lead to cracks in your cheesecake.
- In a separate small bowl, whisk together the large eggs one at a time, mixing well after each addition. Be careful not to overmix. Once the eggs are incorporated, add the red food coloring. Stir gently until you achieve a vibrant, consistent red hue throughout the egg mixture. This vibrant color is the signature of our Red Velvet Cheesecake.
- In a small cup, combine the buttermilk and baking soda. This mixture will fizz up slightly – that’s the reaction that will give orum extractcheesecake a tender crumb. Let it sit for about 30 seconds to a minute to allow the reaction to fully develop, then add the white vinegar. This creates an acidic base that, when combined with the baking soda, will provide lift and tenderness.
- Now it’s time to bring all the elements of the filling together. Gently fold the red egg mixture into the cream cheese mixture. Then, carefully add the buttermilk mixture. Mix on the lowest speed or by hand just until everything is combined. Again, the key here is to avoid overmixing. We want a smooth, homogenous batter that’s a beautiful, deep red color.
Baking and Cooling Your Red Velvet Cheesecake
- Preheat your oven to 325°F (160°C). Remove the chilled crust from the refrigerator. Carefully pour the red velvet cheesecake filling over the prepared Oreo crust. Smooth the top with a spatula to ensure an even surface.
- For the most even baking and to prevent cracks, I highly recommend baking your Red Velvet Cheesecake in a water bath. Wrap the bottom of your springform pan tightly with heavy-duty aluminum foil, ensuring there are no gaps where water could seep in. Place the foil-wrapped pan into a larger roasting pan. Carefully pour hot water into the roasting pan, about halfway up the sides of the springform pan. This gentle, moist heat is the secret to a perfectly baked cheesecake.
- Bake for approximately 60 to 75 minutes. The cheesecake is ready when the edges are set, but the center still has a slight jiggle when you gently shake the pan. It should look mostly opaque, but still have a bit of movement in the very middle. Overbaking will result in a dry cheesecake.
- Once baked, turn off the oven and crack the oven door open slightly. Leave the cheesecake in the oven for another hour to cool down gradually. This slow cooling process further helps to prevent cracks and ensures a creamy texture. After an hour in the slightly open oven, remove the cheesecake from the water bath and the roasting pan. Let it cool completely on a wire rack at room temperature.
- Once completely cooled to room temperature, cover the cheesecake loosely with plastic wrap and refrigerate for at least 6 hours, or preferably overnight. This chilling period is absolutely essential for the flavors to meld and the cheesecake to set up perfectly. Once chilled, carefully run a thin knife around the edge of the springform pan before releasing the sides.
Conclusion:
And there you have it! You’ve just unlocked the secret to creating a show-stopping Red Velvet Cheesecake that’s sure to impress. This recipe balances the rich, tangy creaminess of cheesecake with the iconic, slightly chocolatey flavor and vibrant hue of red velvet cake. We’ve walked through every step, from crafting the perfect crust to achieving that luscious, smooth filling. Don’t be intimidated by its impressive appearance; this dessert is surprisingly manageable for home bakers of all levels.
For the ultimate presentation, consider serving your Red Velvet Cheesecake with a dollop of fresh whipped cream, a scattering of chocolate shavings, or even a few fresh raspberries. It’s also a fantastic centerpiece for holidays and special occasions. If you’re feeling adventurous, try swirling a bit of extra red velvet batter into the cheesecake filling before baking, or experiment with a cream cheese frosting topping for an extra layer of indulgence.
We encourage you to give this delightful Red Velvet Cheesecake a try. The joy of sharing a homemade treat, especially one as visually stunning and delicious as this, is truly unmatched. Happy baking!
Frequently Asked Questions:
Q1: My cheesecake cracked. What went wrong?
Don’t worry, a cracked Red Velvet Cheesecake still tastes amazing! Cracks often happen due to over-baking, a rapid temperature change, or opening the oven door too frequently. Ensure you’re baking until the edges are set but the center still has a slight wobble. Cooling it gradually by turning off the oven and leaving the door ajar can also help prevent cracks.
Q2: Can I make this cheesecake ahead of time?
Absolutely! In fact, Red Velvet Cheesecake often tastes even better the next day after the flavors have had a chance to meld. It needs to chill for at least 4-6 hours, or ideally overnight, before serving. Once completely chilled, it can be stored in the refrigerator, covered, for up to 3-4 days.
Red Velvet Cheesecake Dreamy Dessert Recipe
A decadent and dreamy Red Velvet Cheesecake with a classic Oreo crust, perfect for any occasion. This recipe guides you through creating a smooth, creamy, and vibrantly red cheesecake.
Ingredients
-
1 1/2 cups All-purpose flour
-
2 tsp Unsweetened cocoa powder
-
1/2 tsp Salt
-
1/2 cup Unsalted butter, at room temperature
-
1 cup Granulated sugar
-
10 Oreos (filling removed, wafers crushed)
-
24 oz Full-fat cream cheese, at room temperature
-
1/2 cup Sour cream, at room temperature
-
1/4 cup Vegetable oil
-
2 tsp Pure vanilla extract
-
2 Large eggs, at room temperature
-
4 tsp Red food coloring
-
2/3 cup Buttermilk, at room temperature
-
1 tsp Baking soda
-
1 tsp White vinegar
Instructions
-
Step 1
For the crust: Crush 10 Oreo wafers (filling removed) into fine crumbs. Combine with 4 tablespoons melted unsalted butter and press firmly into the bottom of a 9-inch springform pan. Refrigerate while preparing the filling. -
Step 2
For the filling: Beat 24 oz cream cheese until smooth. Gradually add 1 cup granulated sugar, mixing until fluffy. Incorporate 1/2 cup sour cream, 1/4 cup vegetable oil, and 2 tsp vanilla extract on low speed. Beat 2 large eggs one at a time with 4 tsp red food coloring until combined. Mix 2/3 cup buttermilk with 1 tsp baking soda and 1 tsp white vinegar in a small cup; let fizz. Gently fold the egg mixture into the cream cheese mixture, then carefully add the buttermilk mixture. Mix on the lowest speed or by hand just until combined. Avoid overmixing. -
Step 3
Preheat oven to 325°F (160°C). Pour the filling over the chilled crust. Smooth the top. Wrap the springform pan tightly with foil and place it in a larger roasting pan. Carefully pour hot water into the roasting pan halfway up the sides of the springform pan. -
Step 4
Bake for 60-75 minutes, or until the edges are set and the center has a slight jiggle. Turn off the oven, crack the door open slightly, and leave the cheesecake in the oven for 1 hour to cool gradually. Remove from the water bath and oven, and let cool completely on a wire rack. -
Step 5
Cover loosely with plastic wrap and refrigerate for at least 6 hours, or preferably overnight, to set completely. Run a thin knife around the edge before releasing the sides of the springform pan.
Important Information
Nutrition Facts (Per Serving)
It is important to consider this information as approximate and not to use it as definitive health advice.
Allergy Information
Please check ingredients for potential allergens and consult a health professional if in doubt.
Leave a Comment