
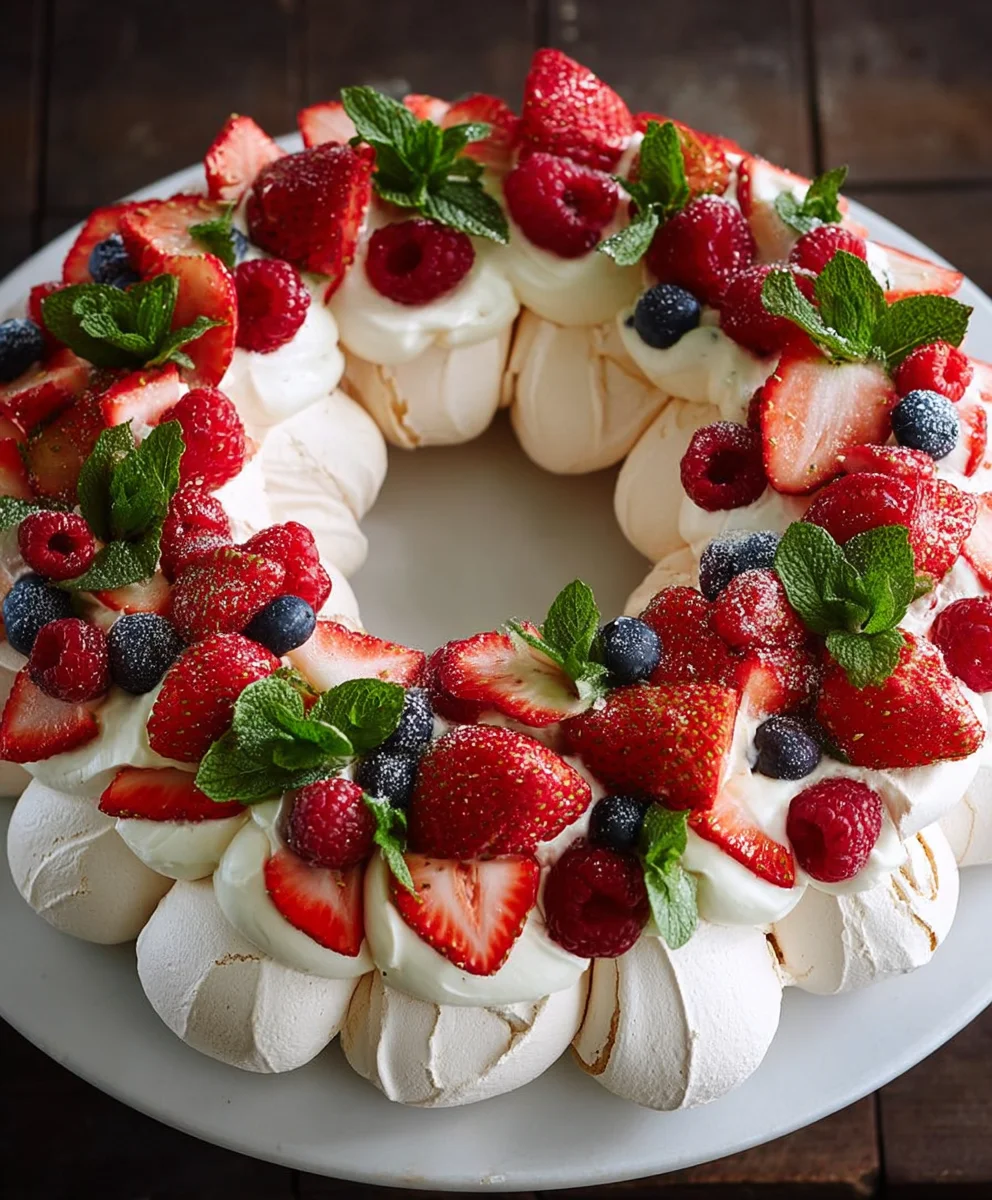
Pull Apart Pavlova Wreath: the dessert that looks as spectacular as it tastes, and is surprisingly simple to create. This isn’t just any pavlova; it’s a celebration in edible form, designed to be shared and savored. Imagin extracte a delicate, crisp meringue shell that cracks ever so slightly with each bite, yielding to a soft, marshmallowy interior. That’s the magic of a perfectly baked pavlova. But what elevates our Pull Apart Pavlova Wreath to an entirely new level is its ingenious design. Instead of one giant, unwieldy disc, we’re creating individual meringue kisses arranged in a beautiful wreath. This makes it incredibly easy for guests to serve themselves, no cutting required! It’s the ultimate dessert for holiday gatherings, birthdays, or simply when you want to impress with minimal fuss. The sheer delight on people’s faces as they pluck their own perfect portion is a reward in itself.

Ingredients:
- 6 extra-large egg whites, at room temperature
- 2 cups icing sugar, also known as powdered sugar, meticulously sifted
- 2 tablespoons cornstarch
- 1 teaspoon pure vanilla extract
- 3 cups heavy cream, or whipping cream, chilled
- 1 cup icing sugar, sifted, for the whipped cream
- 1 teaspoon pure vanilla extract, for the whipped cream
- A generous assortment of fresh fruit, focusing on vibrant berries
- Fresh mint sprigs, for garnish
Making the Meringue Base
Preparing Your Station
Before we begin extract, it’s crucial to ensure your equipment is absolutely spotless. Any trace of grease or fat on your mixing bowl or whisk attachments can prevent your egg whites from whipping up into stiff, glossy peaks. So, give everything a thorough wash and dry. I also find that having your egg whites at room temperature helps them achieve maximum volume. Gently separate your eggs, ensuring no yolk contaminates the whites. Place the egg whites in your clean, dry mixing bowl.
Whipping the Egg Whitesgin extract4>
Begin by whisking the egg whites on a medium speed until they form soft peaks. This means when you lift the whisk, the peaks will curl over. Now, gradually start adding the 2 cups of sifted icing sugar, one tablespoon at a time, while the mixer is still running. Continue to beat until the mixture becomes thick, glossy, and the sugar has completely dissolved. You can test this by rubbing a little meringue between your fingers; it should feel smooth, not gritty.
Adding the Flavor and Stabilizer
Once the sugar is fully incorporated and the meringue is stiff and glossy, gently fold in the 2 tablespoons of cornstarch and 1 teaspoon of vanilla extract. Be careful not to overmix at this stage; you want to maintain as much air in the meringue as possible. The cornstarch acts as a stabilizer, helping to prevent the pavlova from cracking too much and giving it a lovely marshmallowy texture in the center.
Shaping the Wreath
Preheat your oven to 300°F (150°C). Line a large baking sheet with parchment paper. You can draw a large circle on the parchment paper beforehand as a guide, about 10-12 inches in diameter, then flip the paper over so the ink doesn’t transfer to your pavlova. Spoon the meringue mixture onto the prepared baking sheet, shaping it into a wreath. Create a large ring with a hollow center, building up the sides slightly to form a natural well for the cream and fruit later. You can use the back of a spoon or a spatula to create decorative swirls and peaks.
Baking the Pavlova
The Gentle Bake
Place the meringue wreath into the preheated oven. Immediately reduce the oven temperature to 250°F (120°C). Bake for approximately 1 hour and 15 minutes to 1 hour and 30 minutes. The pavlova should be crisp on the outside and pnon-alcoholic ale ivory in color. It will sound hollow when tapped lightly. Avoid opening the oven door during the baking process, as this can cause it to collapse.
Cooling Down
Once the baking time is complete, turn off the oven but leave the pavlova inside with the oven door slightly ajar. This slow cooling process is crucial for preventing cracks and ensuring a perfectly crisp exterior and a chewy, marshmallow-like interior. Let it cool completely in the oven, which could take several hours or even overnight. Once fully cooled, carefully lift the pavlova wreath from the baking sheet using the parchment paper.
Assembling the Pull Apart Pavlova Wreath
Whipping the Cream
While your pavlova is cooling or just before assembling, prepare your whipped cream. In a clean, chilled bowl, whip the 3 cups of cold heavy cream until soft peaks form. Gradually add the 1 cup of sifted icing sugar and 1 teaspoon of vanilla extract. Continue whipping until the cream is thick and holds stiff peaks. Be careful not to overbeat, or you’ll end up with butter.
Decorating Your Masterpiece
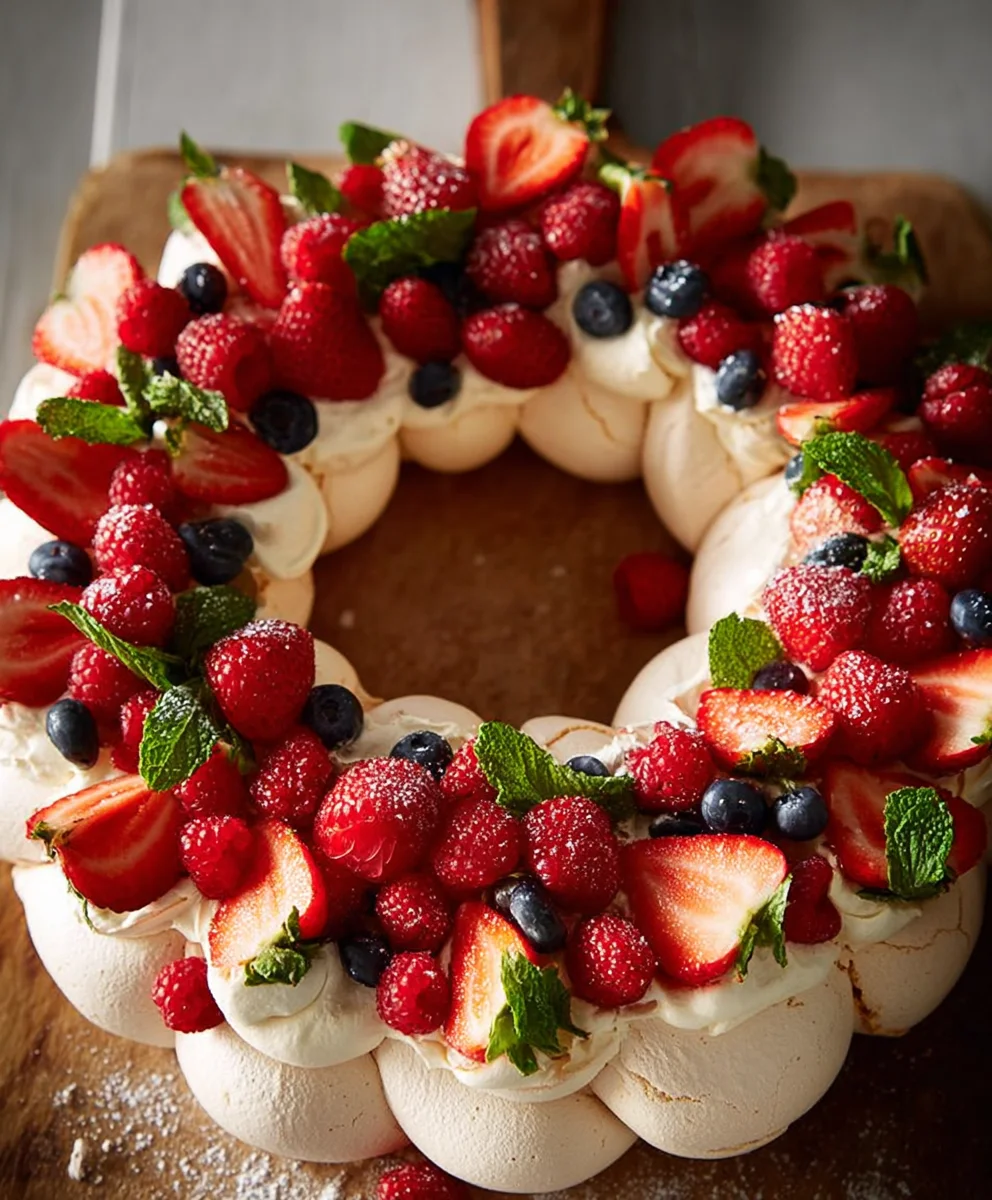
Once your pavlova base is completely cool and ready, carefully transfer it to your serving platter. Spoon or pipe the sweetened whipped cream generously into the hollow center of the wreath, creating a luscious filling. Arrange your beautifully washed and prepared fresh fruit, focusing on a vibrant medley of berries, over the whipped cream. Think about color and tegin extractre when arranging – a mix of strawberries, raspberries, blueberries, and blackberries will look and taste spectacular.
The Finishing Touches
Finally, scatter a few fresh mint sprigs over the fruit for a pop of vibrant green and a refreshing aroma. The mint adds a lovely herbaceous note that complements the sweetness of the pavlova and the tartness of the berries. Serve your Pull Apart Pavlova Wreath immediately. The joy of this dessert is its show-stopping presentation and the delightful textures – crisp meringue, creamy filling, and fresh fruit – that come together in every bite. It’s designed to be pulled apart and shared, making it a perfect centerpiece for any gathering.
Conclusion:
You’ve now mastered the art of creating a stunning and delicious Pull Apart Pavlova Wreath! This recipe is a fantastic centerpiece for any celebration, offering a delightful combination of crispy meringue, soft and chewy interior, and vibrant fresh fruit. We’ve walked through each step, from whipping the egg whites to achieving that perfect pavlova texture, and assembling the beautiful wreath. Remember, practice makes perfect, and even the most rustic-looking pavlova is incredibly rewarding.
For serving, this Pull Apart Pavlova Wreath is best enjoyed fresh. Break off pieces of the meringue and pile them high with whipped cream and your favorite seasonal fruits. Think mixed berries for a classic look, or perhaps tropical fruits like mango and passionfruit for a summery twist. A drizzle of passionfruit coulis or a sprinkle of toasted coconut can add an extra layer of flavor and texture. Don’t be afraid to get creative with your garnishes!
If you’re looking for variations, consider infusing your meringue with a touch of vanilla bean paste or a hint of lemon zest for added fragrance. You could also experiment with different colored meringues by adding a drop of food coloring before baking. For a chocolatey twist, try folding in some cocoa powder into the meringue mixture. Ultimately, this recipe is a canvas for your culinary creativity. I encourage you to give it a try and share your own beautiful creations!
Frequently Asked Questions about the Pull Apart Pavlova Wreath:
Q1: My pavlova cracked, is it ruined?
Not at all! Pavlovas are known for their delicate nature, and a few cracks are perfectly normal and even expected. It doesn’t affect the taste or texture. In fact, a slightly cracked pavlova can sometimes be easier to pull apart. Just embrace its unique charm!
Q2: Can I make the meringue shells for the Pull Apart Pavlova Wreath ahead of time?
Yes, you can! Once baked and completely cooled, you can store the individual meringue pieces in an airtight container at room temperature for up to 2 days. Avoid refrigerating them, as this can make them sticky. Assemble the wreath just before serving to ensure the crispest texture.
Pull-Apart Pavlova Wreath
A festive and impressive dessert featuring a crisp meringue wreath filled with whipped cream and fresh berries, designed to be pulled apart and shared.
Ingredients
-
6 extra-large egg whites, at room temperature
-
2 cups icing sugar, sifted
-
2 tablespoons cornstarch
-
1 teaspoon pure vanilla extract
-
3 cups heavy cream, chilled
-
1 cup icing sugar, sifted, for the whipped cream
-
1 teaspoon pure vanilla extract, for the whipped cream
-
A generous assortment of fresh fruit, focusing on vibrant berries
-
Fresh mint sprigs, for garnish
Instructions
-
Step 1
Prepare your station by ensuring all equipment is spotless. Gently separate egg whites and place them in a clean, dry mixing bowl. Whip egg whites on medium speed until soft peaks form. Gradually add 2 cups of sifted icing sugar, one tablespoon at a time, while the mixer runs, until the mixture is thick, glossy, and the sugar is dissolved. -
Step 2
Gently fold in the cornstarch and 1 teaspoon of vanilla extract into the meringue. Be careful not to overmix. Preheat oven to 300°F (150°C). Line a baking sheet with parchment paper, drawing a 10-12 inch circle as a guide, then flip the paper. Spoon meringue onto the paper and shape into a wreath with a hollow center, building up the sides slightly. -
Step 3
Place the meringue wreath in the preheated oven and immediately reduce the temperature to 250°F (120°C). Bake for 1 hour and 15 minutes to 1 hour and 30 minutes until crisp on the outside and pale ivory in color. Avoid opening the oven door during baking. -
Step 4
Turn off the oven and leave the pavlova inside with the door slightly ajar to cool completely. This slow cooling process is crucial to prevent cracking. Once fully cooled, carefully lift the pavlova wreath from the baking sheet. -
Step 5
While the pavlova cools, prepare the whipped cream. In a clean, chilled bowl, whip the cold heavy cream until soft peaks form. Gradually add 1 cup of sifted icing sugar and 1 teaspoon of vanilla extract, whipping until stiff peaks form. Be careful not to overbeat. -
Step 6
Transfer the cooled pavlova base to a serving platter. Spoon or pipe the whipped cream generously into the hollow center of the wreath. Arrange a colorful assortment of fresh berries over the whipped cream. -
Step 7
Garnish the pavlova wreath with fresh mint sprigs. Serve immediately. This dessert is designed to be pulled apart and shared, making it a perfect centerpiece for gatherings.
Important Information
Nutrition Facts (Per Serving)
It is important to consider this information as approximate and not to use it as definitive health advice.
Allergy Information
Please check ingredients for potential allergens and consult a health professional if in doubt.

Leave a Comment