
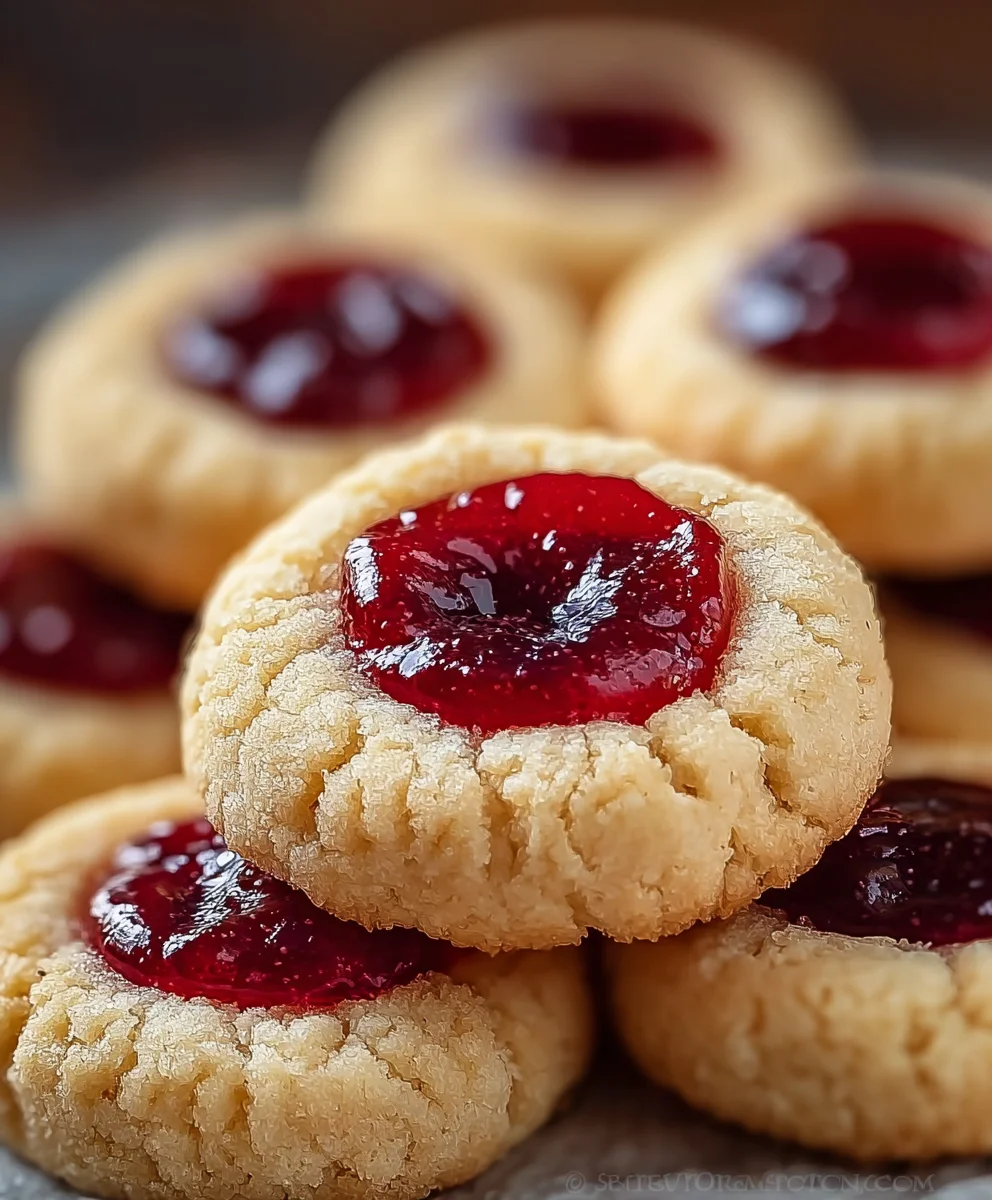
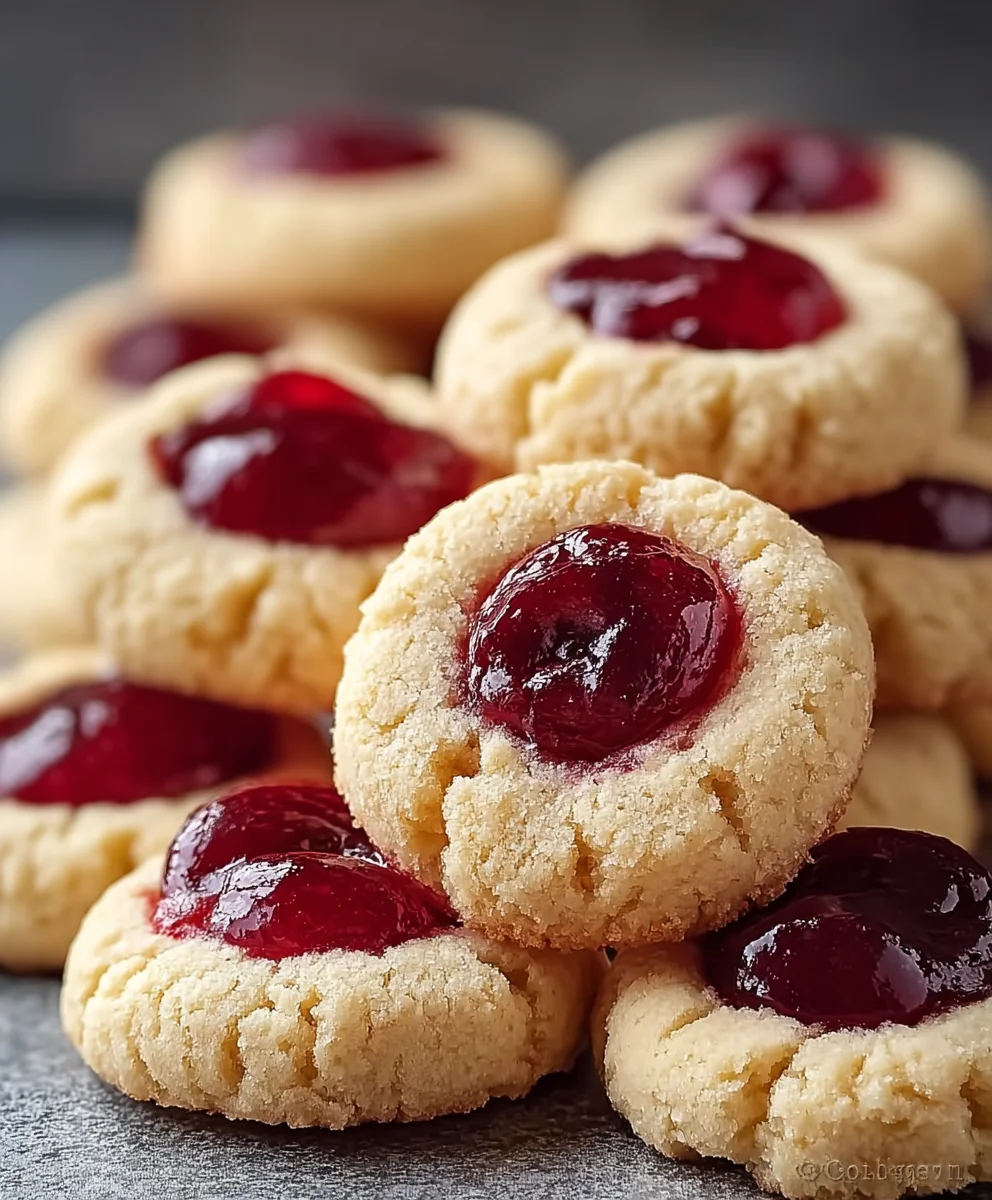
Irresistible Cherry Thumbprint Cookies are more than just a sweet treat; they’re a nostalgic embrace, a tiny burst of sunshine, and a guaranteed smile-maker. Imagin extracte tender, buttery cookie dough gently cradling a jewel-toned dollop of bright cherry filling, baked to golden perfection. It’s no wonder these delightful cookies have captured hearts for generations. Their simple elegance belies the explosion of flavor and texture they offer with every bite. The delicate crum extractble of the cookie, combined with the slightly tart and intensely fruity cherry center, creates a harmonious symphony that’s utterly addictive. We love them for their charming appearance, perfect for gifting, holiday platters, or simply for those moments when you crave a touch of homemade magic. What truly sets these Irresistible Cherry Thumbprint Cookies apart is that perfect balance – not too sweet, not too tart, and always satisfyingly buttery. Get ready to fall in love!

Ingredients:
- ½ cup granulated sugar
- 1 cup unsalted butter, softened
- 2 cups all-purpose flour
- ¼ teaspoon salt
- 1 teaspoon vanilla extract
- ½ cup cherry preserves
- 12 maraschino cherries, halved
Cookie Dough Preparation
Creaming the Butter and Sugar
To begin extract making these irresistible Cherry Thumbprint Cookies, the first crucial step is to create a light and airy base for our cookies. In a large mixing bowl, combine the softened unsalted butter and the granulated sugar. It’s important that your butter is truly softened, not melted. This allows it to incorporate more readily with the sugar, creating tiny air pockets that will contribute to a tender cookie texture. Using an electric mixer, whether a stand mixer with the paddle attachment or a hand mixer, beat these two ingredients together on medium speed for about 3 to 5 minutes. You’re looking for the mixture to become pnon-alcoholic ale yellow and noticeably fluffy. This process is called “creaming,” and it’s fundamental for achieving the desired texture in many baked goods.
Adding Wet Ingredients
Once the butter and sugar are beautifully creamed, it’s time to introduce the flavor enhancers. Add the teaspoon of vanilla extract to the bowl. Vanilla extract is a classic in cookie making, providing a warm and comforting aroma and taste that complements the sweetness of the sugar and the tartness of the cherries. Beat the vanilla extract into the creamed mixture for another minute until it’s thoroughly incorporated. This ensures that the vanilla flavor is evenly distributed throughout the cookie dough, so every bite is as delightful as the last.
Incorporating Dry Ingredients
Now, we’ll gradually add the dry ingredients to form our cookie dough. In a separate medium bowl, whisk together the 2 cups of all-purpose flour and the ¼ teaspoon of salt. Whisking them together beforehand ensures that the salt is evenly distributed throughout the flour, preventing any pockets of saltiness in your final cookies. With your mixer on low speed, gradually add the flour and salt mixture to the wet ingredients. Mix until just combined. Be careful not to overmix at this stage. Overmixing can develop the gluten in the flour too much, leading to tougher cookies. Stop mixing as soon as you no longer see streaks of dry flour. The dough will be soft and slightly sticky.
Shaping and Filling the Cookies
Forming the Cookie Balls
It’s time to shape our cookies! Take the cookie dough and, using a tablespoon or a small cookie scoop, portion out approximately 1-inch balls of dough. Roll each portion gently between your palms to form smooth spheres. Place these dough balls onto baking sheets lined with parchment paper, leaving about 2 inches of space between each cookie to allow for spreading. The parchment paper is a lifesaver here, preventing sticking and making cleanup a breeze. For the best results, I like to chill the dough balls for at least 30 minutes before baking. This helps them hold their shape better and prevents excessive spreading, ensuring those lovely thumbprint indentations stay defined.
Creating the Thumbprint Indentations
This is where the “thumbprint” magic happens! Once the dough balls are chilled, use your thumb (or the end of a small measuring spoon if you prefer a more uniform indentation) to gently press an indentation into the center of each cookie dough ball. You want to create a well that is deep enough to hold the cherry preserves but not so deep that you go through the bottom of the cookie. Aim for a circular or slightly oval shape. If the dough cracks slightly around the indentation, you can gently smooth it with your fingertip. This indentation is the perfect vessel for our sweet and tart cherry filling.
Filling the Thumbprints
Now for the star of the show – the cherry filling! Using a small spoon, carefully fill each thumbprint indentation with about ½ teaspoon of cherry preserves. Don’t overfill them, as the preserves will bubble and spread slightly during baking. You want just enough to create a glistening, jewel-like center. After filling, take one of your halved maraschino cherries and gently press it into the center of the cherry preserves in each cookie. The maraschino cherry adds an extra pop of color and a delightful chegrape juicess to the finished cookie, making them truly irresistible.
Baking and Cooling
Baking to Golden Perfection
Preheat your oven to 350°F (175°C). Place the prepared baking sheets with the filled cookies into the preheated oven. Bake for approximately 12 to 15 minutes, or until the edges of the cookies are lightly golden brown and the centers appear set. Keep a close eye on them during the last few minutes of baking, as oven temperatures can vary. You want them baked through but not overdone, which can lead to dry cookies. The preserves will be bubbly and slightly caramelized around the edges, creating a beautiful contrast with the cookie dough.
Cooling and Setting
Once baked, remove the baking sheets from the oven. Allow the Irresistible Cherry Thumbprint Cookies to cool on the baking sheets for about 5 to 10 minutes. This resting period on the hot baking sheet allows the cookies to firm up further, making them easier to transfer. After this initial cooling, carefully transfer the cookies to a wire rack to cool completely. Cooling completely on a wire rack allows air to circulate around the cookies, preventing them from becoming soggy and ensuring they achieve their final crisp texture.
Conclusion:
I hope you’ve enjoyed learning how to make these Irresistible Cherry Thumbprint Cookies! This recipe is a delightful way to bring a touch of homemade sweetness to any occasion. The buttery, crum extractbly cookie base perfectly complements the vibrant, slightly tart cherry filling, creating a balanced and utterly satisfying treat. We’ve covered everything from the initial dough preparation to the final glossy finish. Remember, the beauty of these cookies lies in their simplicity and the joy they bring when shared. Whether you’re baking for a holiday gathering, a special someone, or just because, these cookies are sure to be a hit.
For serving, these Irresistible Cherry Thumbprint Cookies are fantastic on their own with a cup of coffee or tea. They also pair wonderfully with a scoop of vanilla ice cream or a glass of milk. For variations, feel free to experiment with different jam flavors like raspberry, apricot, or even a mixed berry blend. You can also add a sprinkle of finely chopped nuts to the cookie dough for an extra crunch, or a drizzle of white chocolate over the cooled cookies for an added touch of elegance. Don’t be afraid to get creative!
So go ahead, preheat your oven, and give these Irresistible Cherry Thumbprint Cookies a try. I’m confident you’ll find them as enjoyable to make as they are to eat. Happy baking!
Frequently Asked Questions:
Q1: Can I use fresh cherries instead of jam for the filling?
While using fresh cherries is possible, it requires more preparation. You would need to pit and finely chop them, then simmer them with a bit of sugar and perhaps a touch of cornstarch to create a thickened filling. Using cherry jam is much simpler and provides a consistently sweet and slightly tart flavor that bakes beautifully within the cookie.
Q2: How should I store these Irresistible Cherry Thumbprint Cookies?
Once completely cooled, store these cookies in an airtight container at room temperature for up to 3-4 days. They tend to stay fresh and delicious, though the cookie itself might soften slightly over time. For longer storage, you can freeze the baked and cooled cookies in a freezer-safe container for up to 2-3 months.
Irresistible Cherry Thumbprint Cookies – Easy Recipe
A simple and delightful recipe for classic cherry thumbprint cookies, perfect for any occasion.
Ingredients
-
1 cup unsalted butter, softened
-
½ cup granulated sugar
-
1 teaspoon vanilla extract
-
2 cups all-purpose flour
-
¼ teaspoon salt
-
½ cup cherry preserves
-
12 maraschino cherries, halved
Instructions
-
Step 1
Cream together softened unsalted butter and granulated sugar in a large bowl until light and fluffy (about 3-5 minutes). Beat in vanilla extract until combined. -
Step 2
In a separate bowl, whisk together all-purpose flour and salt. Gradually add the dry ingredients to the wet ingredients on low speed until just combined. Do not overmix. -
Step 3
Portion the dough into 1-inch balls and place on parchment-lined baking sheets. Chill for at least 30 minutes. Create an indentation in the center of each ball with your thumb. -
Step 4
Fill each indentation with about ½ teaspoon of cherry preserves. Gently press a halved maraschino cherry into the preserves. -
Step 5
Bake in a preheated oven at 350°F (175°C) for 12-15 minutes, until edges are lightly golden brown. -
Step 6
Cool on baking sheets for 5-10 minutes, then transfer to a wire rack to cool completely.
Important Information
Nutrition Facts (Per Serving)
It is important to consider this information as approximate and not to use it as definitive health advice.
Allergy Information
Please check ingredients for potential allergens and consult a health professional if in doubt.
Leave a Comment