
Tater Tot Appetizer Cups are the undisputed champions of any gathering, a delightful little bite that consistently steals the show. If you’ve ever found yourself reaching for that second, third, or let’s be honest, fourth one before you even realize it, you know the magic. What is it about these little golden nuggets, encased in a creamy, savory filling, that makes them so utterly irresistible? It’s the perfect textural contrast – the satisfying crunch of a perfectly baked tater tot giving way to a warm, gooey center. They’re universally loved because they tap into that nostalgic comfort food feeling while simultaneously feeling a little bit fancy, making them an ideal appetizer for everything from casual game nights to more elegant holiday parties. The sheer versatility of these Tater Tot Appetizer Cups is another reason they’re so beloved; you can customize the fillings to suit any taste or occasion, ensuring everyone finds something to adore.

Ingredients:
- 48-60 frozen tater tots (approximately a 16-oz bag)
- ¾ cup shredded cheddar cheese
- ½ cup sour cream
- 4 slices bacon, cooked until crisp and then crumbled
- 2 green onions, thinly sliced, using only the green parts
Preheating and Preparation
Step 1: Preheat Your Oven and Prepare the Tater Tot Base
The first crucial step to creating these irresistible Tater Tot Appetizer Cups is to get your oven ready. Preheat it to a nice, hot 400 degrees Fahrenheit (200 degrees Celsius). This high heat is essential for ensuring your tater tots get perfectly crispy on the outside and delightfully tender on the inside, forming a sturdy cup. While the oven is heating up, it’s time to prepare your baking vessel. A standard 24-cup mini muffin tin is ideal for this recipe. You don’t necessarily need to grease it, as the tater tots will release some of their own natural oils. However, if you are concerned about sticking, a very light coating of cooking spray or a dab of butter in each cup will do the trick.
Step 2: Crafting the Tater Tot Cups
Now for the fun part – creating the “cups”! Take your frozen tater tots and place one tater tot in the bottom of each mini muffin cup. Then, carefully press another tater tot down on top of the first one, pushing it firmly towards the sides of the muffin cup. The goal here is to create a hollowed-out space in the center of each cup. Think of it like making a little potato nest. You want to press them down enough so that they form a distinct well that can hold your delicious fillings, but be careful not to break them completely apart. Aim for a relatively even thickness of potato all around the sides and bottom of each cup. This will ensure they bake uniformly and hold their shape well.
Baking the Tater Tot Cups
Step 3: Initial Baking for Crispy Tater Tots
Once your tater tot cups are formed, it’s time to send them into the preheated oven. Place the mini muffin tin on a baking sheet. This is a good practice to catch any potential drips and makes it easier to get the tin in and out of the oven. Bake these tater tot shells for approximately 15 to 20 minutes. During this time, you want them to start turning golden brown and become nice and firm. We’re not looking for them to be completely cooked through and fully browned at this stage, but rather to have a good foundation that will crisp up further once the fillings are added. Keep an eye on them to prevent any burning, as oven temperatures can vary.
Adding the Delicious Fillings
Step 4: The Cheesy, Bacon-y Goodness
After the initial bake, carefully remove the mini muffin tin from the oven. The tater tot cups should be firm and starting to get golden. Now it’s time to fill them! First, generously sprinkle about half of your shredded cheddar cheese into the bottom of each partially baked tater tot cup. This cheese will melt beautifully and act as a delicious binder for the other ingredients. Next, evenly distribute the crumbled cooked bacon over the cheese in each cup. The salty, smoky flavor of the bacon is a perfect complement to the mild potato.
Step 5: The Final Bake and Toppings
Return the mini muffin tin to the oven for another 8 to 10 minutes. This second bake is crucial for melting the cheese completely and warming through the bacon. You want to see that cheddar cheese bubbling and perfectly melted, creating a gooey layer. Once the cheese is melted and everything looks beautifully golden and inviting, carefully remove the tin from the oven. Let the Tater Tot Appetizer Cups cool in the tin for a few minutes. This slight cooling period allows them to set up a bit, making them easier to remove. While they are still warm, dollop a spoonful of sour cream into the center of each cup. Finally, garnish each Tater Tot Appetizer Cup with a sprinkle of the sliced green onions. The fresh, sharp bite of the green onion cuts through the richness of the cheese and bacon, providing a delightful contrast. Serve these warm and enjoy the incredible crunch of the tater tots combined with the creamy, savory filling!

Conclusion:
There you have it! Your guide to creating these undeniably delicious and crowd-pleasing Tater Tot Appetizer Cups. We’ve explored how simple ingredients can transform into a truly spectacular bite, perfect for any gathering. The beauty of this recipe lies in its versatility and ease of preparation, making it a go-to for both novice and experienced home cooks. I hope you’ve enjoyed learning how to assemble these savory delights, and more importantly, I encourage you to give them a try yourself. The crispy exterior of the tater tots, combined with the melty cheese and your chosen fillings, creates a flavor and texture sensation that’s hard to beat. Don’t be afraid to experiment and make them your own!
For serving, these Tater Tot Appetizer Cups are fantastic on their own, but they also pair wonderfully with a variety of dipping sauces like ranch, sriracha mayo, or even a simple ketchup. Consider serving them alongside other appetizers for a potluck or as a fun main course alternative for a casual movie night.
Frequently Asked Questions:
What are the best fillings for Tater Tot Appetizer Cups?
The possibilities are endless! Classic options include crumbled bacon, shredded cheese (cheddar, Monterey Jack, or a blend), and a dollop of sour cream. For a heartier option, try cooked ground beef or chicken, diced jalapeños, or even caramelized onions. Vegetarian versions can feature sautéed mushrooms, spinach, or roasted red peppers.
Can I make Tater Tot Appetizer Cups ahead of time?
You can prepare the base by pressing the tater tots into the muffin tin and partially baking them. However, it’s best to add your fillings and finish baking just before serving to ensure the tater tots remain crispy and the cheese is perfectly melted.
How do I prevent the Tater Tot Appetizer Cups from sticking to the muffin tin?
Greasing your muffin tin thoroughly with cooking spray or butter is crucial. You can also line the muffin cups with parchment paper liners or silicone muffin liners for extra insurance. Ensure the tater tots are pressed firmly into the base to create a good seal.
Easy Tater Tot Appetizer Cups – Crowd Pleaser
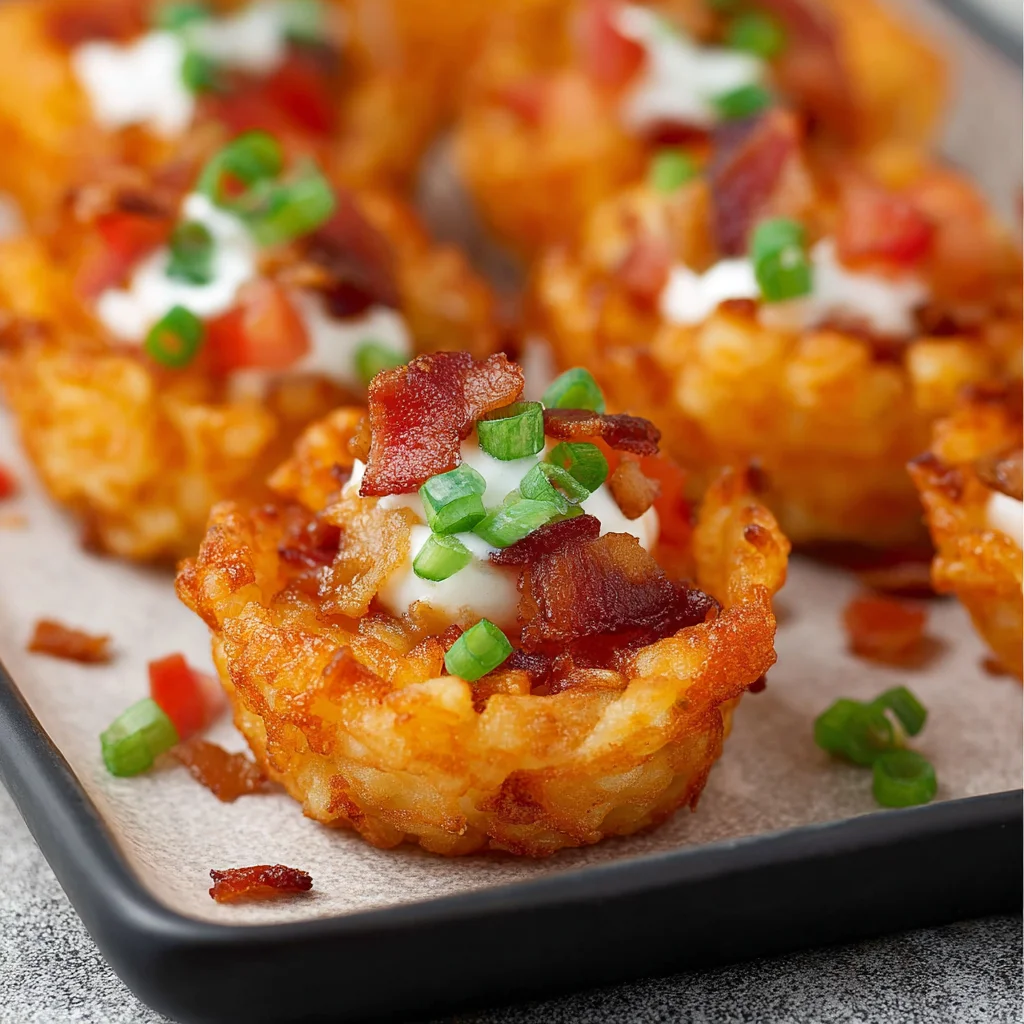
Irresistible tater tot cups filled with melted cheddar cheese, crispy bacon, and a dollop of sour cream, topped with fresh green onions. A perfect appetizer for any gathering.
Ingredients
-
48-60 frozen tater tots (approximately a 16-oz bag)
-
¾ cup shredded cheddar cheese
-
½ cup sour cream
-
4 slices beef bacon, cooked until crisp and then crumbled
-
2 green onions, thinly sliced, using only the green parts
Instructions
-
Step 1
Preheat oven to 400°F (200°C). Prepare a 24-cup mini muffin tin, lightly greasing if desired. -
Step 2
Place one frozen tater tot in the bottom of each mini muffin cup. Press another tater tot on top, pushing towards the sides to create a hollow ‘cup’ shape. Aim for even thickness. -
Step 3
Place the mini muffin tin on a baking sheet and bake for 15-20 minutes, until tater tot cups are starting to turn golden brown and firm. -
Step 4
Remove from oven. Sprinkle about half of the shredded cheddar cheese into the bottom of each tater tot cup. Evenly distribute the crumbled beef bacon over the cheese. -
Step 5
Return to the oven and bake for another 8-10 minutes, until the cheese is fully melted and bubbling. Let cool slightly in the tin. -
Step 6
Dollop a spoonful of sour cream into the center of each warm tater tot cup and garnish with sliced green onions. Serve warm.
Important Information
Nutrition Facts (Per Serving)
It is important to consider this information as approximate and not to use it as definitive health advice.
Allergy Information
Please check ingredients for potential allergens and consult a health professional if in doubt.


Leave a Comment