

Homemade fruit leather recipes are a delightful journey back to childhood, a vibrant explosion of pure fruit flavor that’s surprisingly easy to create in your own kitchen. There’s a special kind of magic in transforming simple, fresh fruit into those chewy, naturally sweet strips we all adored. What makes this treat so universally loved? It’s the wholesome goodness, the absence of artificial flavors and preservatives, and the sheer joy of a healthy snack that feels like a real indulgence. My homemade fruit leather recipe allows you to harness the season’s best bounty, from sun-ripened berries to sweet stone fruits, creating a customizable treat that’s perfect for lunchboxes, after-school snacks, or even a guilt-free dessert. Get ready to discover just how simple and rewarding making your own delicious fruit leather can be!
Why You’ll Love This Recipe
Unleash Your Inner Sweetmaker

Homemade Fruit Leather Recipe
There’s something incredibly satisfying about transforming simple fruit into a chewy, intensely flavorful treat. Homemade fruit leather is a fantastic way to use up seasonal produce, create a healthy snack that your kids (and you!) will love, and avoid all those artificial additives found in store-bought versions. It’s surprisingly easy to make and the results are incredibly rewarding. Imagin extracte a vibrant, tangy ribbon of pure fruit goodness, perfect for lunchboxes, hikes, or just a delightful afternoon pick-me-up. I love experimenting with different fruit combinations, but this basic recipe is a perfect starting point.
Ingredients:
Instructions:
This recipe is all about capturing the essence of fresh fruit and concentrating it into a delightful chewy treat. The process is straightforward, involving a bit of blending and slow drying. Don’t be intimidated; it’s a forgiving recipe and the results are well worth the minimal effort.
1. Prepare Your Fruit: The first step is to get your fruit ready. Wash your chosen fruit thoroughly. If you’re using berries, you can usually use them whole or just give them a quick rinse. For larger fruits like peaches, apples, or pears, you’ll want to peel them (optional, but it makes for a smoother texture), remove the cores or pits, and then chop them into roughly uniform pieces. This helps ensure they cook evenly. Don’t worry about making them perfectly uniform; as long as they’re in bite-sized pieces, they’ll break down beautifully. If you’re using apples or pears, a little browning isn’t a deal-breaker since they’ll be cooked and dried.
2. Cook and Soften the Fruit: Once your fruit is chopped, it’s time to soften it up. Place the chopped fruit in a medium saucepan. Add the 3 tablespoons of white sugar and the juice of half a lemon. The sugar helps to sweeten the fruit and also acts as a mild preservative. The lemon juice is crucial; it adds a lovely bright tang that balances the sweetness and prevents the fruit from oxidizing (turning brown), especially if you’re using fruits like apples or peaches. Stir everything together. Place the saucepan over medium heat and cook, stirring occasionally, until the fruit has softened significantly and is releasing its juices. This usually takes about 10-15 minutes, depending on the type of fruit you’re using. You want the fruit to be tender enough to mash easily with a fork. Don’t let it burn! If it seems like it’s drying out too quickly, you can add a tablespoon or two of water.
3. Blend into a Smooth Purée: Now that your fruit is cooked and tender, it’s time to create that smooth, luscious purée that will become your fruit leather. Carefully transfer the cooked fruit mixture into a blender or a food processor. Blend until the mixture is completely smooth and there are no large chunks remaining. If your blender is struggling, you can add a tiny splash of water (just a teaspoon at a time) to help it along, but be careful not to make it too watery. The goal is a thick, velvety purée. You can also use an immersion blender directly in the saucepan if that’s easier. Once you have a smooth purée, taste it. This is your chance to adjust the sweetness. If your fruit was particularly tart, you might want to add another teaspoon or two of sugar. Conversely, if it’s very sweet, you can leave it as is or even add a touch more lemon juice for extra zing.
4. Prepare for Drying: This is where the magic of dehydration begin extracts. Preheat your oven to its lowest possible setting. This is usually around 170-200°F (75-95°C). It’s crucial to dry the fruit leather slowly and at a low temperature to avoid cooking it further and to ensure it dries evenly without becoming brittle or burnt. Line a baking sheet with parchment paper or a silicone baking mat. Make sure the lining extends up the sides of the baking sheet to create a shallow “pan” for your fruit purée. Pour the fruit purée onto the prepared baking sheet. Spread it evenly with a spatula, aiming for a thickness of about ¼ inch. Try to get it as uniform as possible across the entire surface. This consistency is key for even drying. If it’s too thick in some spots and too thin in others, you’ll end up with some parts being leathery and others being brittle or still moist.
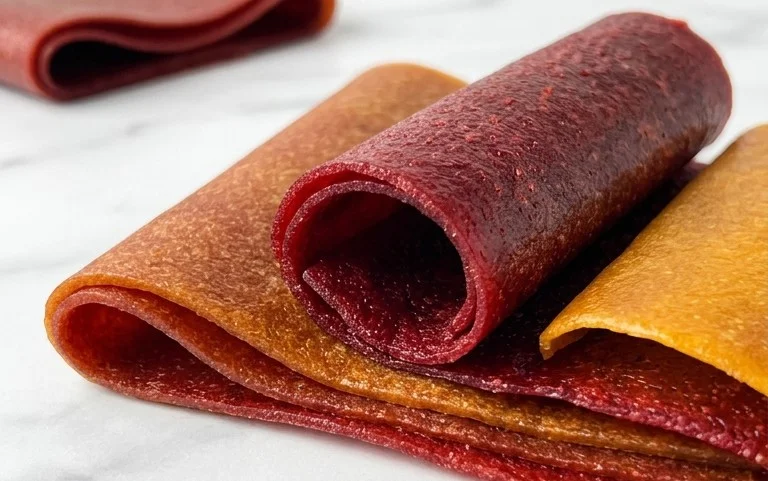
5. The Slow Drying Process: Place the baking sheet with the fruit purée into your preheated oven. Now comes the patient part. Leave the oven door slightly ajar – just crack it open a tiny bit. You can use a wooden spoon or a piece of crum extractpled foil to prop it open. This allows moisture to escape from the oven, promoting the drying process and preventing steam from building up, which would make your fruit leather gummy. The drying time can vary significantly depending on your oven and the humidity in your home, but it typically takes anywhere from 4 to 8 hours, sometimes even longer. Check on the fruit leather every hour or two. You’re looking for it to be firm to the touch, no longer sticky, and slightly pliable. It should peel away cleanly from the parchment paper. Once it feels mostly dry, you can remove it from the oven and let it cool completely on the baking sheet. As it cools, it will firm up even more. If you find any spots are still a bit sticky after cooling, you can pop it back in the oven for another hour or so.
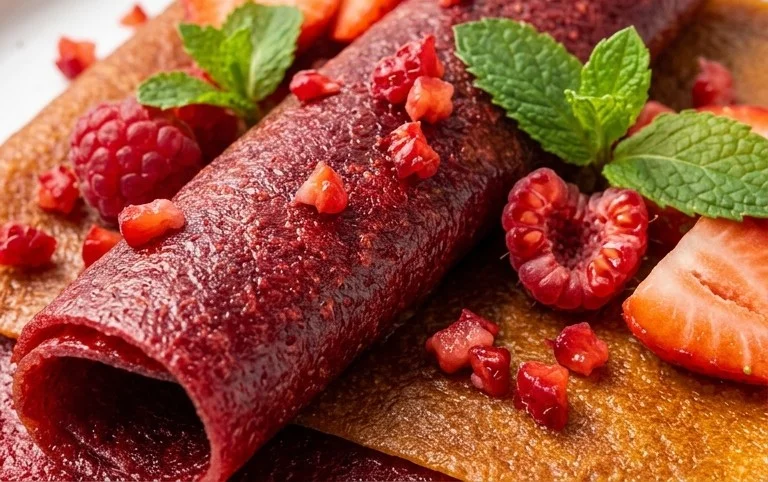
Once your fruit leather has completely cooled and is no longer sticky, carefully peel it off the parchment paper. You can then cut it into strips using a pizza cutter or a sharp knife, or even roll it up into little logs. Store your homemade fruit leather in an airtight container at room temperature for a week or two, or in the refrigerator for longer storage. Enjoy your delicious, homemade creation!
Conclusion:
Making your own fruit leather is such a rewarding and delicious endeavor! It’s a fantastic way to preserve the vibrant flavors of fresh fruit, reduce food waste, and create a healthy, satisfying snack for yourself and your loved ones. The simplicity of this homemade fruit leather recipe is truly its strength – requiring just a few ingredients and minimal active preparation. You’ll be amazed at how a basic puree transforms into chewy, flavorful strips that are infinitely more satisfying than anything you’ll find in a store. The natural sweetness of the fruit shines through, making it a perfect treat for lunchboxes, after-school snacks, or even a guilt-free dessert.
I highly encourage you to give this recipe a try! Don’t be intimidated by the drying process; it’s largely hands-off and the results are so worth it. Feel free to experiment with different fruit combinations to discover your perfect flavor profile. Imagin extracte tangy raspberry and apple, or sweet mango and peach. The possibilities are truly endless. Serve your homemade fruit leather cut into fun shapes for kids, rolled up as a quick energy boost for hikes, or even crum extractbled over yogurt or ice cream for a burst of fruity goodness.
Frequently Asked Questions about Homemade Fruit Leather:
What fruits work best for making fruit leather?
Almost any fruit can be used! Berries (strawberries, raspberries, blueberries), stone fruits (peaches, apricots, plums), apples, pears, and tropical fruits like mango and pineapple all work wonderfully. For a more complex flavor, consider combining sweet and tart fruits.
How long does homemade fruit leather last?
When stored properly in an airtight container at room temperature, homemade fruit leather can last for about 2-3 weeks. For longer storage, you can refrigerate it for up to a month, or even freeze it for several months. Ensure it’s completely cool before sealing for storage.
Can I make fruit leather without a dehydrator?
Absolutely! You can use your oven on its lowest setting with the door slightly ajar, or air dry it in a very warm, dry climate. Both methods require vigilance to prevent burning and ensure even drying. Patience is key!
Homemade Fruit Leather
A simple and delicious recipe for making your own fruit leather at home with just a few ingredients.
Ingredients
-
2 cups fruit, chopped
-
3 tbsp white sugar
-
juice of ½ whole lemon
-
1 tsp vanilla extract
-
Pinch of cinnamon
Instructions
-
Step 1
Combine chopped fruit, sugar, lemon juice, vanilla extract, and cinnamon in a saucepan. -
Step 2
Cook over medium heat, stirring occasionally, until the fruit has broken down and the mixture has thickened slightly. -
Step 3
For a smoother texture, you can blend the mixture using an immersion blender or transfer it to a regular blender. -
Step 4
Pour the fruit mixture onto a baking sheet lined with parchment paper, spreading it thinly and evenly. -
Step 5
Bake in a preheated oven at 175°F (80°C) for 3-6 hours, or until the fruit leather is no longer sticky to the touch. Drying time will vary depending on thickness and oven. -
Step 6
Once dried, carefully peel the fruit leather off the parchment paper. Cut into desired shapes and store in an airtight container.
Important Information
Nutrition Facts (Per Serving)
It is important to consider this information as approximate and not to use it as definitive health advice.
Allergy Information
Please check ingredients for potential allergens and consult a health professional if in doubt.
Leave a Comment