
Easy Homemade Bread is more than just a recipe; it’s a journey into the heart of comfort and deliciousness. There’s something undeniably magical about pulling a warm, fragrant loaf of bread from your own oven. It’s a scent that fills your home with an irresistible aroma, promising simple pleasure and cozy moments. People flock to making their own bread because it connects us to a timeless tradition, offering a tangible reward for a little bit of effort. What truly makes easy homemade bread so special is its accessibility. Forget complicated techniques and intimidating steps. This recipe is designed for everyone, from absolute begin extractners to seasoned bakers looking for a quick win. You’ll be amazed at how satisfying it is to create something so fundamental, so universally loved, from scratch. Get ready to experience the joy of crafting your own perfect loaf – it’s easier than you think!

Easy Homemade Bread
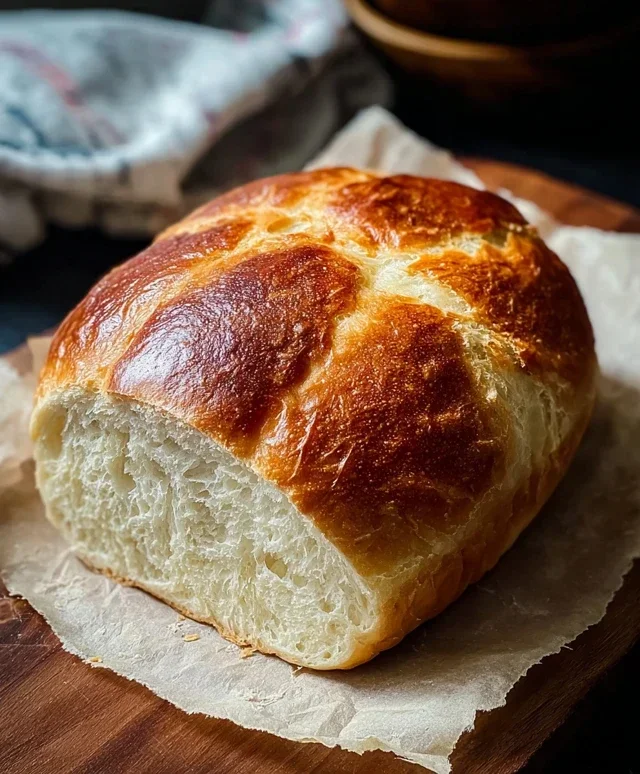
There’s something incredibly satisfying about pulling a warm, crusty loaf of homemade bread from your oven. The aroma alone is enough to make your kitchen feel like a cozy haven. Many people shy away from making bread, thinking it’s a complicated process reserved for seasoned bakers. I used to be one of them! But I’m here to tell you that making delicious, artisan-style bread at home is surprisingly simple, especially with this easy recipe. It requires minimal hands-on time and just a few basic ingredients you likely already have in your pantry. Get ready to impress yourself and your loved ones with this delightful, no-fuss bread.
Ingredients:
Let’s Get Baking!
This recipe is designed for begin extractners, so don’t worry if you’ve never baked bread before. We’ll go through each step clearly, and before you know it, you’ll have a beautiful loaf to enjoy. The key to this recipe’s simplicity is the use of instant yeast, which can be mixed directly with the dry ingredients, saving you a step.
Mixing the Dough
1. First, gather your ingredients and a large mixing bowl. Pour the 1 ½ cups of warm water into the bowl. It’s important that the water is warm, not hot, as water that’s too hot can kill the yeast, and water that’s too cold won’t activate it properly. Aim for a temperature that feels comfortably warm to the touch, around 105-115°F (40-46°C). This cozy temperature is perfect for waking up the yeast.
2. Next, add the 1 packet (2 ¼ teaspoons) of instant yeast to the warm water. Give it a gentle stir just to distribute it evenly. Let this mixture sit for about 5 minutes. You should start to see some foamy bubbles forming on the surface. This is called “proofing” the yeast, and it tells you that your yeast is alive and ready to work its magic. If you don’t see any bubbles after 5-10 minutes, your yeast might be expired, and you’ll want to use a fresh packet.
3. Now, add the 3 cups of bread flour and the 2 ½ teaspoons of kosher salt to the bowl. If you’re using all-purpose flour, that’s perfectly fine too; it will yield a slightly softer crum extractb, but it will still be delicious. The salt is crucial not only for flavor but also for controlling the yeast activity and strengthening the gluten structure of the dough.
Kneading and Rising
4. Using a sturdy spoon or your hands, mix the ingredients together until a shaggy dough forms. It will look messy and sticky at this stage, and that’s completely normal. Don’t be tempted to add more flour at this point; we want the dough to be a bit wet. Once the ingredients are mostly incorporated, turn the dough out onto a lightly floured surface. Now it’s time for a little bit of kneading. This is where we develop the gluten, which gives bread its structure and chegrape juicess. Fold the dough over on itself, push down and away with the heels of your hands, then turn it a quarter turn and repeat. Continue this process for about 8-10 minutes. The dough will gradually become smoother, more elastic, and less sticky. You’ll know it’s ready when you can poke it with a finger and the indentation slowly springs back. If the dough feels too sticky to handle, lightly dust your hands and the surface with a little more flour, but use it sparingly.
5. Once your dough is well-kneaded, shape it into a smooth ball. Lightly grease a clean large bowl with a little oil or cooking spray. Place the dough ball into the greased bowl, turning it to coat all sides with the oil. Cover the bowl tightly with plastic wrap or a clean kitchen towel. Find a warm, draft-free spot in your kitchen for the dough to rise. An oven that’s turned off but has the light on can be a great spot. Let the dough rise for about 1 to 1 ½ hours, or until it has doubled in size. This “first rise” or “bulk fermentation” is where the yeast produces carbon dioxide, making the dough puff up.
Shaping and Baking
6. After the first rise, gently punch down the dough to release the air. Turn the dough out onto a lightly floured surface again. You can shape it into a round loaf (boule) or an oval loaf (batard). For a round loaf, gently cup your hands around the dough and tuck the edges underneath to create surface tension, forming a taut ball. For an oval loaf, gently pat the dough into a rectangle and then roll it up tightly from one end, pinching the seam closed.
7. Place your shaped loaf onto a baking sheet lined with parchment paper or a baking stone. Cover it loosely with plastic wrap or a clean kitchen towel and let it rest for another 30-45 minutes. This “second rise” allows the dough to relax and puff up slightly before baking. While the dough is having its second rise, preheat your oven to 400°F (200°C). For an even crustier loaf, you can place a shallow oven-safe pan on the bottom rack of your oven while it preheats.
8. Once the oven is preheated and the dough has had its second rise, you can score the top of the loaf with a sharp knife or a razor blade. This is purely for aesthetics, but it allows the bread to expand in a controlled way in the oven. Just a few shallow slashes will do. Carefully place the baking sheet with your loaf into the preheated oven. If you used the pan for steam, carefully pour about 1 cup of hot water into it now to create steam. Close the oven door quickly to trap the steam. Bake for 30-35 minutes, or until the crust is a deep golden brown and the bottom of the loaf sounds hollow when tapped.
9. Once baked, carefully remove the bread from the oven and transfer it to a wire rack to cool completely. This is perhaps the hardest part – waiting! Cooling allows the bread to finish cooking internally and develop its final texture and flavor. Slicing into a hot loaf can result in a gummy texture. Resist the temptation and let it cool for at least an hour.
Enjoy your incredible homemade bread with butter, jam, or as a delicious accompaniment to your favorite meals. You’ve just conquered homemade bread!
Conclusion:
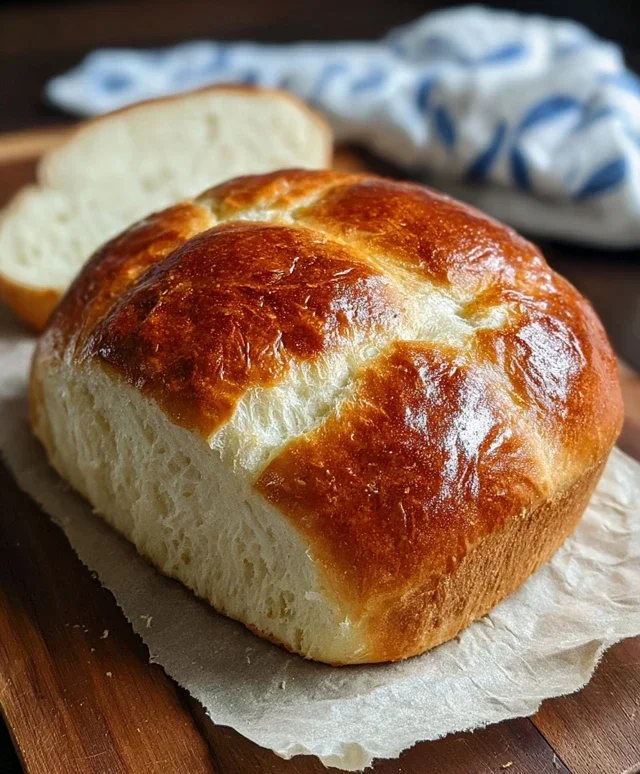
And there you have it! You’ve learned how incredibly simple and rewarding it is to bake your own easy homemade bread. This recipe truly shines because it demystifies bread-making, proving that you don’t need fancy equipment or years of experience to achieve a beautiful, delicious loaf. The aroma that fills your kitchen as it bakes is simply unparalleled, and the taste of fresh bread, warm from the oven, is an experience you won’t forget. It’s perfect for slathering with butter, dipping into soups and stews, or transforming into the most delightful sandwiches imagin extractable.
Don’t be afraid to experiment! You can easily adapt this recipe by adding herbs, seeds, or even a handful of cheese to the dough for a unique twist. I wholeheartedly encourage you to give this recipe a try. The satisfaction of pulling your own golden-brown loaf from the oven is immense, and I promise, it’s worth every moment. Happy baking!
Frequently Asked Questions:
What can I serve with my easy homemade bread?
This versatile bread is a fantastic accompaniment to so many dishes! It’s wonderful with a hearty bowl of chili, a rich tomato soup, or even just a simple salad. For breakfast, it makes amazing toast. It’s also the perfect vehicle for garlic butter or olive oil and balsamic vinegar for an appetizer.
Can I freeze this easy homemade bread?
Absolutely! Once completely cooled, you can wrap the loaf tightly in plastic wrap and then in aluminum foil or place it in a freezer-safe bag. It will stay fresh in the freezer for up to 3 months. Thaw it at room temperature or gently reheat slices in the oven.
My dough didn’t rise as much as I expected. What went wrong?
Several factors can affect dough rise. Ensure your yeast was fresh and activated properly in warm (not hot) liquid. Also, the room temperature can play a role; a warmer environment generally encourages a better rise. Don’t overwork the dough, as this can toughen the gluten structure. A slightly denser loaf is still perfectly delicious!
Easy Homemade Bread
A simple and satisfying recipe for delicious homemade bread, perfect for beginners.
Ingredients
-
1 ½ cups warm water
-
3 cups bread flour
-
1 packet instant yeast
-
2 ½ tsp kosher salt
-
2 tablespoons olive oil
-
1 teaspoon sugar
Instructions
-
Step 1
In a large bowl, combine warm water and sugar. Sprinkle the yeast over the water and let it sit for 5-10 minutes until foamy. -
Step 2
Add the flour, salt, and olive oil to the bowl with the yeast mixture. -
Step 3
Stir with a wooden spoon or spatula until a shaggy dough forms. Turn the dough out onto a lightly floured surface and knead for 5-7 minutes until smooth and elastic. -
Step 4
Place the dough in a lightly oiled bowl, turning to coat. Cover with plastic wrap or a damp kitchen towel and let it rise in a warm place for 1-1.5 hours, or until doubled in size. -
Step 5
Punch down the dough and shape it into a loaf. Place it in a greased loaf pan. -
Step 6
Cover the loaf pan and let it rise again for another 30-45 minutes, or until it has nearly doubled. -
Step 7
Preheat oven to 375°F (190°C). Bake for 30-35 minutes, or until the crust is golden brown and the internal temperature reaches 190-200°F (88-93°C). -
Step 8
Remove from oven and let cool on a wire rack before slicing.
Important Information
Nutrition Facts (Per Serving)
It is important to consider this information as approximate and not to use it as definitive health advice.
Allergy Information
Please check ingredients for potential allergens and consult a health professional if in doubt.

Leave a Comment