
Quick Air Fryer Tortilla Garlic Bread is about to become your new kitchen obsession, and trust me, you’ll wonder how you ever lived without it. Imagin extracte this: golden, crispy edges, a wonderfully soft interior, and that irresistible aroma of toasted garlic and butter wafting through your home. This isn’t just a side dish; it’s a flavor revelation that elevates any meal from ordinary to extraordinary, all in a fraction of the time traditional garlic bread demands. People adore this quick air fryer tortilla garlic bread because it delivers that beloved garlicky, buttery crunch we all crave, but with a surprisingly light and airy texture. What truly sets this recipe apart is its ingenious use of tortillas as the base. They transform into a perfectly uniform, delightfully chewy yet crispy canvas, soaking up the garlic-butter mixture beautifully and cooking to perfection in the air fryer, making it an absolute game-changer for busy weeknights or spontaneous entertaining.

Ingredients:
- 2 flour tortilla shells
- 1 tablespoon butter, softened
- ½ cup grated mozzarella cheese
- Garlic powder, to taste
- Italian seasoning, to taste
- Fresh parsley, chopped (optional, for garnish)
Preparing Your Tortilla Garlic Bread
This stage is all about getting your ingredients ready to transform into delicious, crispy tortilla garlic bread. It’s a simple process, but taking a moment to ensure everything is prepared correctly will lead to the best results. First, let’s talk about the butter. It’s crucial that your butter is softened. This means taking it out of the refrigerator about 30 minutes to an hour before you plan to start assembling your tortilla bread. You want it to be spreadable, not melted. If you forget to take it out in advance, you can gently microwave it in very short bursts (5-10 seconds at a time), being careful not to let it turn into liquid. A softened butter will spread evenly across the tortilla, ensuring consistent flavor and crispiness.
Next, we have our grated mozzarella cheese. If you’re grating it yourself from a block, you’ll get a better melt and flavor compared to pre-shredded cheese, which often has anti-caking agents that can affect texture. Simply use a box grater or a food processor with a grating attachment. Having your cheese ready to go in a bowl makes the assembly process much faster, which is key for a “quick” recipe.
Now, let’s address the seasonings. Garlic powder and Italian seasoning are your flavor powerhouses here. You can measure these out with a spoon or, for a more rustic approach, shake them directly from their containers. The beauty of “to taste” is that you have full control. If you’re a garlic lover, don’t be shy! If you prefer a subtler hint, start with a smaller amount. The same applies to the Italian seasoning, which typically contains a blend of dried oregano, basil, thyme, and rosemary. These dried herbs will bloom and release their aromatic oils as they cook, infusing the tortilla with delightful savory notes.
Finally, if you’re opting for a fresh garnish, prepare your fresh parsley. Wash and thoroughly dry the parsley. You can then finely chop it using a sharp knife. Keeping it separate until the very end ensures its vibrant green color and fresh, bright flavor remain intact. Having all these components laid out and ready before you even preheat your air fryer will make the entire cooking process smooth and efficient.
Assembling the Tortilla Garlic Bread
This is where the magic starts to happen. Lay your two flour tortilla shells flat on a clean work surface. You can use a plate or a cutting board. Now, take your softened butter and spread a thin, even layer across the entire surface of each tortilla. Aim for complete coverage, getting right to the edges. This butter layer is essential for achieving that golden-brown crispiness and also acts as a binder for our seasonings. Don’t be tempted to go too thick with the butter, as too much can make the tortilla greasy rather than crisp.
Once the butter is spread, it’s time to season. Sprinkle a generous amount of garlic powder over the buttered surface of each tortilla. Remember, this is “to taste,” so adjust according to your preference. Following the garlic powder, distribute the Italian seasoning evenly across the tortillas. Ensure a good mix of both seasonings so that every bite is flavorful. Gently press down with your fingertips or the back of a spoon to help the seasonings adhere to the butter. This also helps to evenly distribute the flavor.
The final layer of assembly is the cheese. Sprinkle the grated mozzarella cheese evenly over the seasoned butter. You want to create a nice, even layer of cheese that will melt beautifully and bind everything together. Make sure to spread it from edge to edge, as a little bit of cheesy goodness in every corner is always welcome. You can also gently press the cheese down slightly. This step ensures that when the tortilla goes into the air fryer, the cheese melts and creates a cohesive, delicious topping.
Cooking in the Air Fryer
Now that your tortilla garlic bread is assembled, it’s time to put it to work in the air fryer. Preheat your air fryer to 375 degrees Fahrenheit (190 degrees Celsius). Preheating is a vital step in air frying, as it ensures that your food cooks evenly and gets that signature crisp from the moment it enters the basket. While the air fryer is preheating, you can very carefully place one of the assembled tortillas into the air fryer basket. If your air fryer is smaller, you may need to cook them one at a time to avoid overcrowding, which can lead to uneven cooking and prevent crisping.
Carefully slide the tortilla into the preheated air fryer basket. Be mindful of the cheese, as it might be slightly loose. Close the air fryer drawer and cook for approximately 3 to 5 minutes. The exact cooking time will depend on your specific air fryer model and how crispy you like your tortilla bread. Keep a close eye on it, especially during the last minute or two of cooking. You’re looking for the edges of the tortilla to become golden brown and crispy, and the mozzarella cheese to be melted and possibly slightly bubbly. The aroma of garlic and herbs will start to fill your kitchen, a sure sign that deliciousness is imminent.
Checking for Doneness and Final Touches
Once you notice the tortilla edges are turning golden and the cheese is beautifully melted, it’s time to check for doneness. Carefully open the air fryer drawer. The tortilla should be firm and crispy, not limp or soggy. If it’s not as crispy as you’d like, you can continue to cook it for another minute or two, but watch it very closely to prevent burning.
Once cooked to perfection, carefully remove the tortilla garlic bread from the air fryer basket. You can use a spatula or tongs for this. If you cooked them one at a time, repeat the cooking process for the second tortilla.
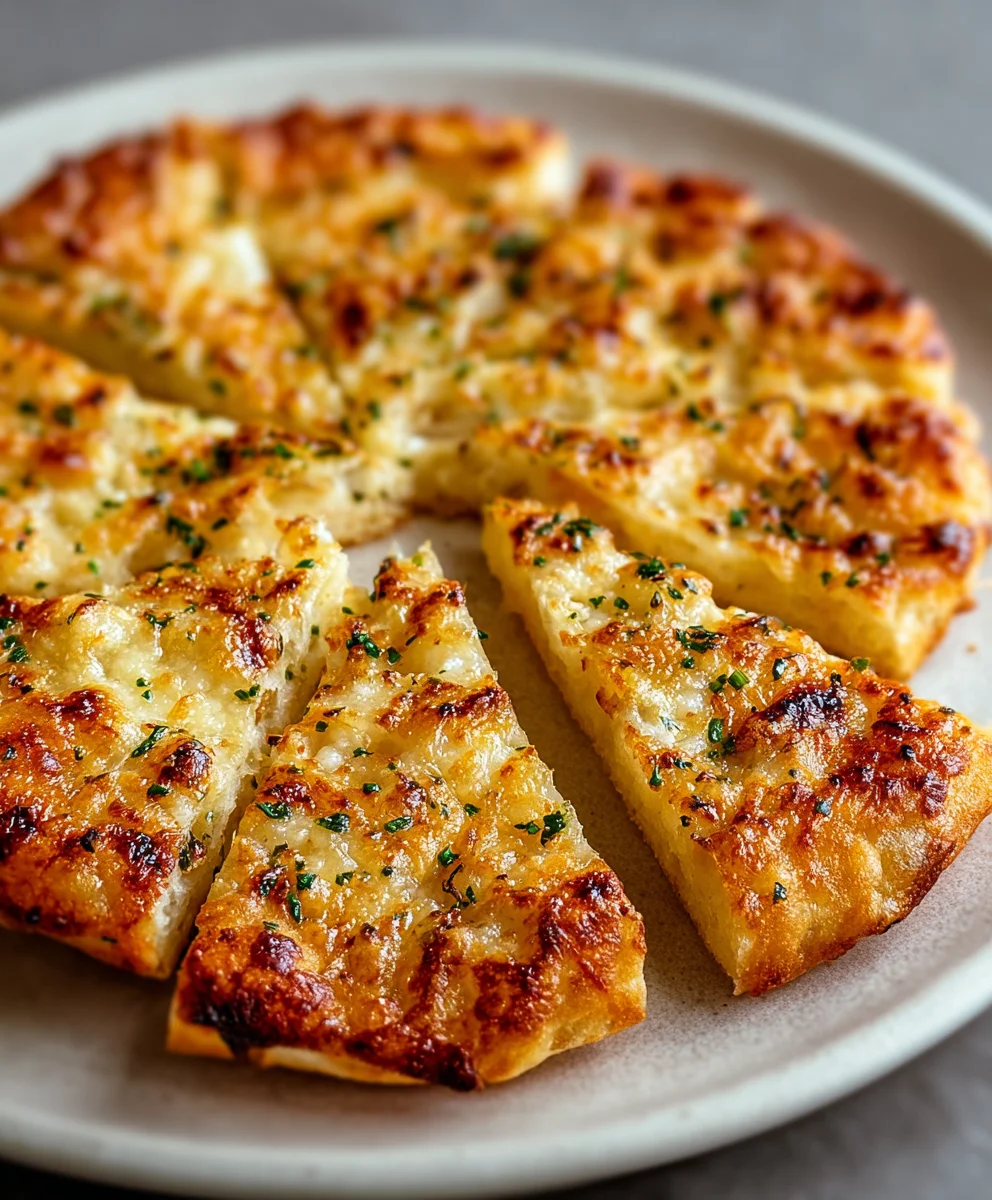
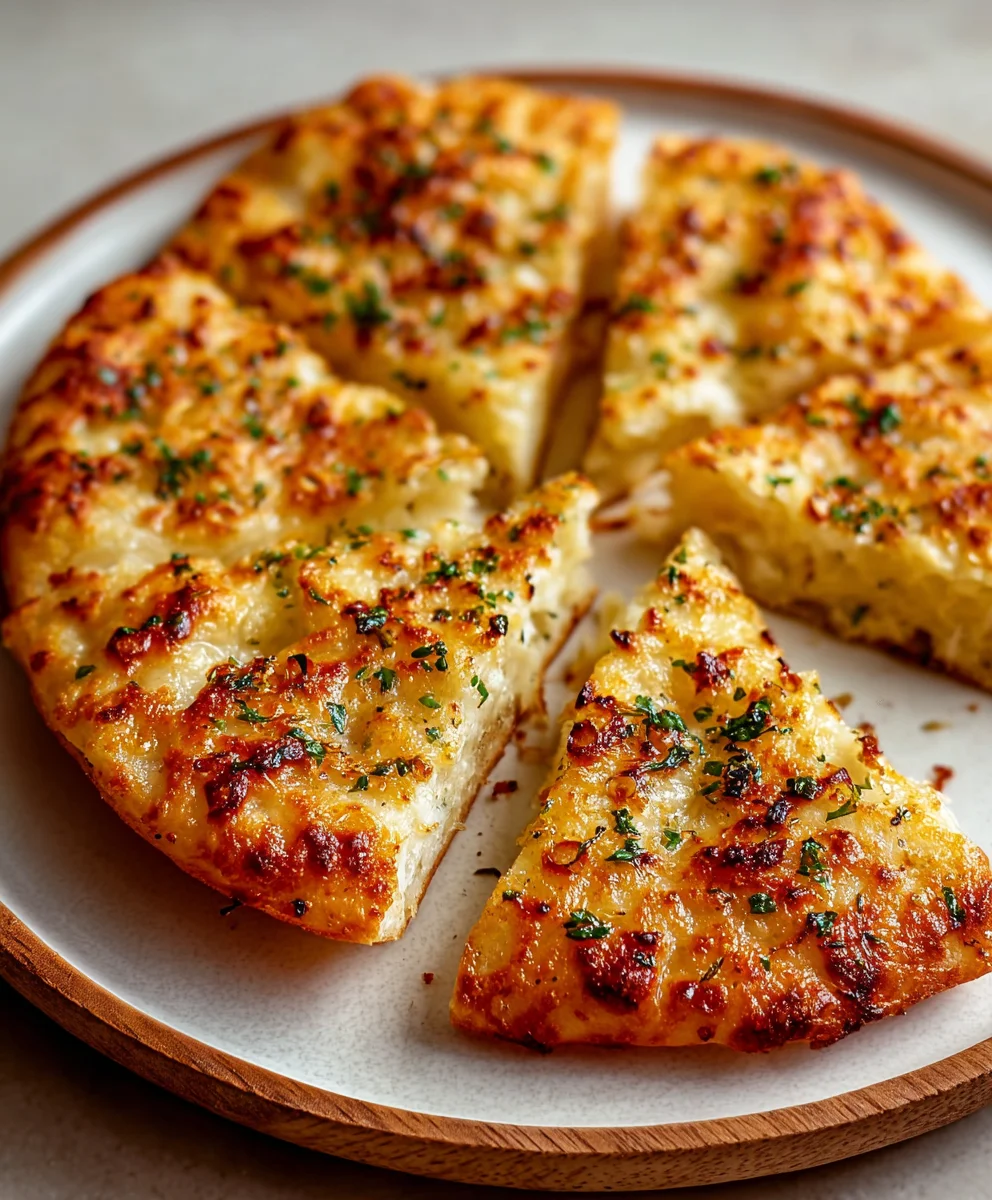
Now comes the optional but highly recommended finishing touch. If you prepared fresh parsley, sprinkle the chopped parsley over the hot tortilla garlic bread. The heat from the bread will slightly wilt the parsley, releasing its fresh aroma and adding a beautiful pop of color. This final step elevates the presentation and adds an extra layer of freshness to this quick and easy treat. Allow it to cool for just a moment before slicing and serving. Enjoy your incredibly quick and satisfying air fryer tortilla garlic bread!
Conclusion:
And there you have it – a delicious and incredibly easy batch of Quick Air Fryer Tortilla Garlic Bread! This recipe is a true game-changer when you’re craving that irresistible garlicky, cheesy goodness without the fuss. We’ve walked through the simple steps to transform humble tortillas into a crispy, flavor-packed side dish or snack that’s ready in minutes. The beauty of this recipe lies in its speed and simplicity, making it perfect for busy weeknights or spontaneous cravings.
I love serving these warm, fresh from the air fryer, alongside a hearty soup or a vibrant salad. They also make an excellent base for mini pizzas or a fun appetizer with a side of marinara for dipping. Don’t be afraid to get creative with the variations! Feel free to sprinkle on some red pepper flakes for a little heat, add a pinch of dried Italian herbs for extra aroma, or even toss on some finely chopped fresh parsley after cooking for a pop of color and freshness. I truly hope you enjoy making and devouring this delightful Quick Air Fryer Tortilla Garlic Bread as much as I do. Give it a try and discover your new favorite quick side!
Frequently Asked Questions:
Q: Can I use different types of tortillas?
Absolutely! While corn tortillas work wonderfully and offer a great texture, you can also use flour tortillas. Keep in mind that flour tortillas might cook slightly faster and could become a bit chewier rather than perfectly crisp, depending on your air fryer. Experiment to see which you prefer!
Q: How should I store leftovers?
For the best experience, I recommend enjoying your Quick Air Fryer Tortilla Garlic Bread immediately after it’s made. However, if you do have leftovers, let them cool completely and store them in an airtight container at room temperature for up to a day. To reheat, a quick zap in the air fryer or toaster oven will help restore some of their crispiness.
Air Fryer Tortilla Garlic Bread
A quick and delicious recipe for crispy tortilla garlic bread made in the air fryer.
Ingredients
-
2 flour tortilla shells
-
1 tablespoon butter, softened
-
1/2 cup grated mozzarella cheese
-
Garlic powder, to taste
-
Italian seasoning, to taste
-
Fresh parsley, chopped (optional, for garnish)
Instructions
-
Step 1
Prepare ingredients: Ensure butter is softened, cheese is grated, and seasonings are ready. If using, wash, dry, and chop fresh parsley. -
Step 2
Assemble the tortilla garlic bread: Lay out tortilla shells. Spread softened butter evenly over each tortilla. Sprinkle with garlic powder and Italian seasoning, pressing gently to adhere. -
Step 3
Add cheese: Sprinkle grated mozzarella cheese evenly over the seasoned butter on each tortilla, ensuring edge-to-edge coverage. -
Step 4
Cook in air fryer: Preheat air fryer to 375°F (190°C). Carefully place one assembled tortilla into the air fryer basket. Cook for 3-5 minutes, or until edges are golden brown and crispy, and cheese is melted and bubbly. -
Step 5
Repeat and garnish: Remove the cooked tortilla. If cooking one at a time, repeat the cooking process for the second tortilla. Sprinkle with fresh chopped parsley (if using) for garnish. -
Step 6
Serve: Allow to cool slightly, then slice and serve immediately.
Important Information
Nutrition Facts (Per Serving)
It is important to consider this information as approximate and not to use it as definitive health advice.
Allergy Information
Please check ingredients for potential allergens and consult a health professional if in doubt.


Leave a Comment